Create and edit cards
Each card is one record: a feature, a release, a client, a file. You create it with a title, then fill in the properties its type defines, write its content and attach files.
Create a card
Section titled “Create a card”- In Cards, open the type of card you want, for example Feature under Product catalogue, and click New card (or press C).
- Check the Space and Type at the top of the dialog. They start as the space and type you’re viewing. Click either to change it; types with sub-types open a submenu.
- Enter a Title.
- Click Create (or press Ctrl Enter). The new card opens.
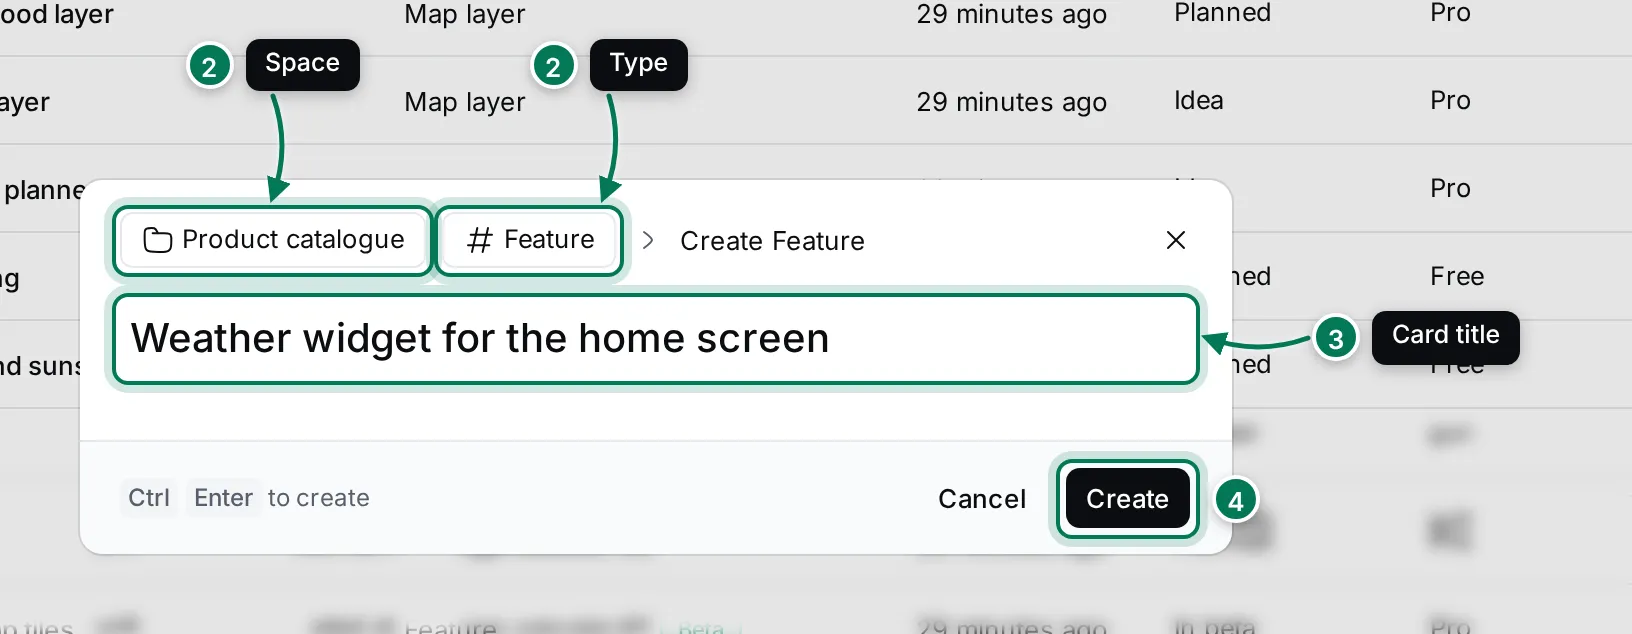
You can also create a card from the Feed view by writing a post. See Views, filters and search.
Edit a card
Section titled “Edit a card”The card page shows everything about one card. Its sections can be folded one by one, or all at once with Minimize all and Expand all. The thin strip at the right edge jumps to a section.
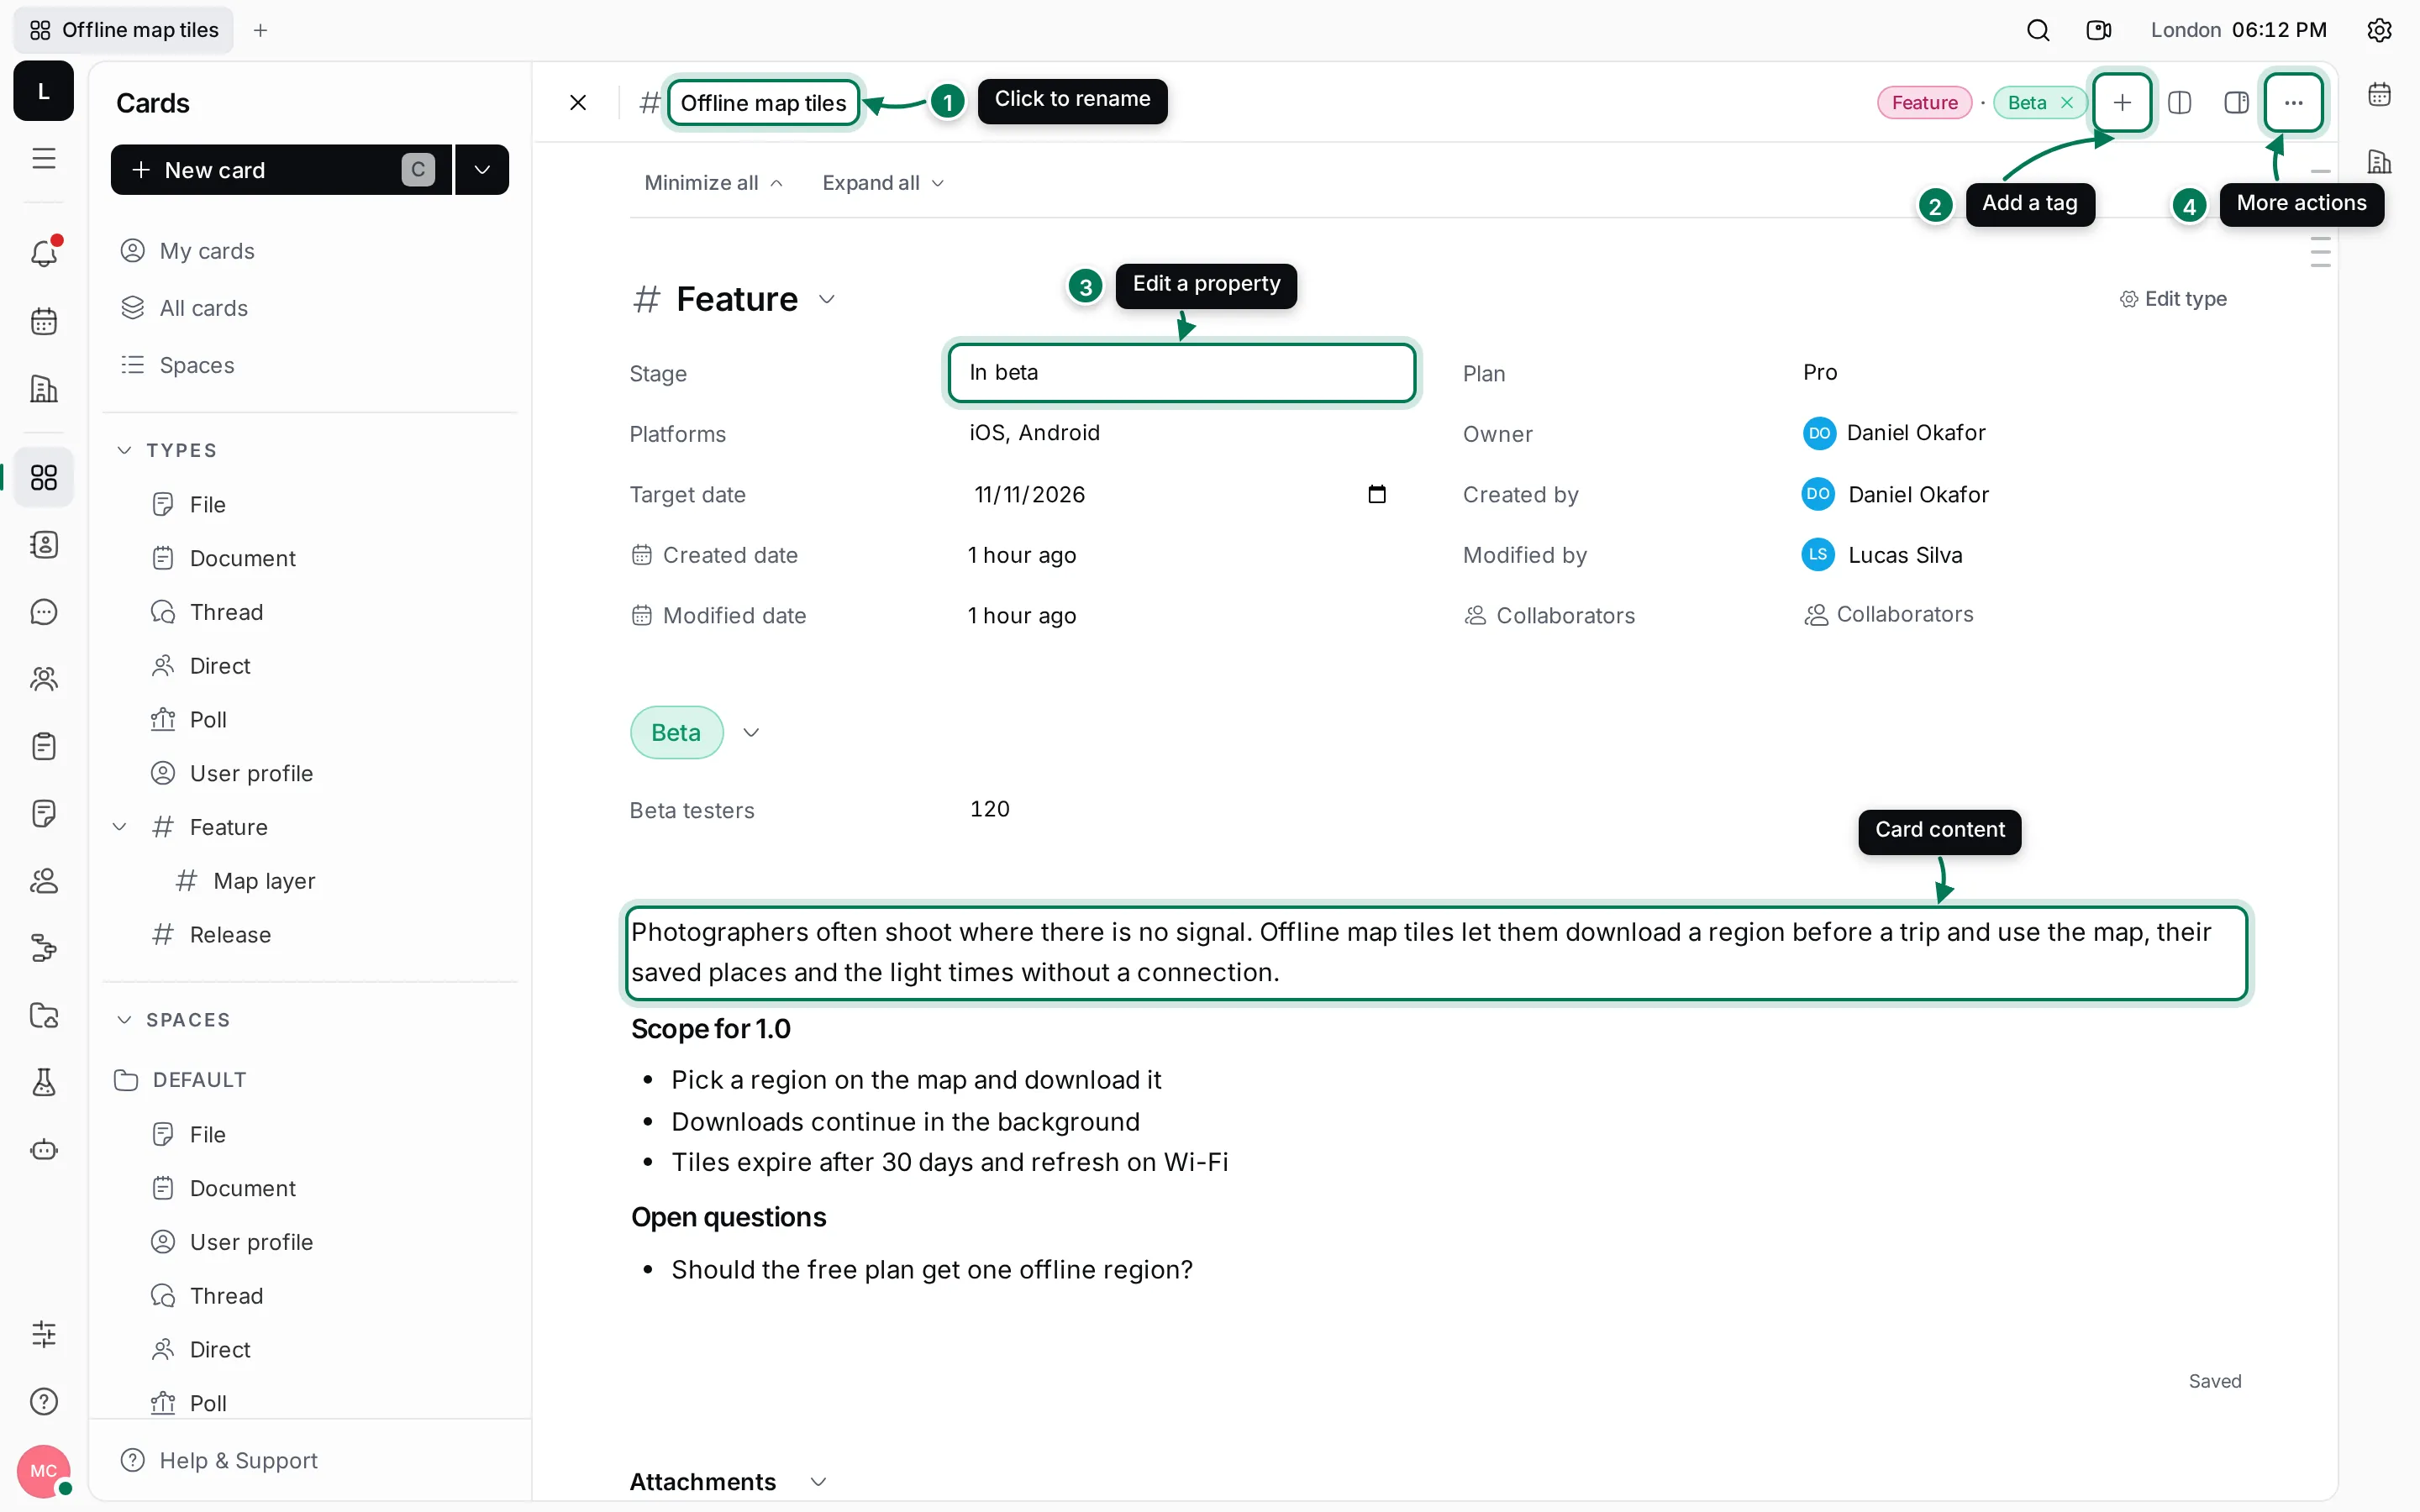
- Click the title to rename the card. Press Enter to save or Esc to cancel.
- Click + next to the type and tags to add a tag.
- Click a property’s value to change it. Each kind of property has its own editor: a list for Stage, a people picker for Owner, a calendar for Target date.
- Click ⋯ for more actions.
Below the properties is the card’s content. Write in it like a document, with headings, lists, tables, images and @mentions. Changes save as you type and others see them live.
Collaborators are the people who follow the card. Whoever changes the card is added automatically; click the row to add or remove people.
Add tags
Section titled “Add tags”- Click + next to the card’s type and tags.
- Pick a tag. Only the tags of the card’s type that aren’t on the card yet are offered.
- Fill in the tag’s properties in the new section that appears under the type’s properties.

To remove a tag, click the × on its chip in the header. The tag’s values go with it, so check before you click.
Split a card into child cards
Section titled “Split a card into child cards”A card can have child cards, so a large piece of work can be broken down. The Lumen Offline map tiles feature has three children: Region picker, Background download and Tile expiry.
- Open the parent card and scroll to Children.
- Click Create child, enter the title and click Create.
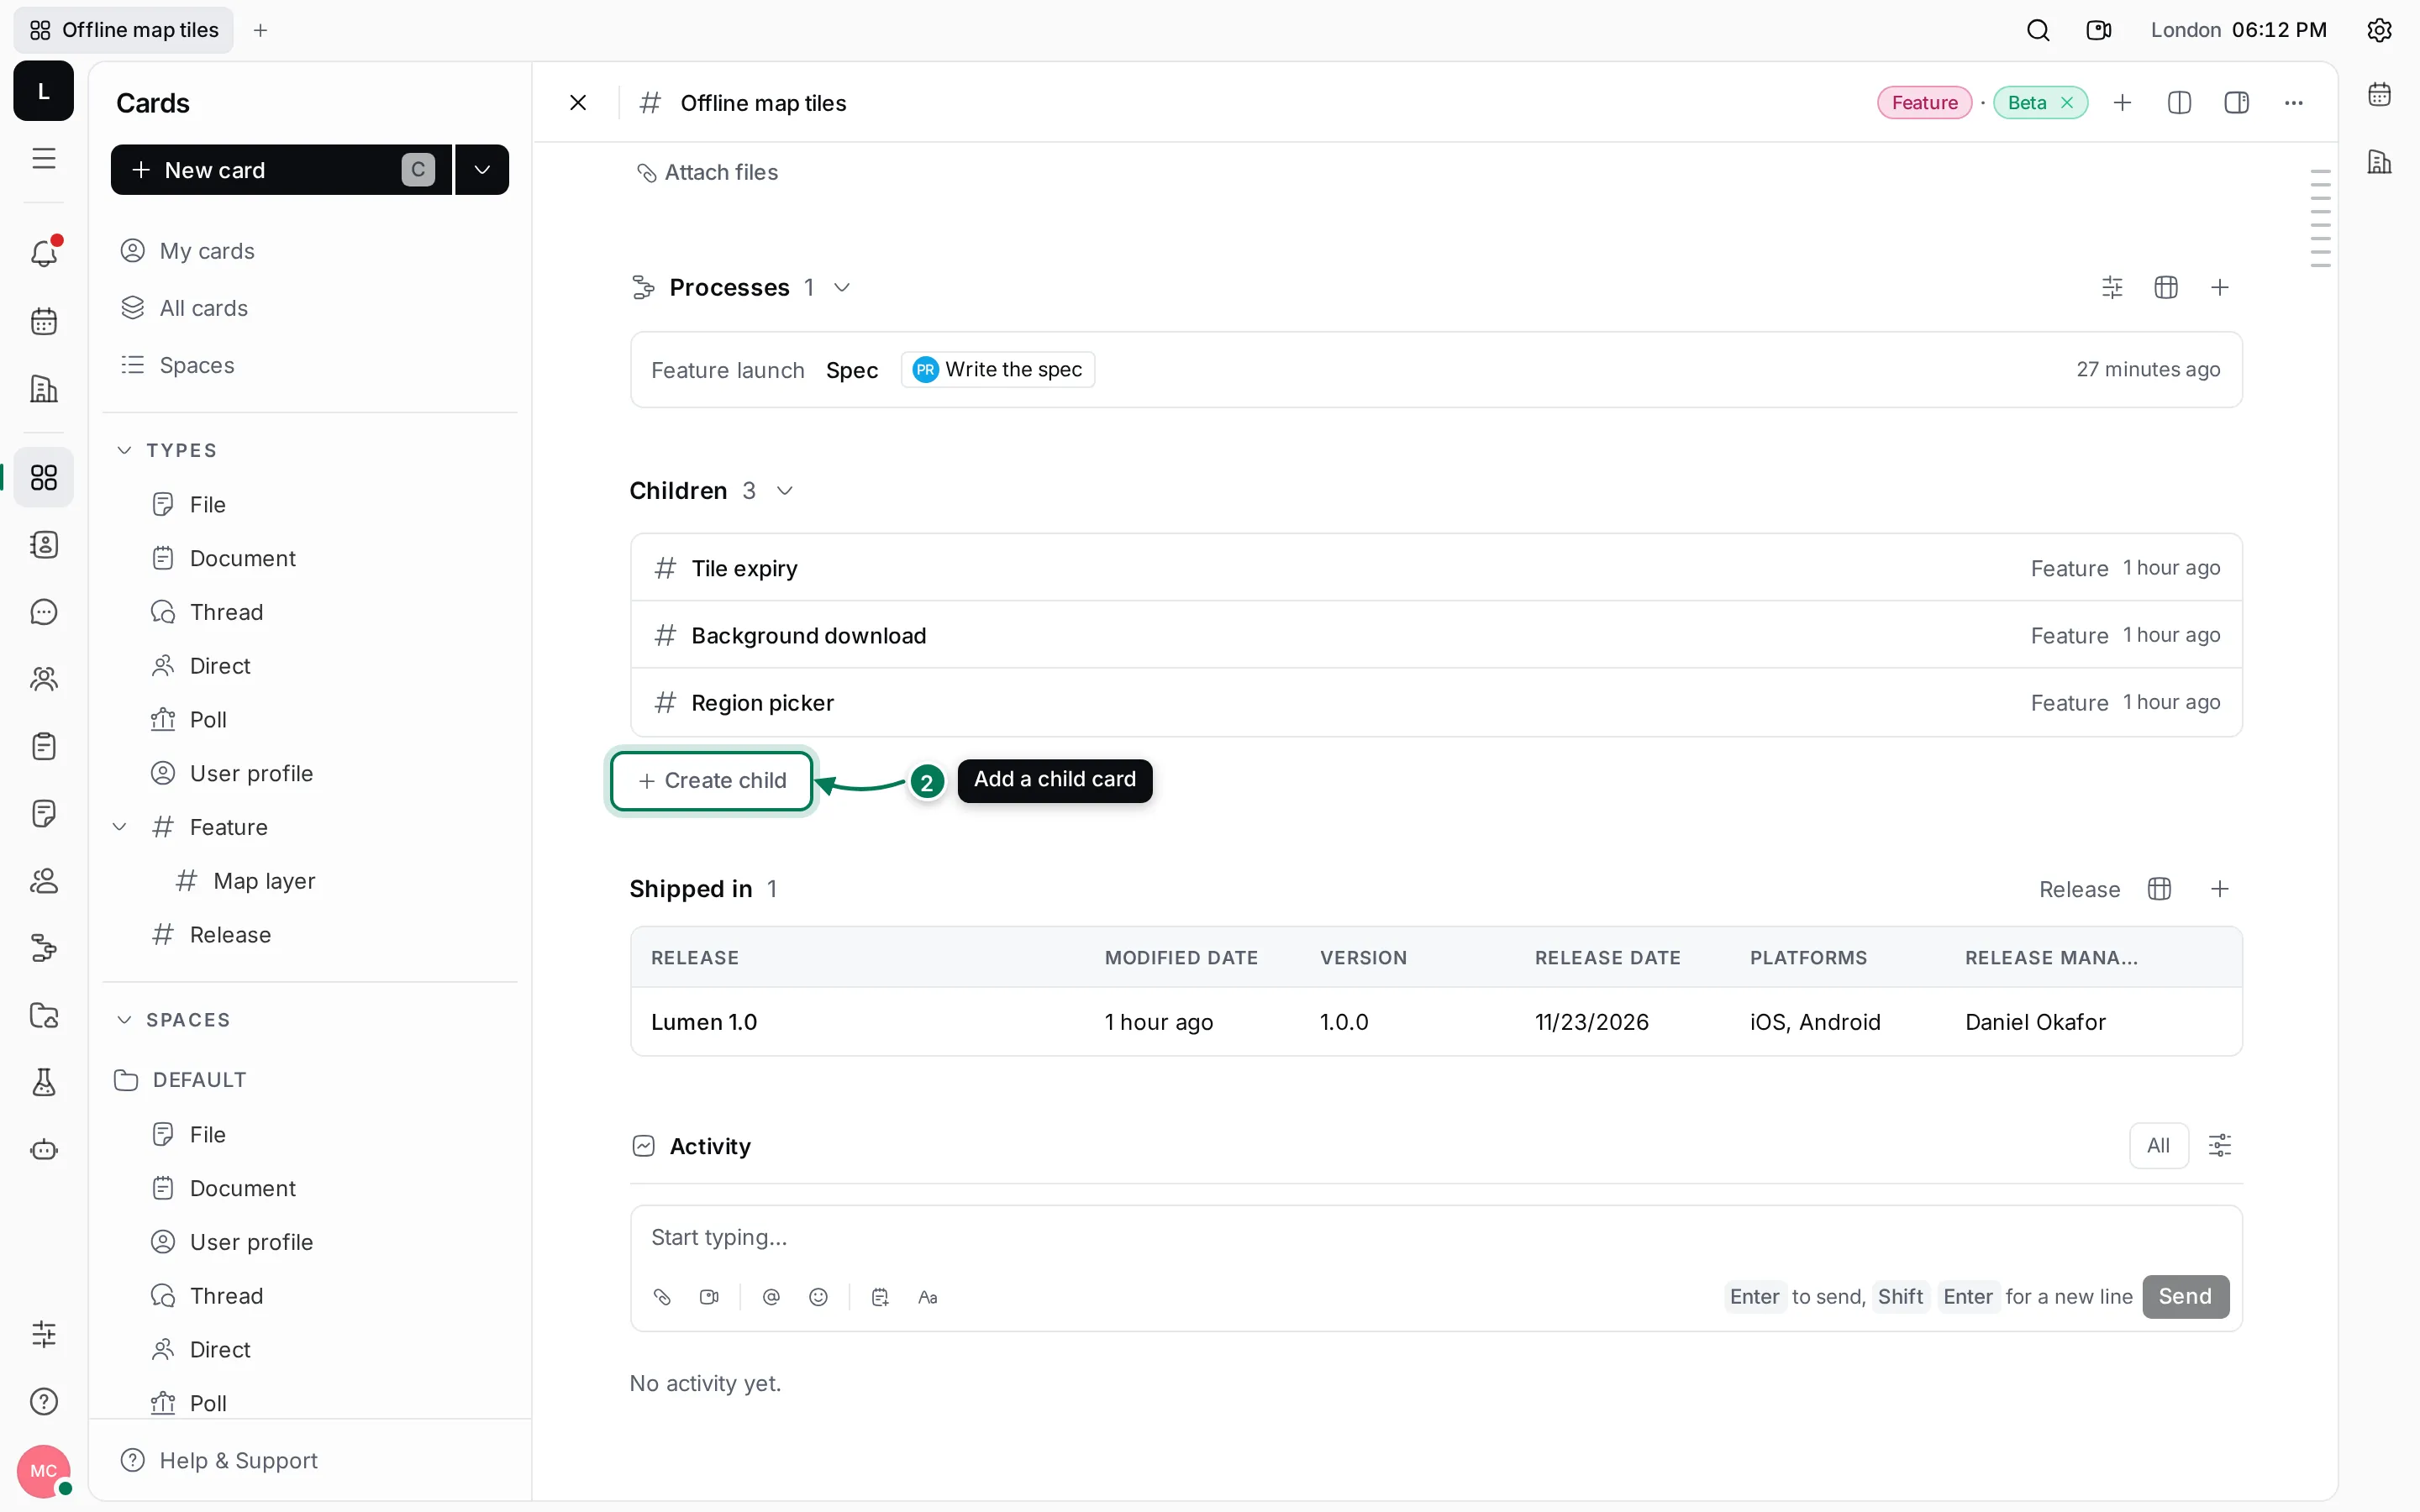
To move an existing card under another one, click ⋯ › Set parent on it and pick the parent. Unset parent makes it a top-level card again. The parents show before the title at the top of a child card.
Attach files
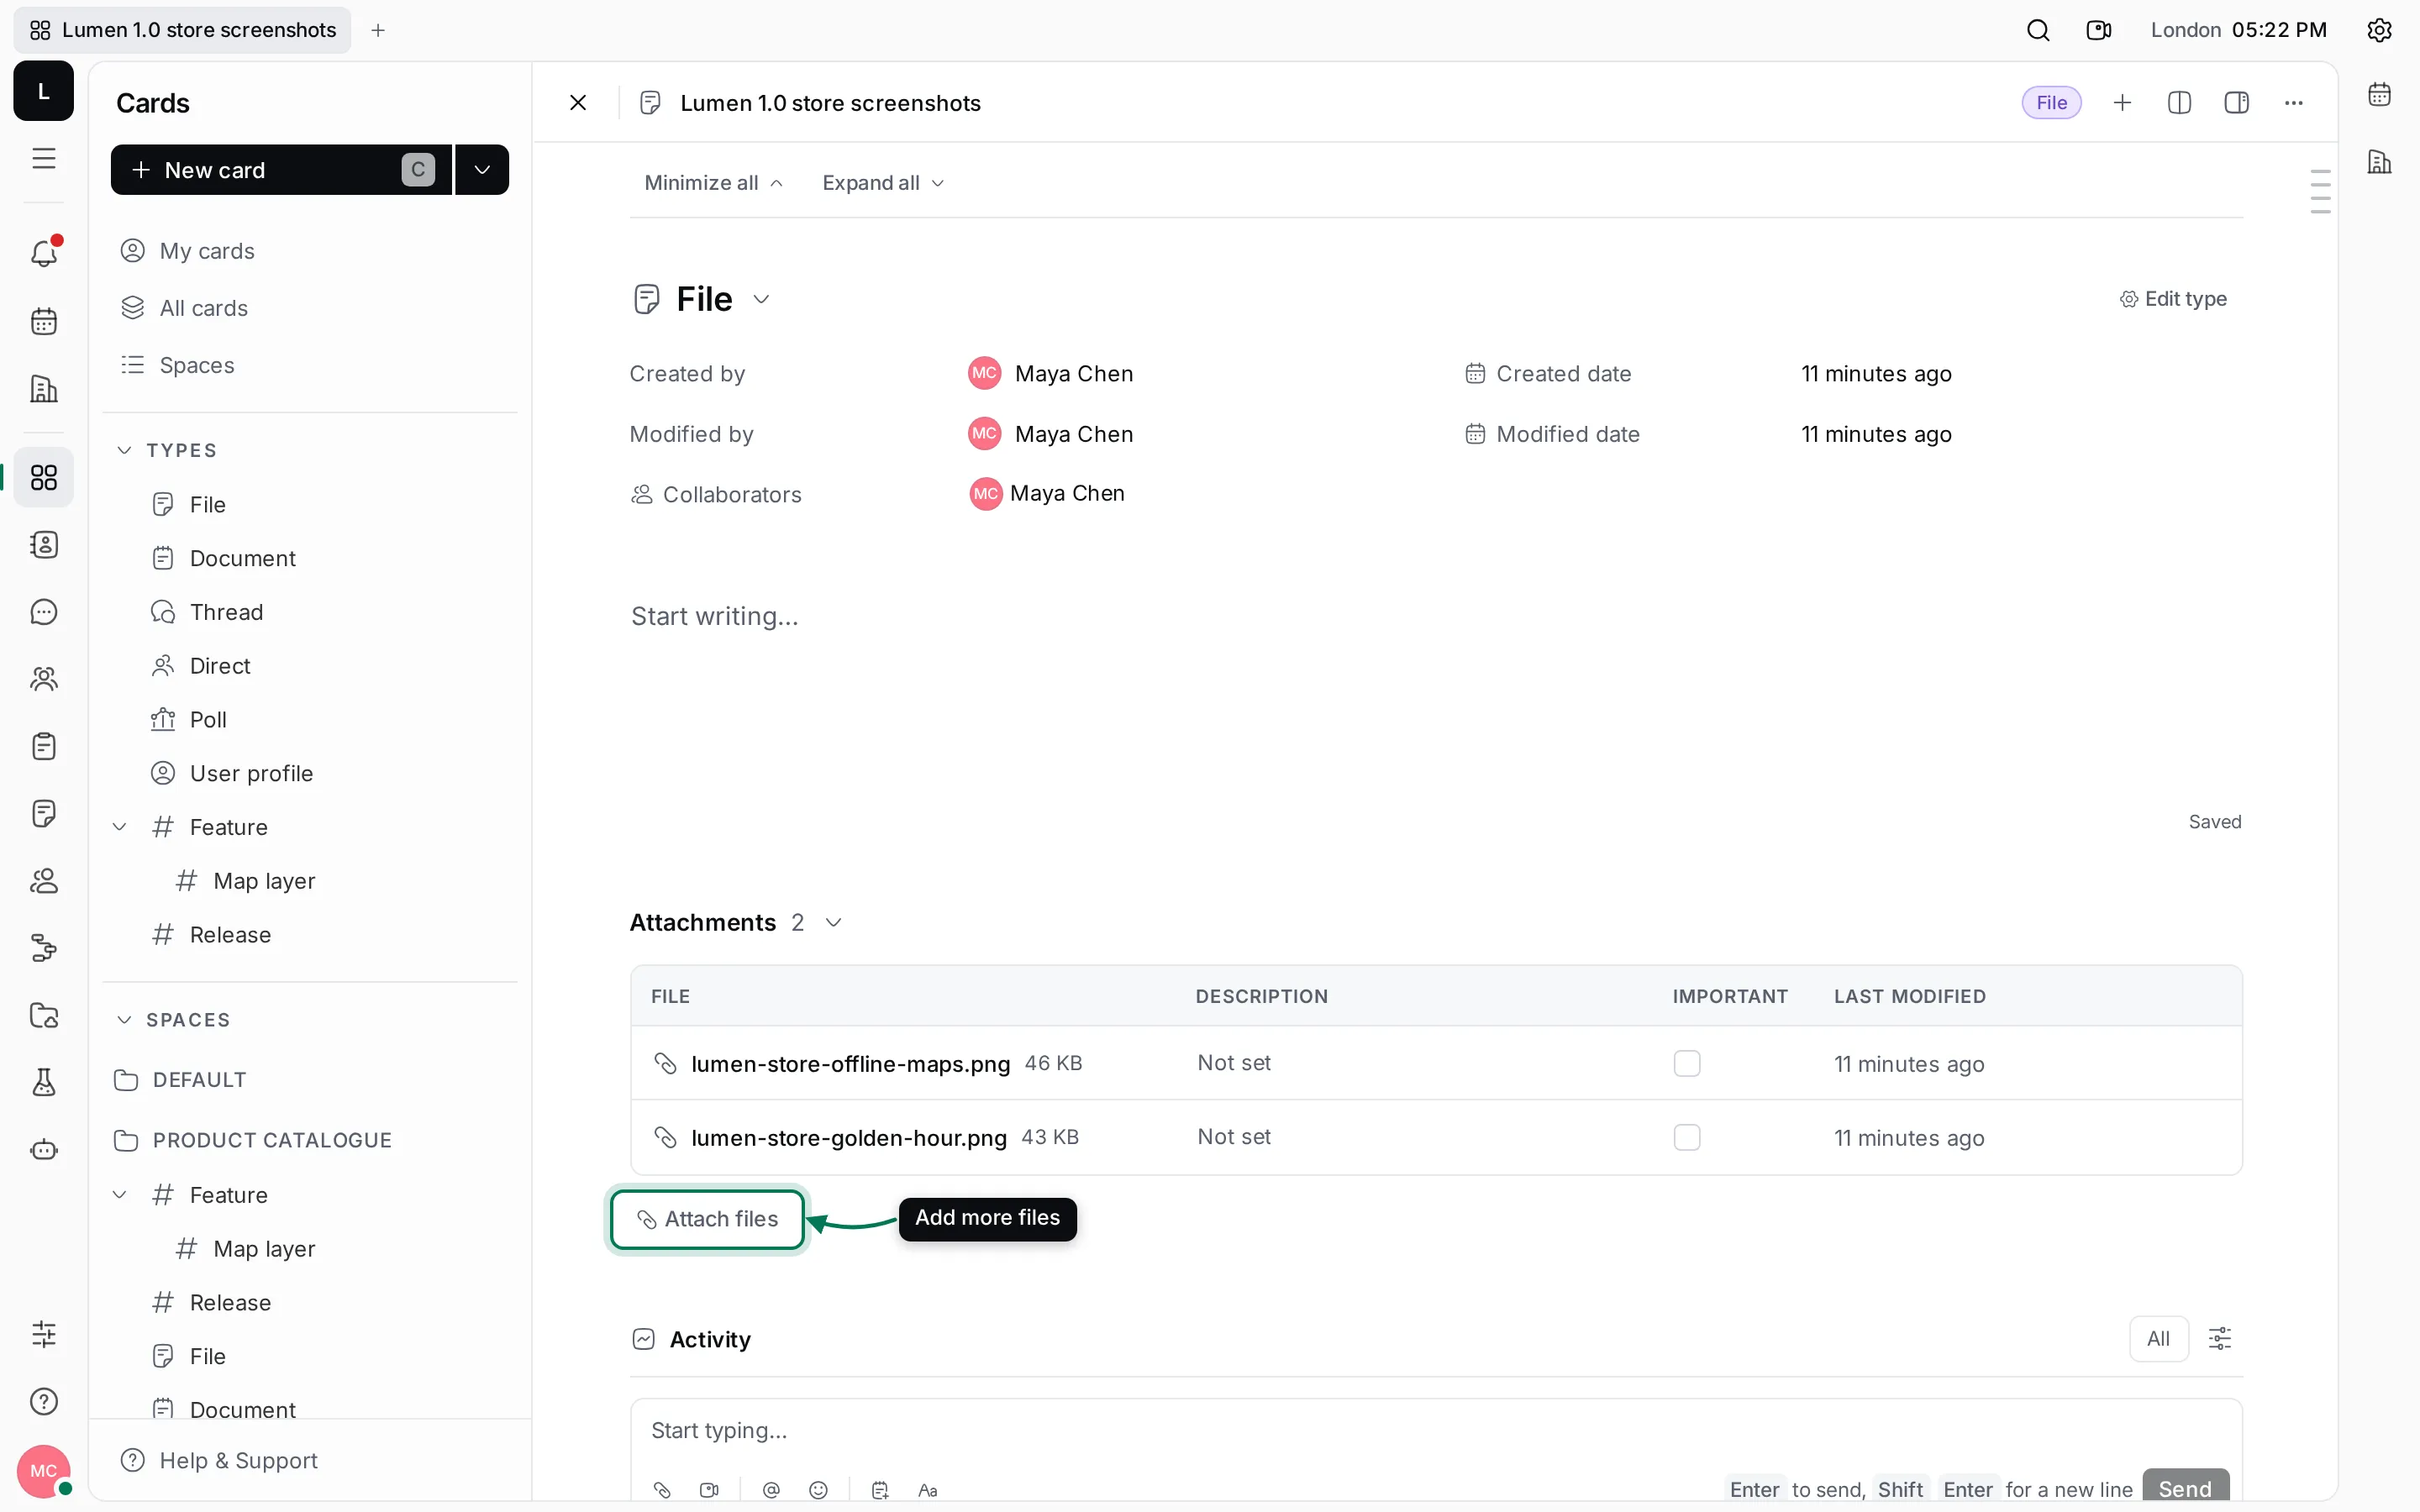
Section titled “Attach files”Scroll to Attachments and click Attach files, or drop files onto the card, or paste them into the content. Each file has a Description you can edit and an Important checkbox; important files sort to the top.
Cards of the File type are meant for files: create one, then attach the files to it. Lumen Labs keeps its store screenshots that way.
More actions
Section titled “More actions”Click ⋯ in the card’s header, or right-click a card in a list, for the other actions.
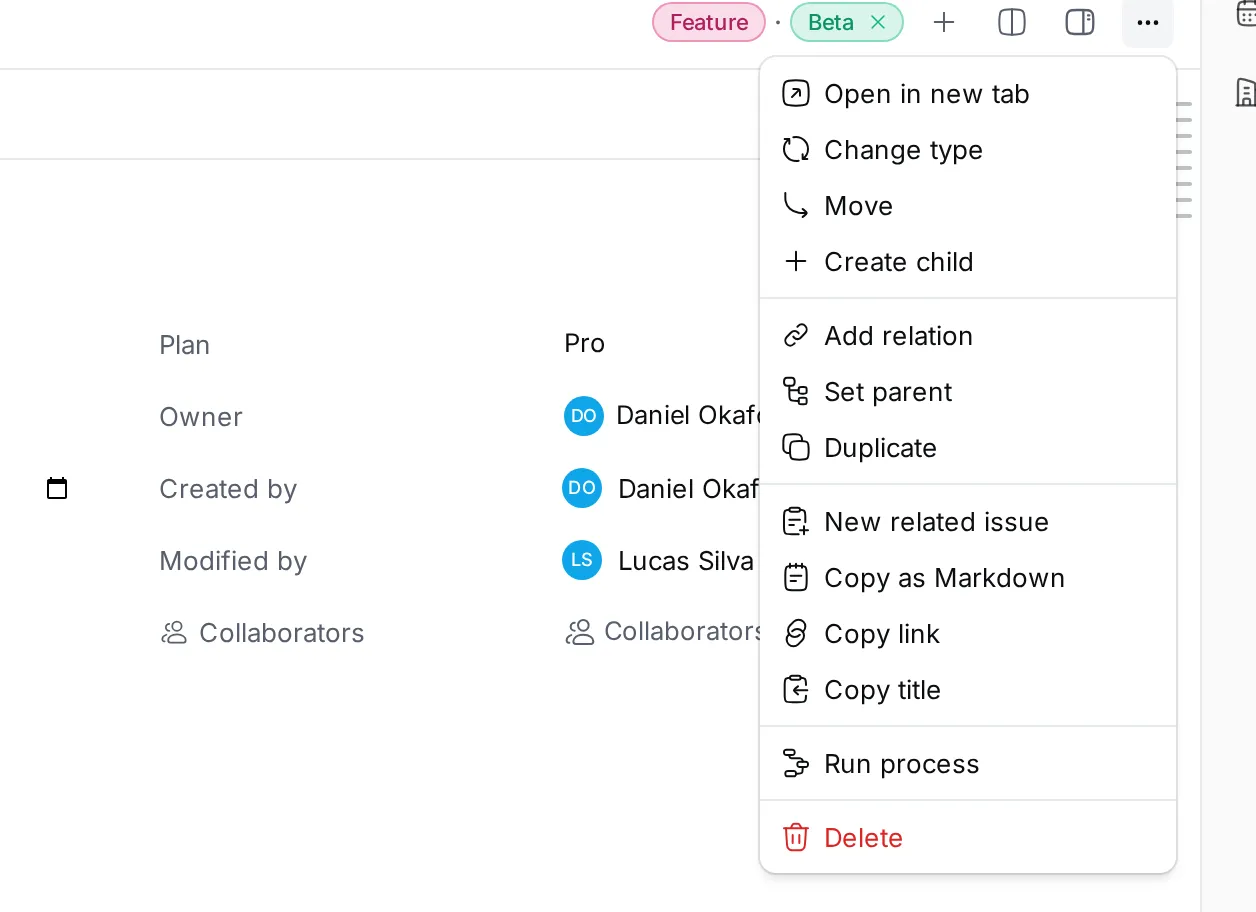
- Change type gives the card another type. Values of properties the new type doesn’t have are hidden, not lost: change the type back to see them again.
- Move moves the card to another space.
- Duplicate makes a copy with the type, property values, chosen tags and the parent. The content, files and relations stay with the original.
- Add relation links the card to another one. See Link cards with relations.
- New related issue creates a Tracker issue linked to the card.
- Copy as Markdown copies the title and content as Markdown.
- Run process starts one of the type’s processes on the card.
- Delete removes the card with its child cards, comments and files, for everyone.
Comment on a card
Section titled “Comment on a card”The Activity section at the bottom lists what changed and who changed it, and has a comment box. Press Enter to send a comment and Shift Enter for a new line. Comments can have files, reactions and threads.