Classes, fields and space types
Every record in Maxint Work, from an issue to a person or a document, belongs to a class that lists its fields. You can add your own fields, define lists of options for them, relate records to each other, and decide which roles and statuses each kind of project or teamspace has. Most of these pages are for Maintainers and Owners.
Add a field to a class
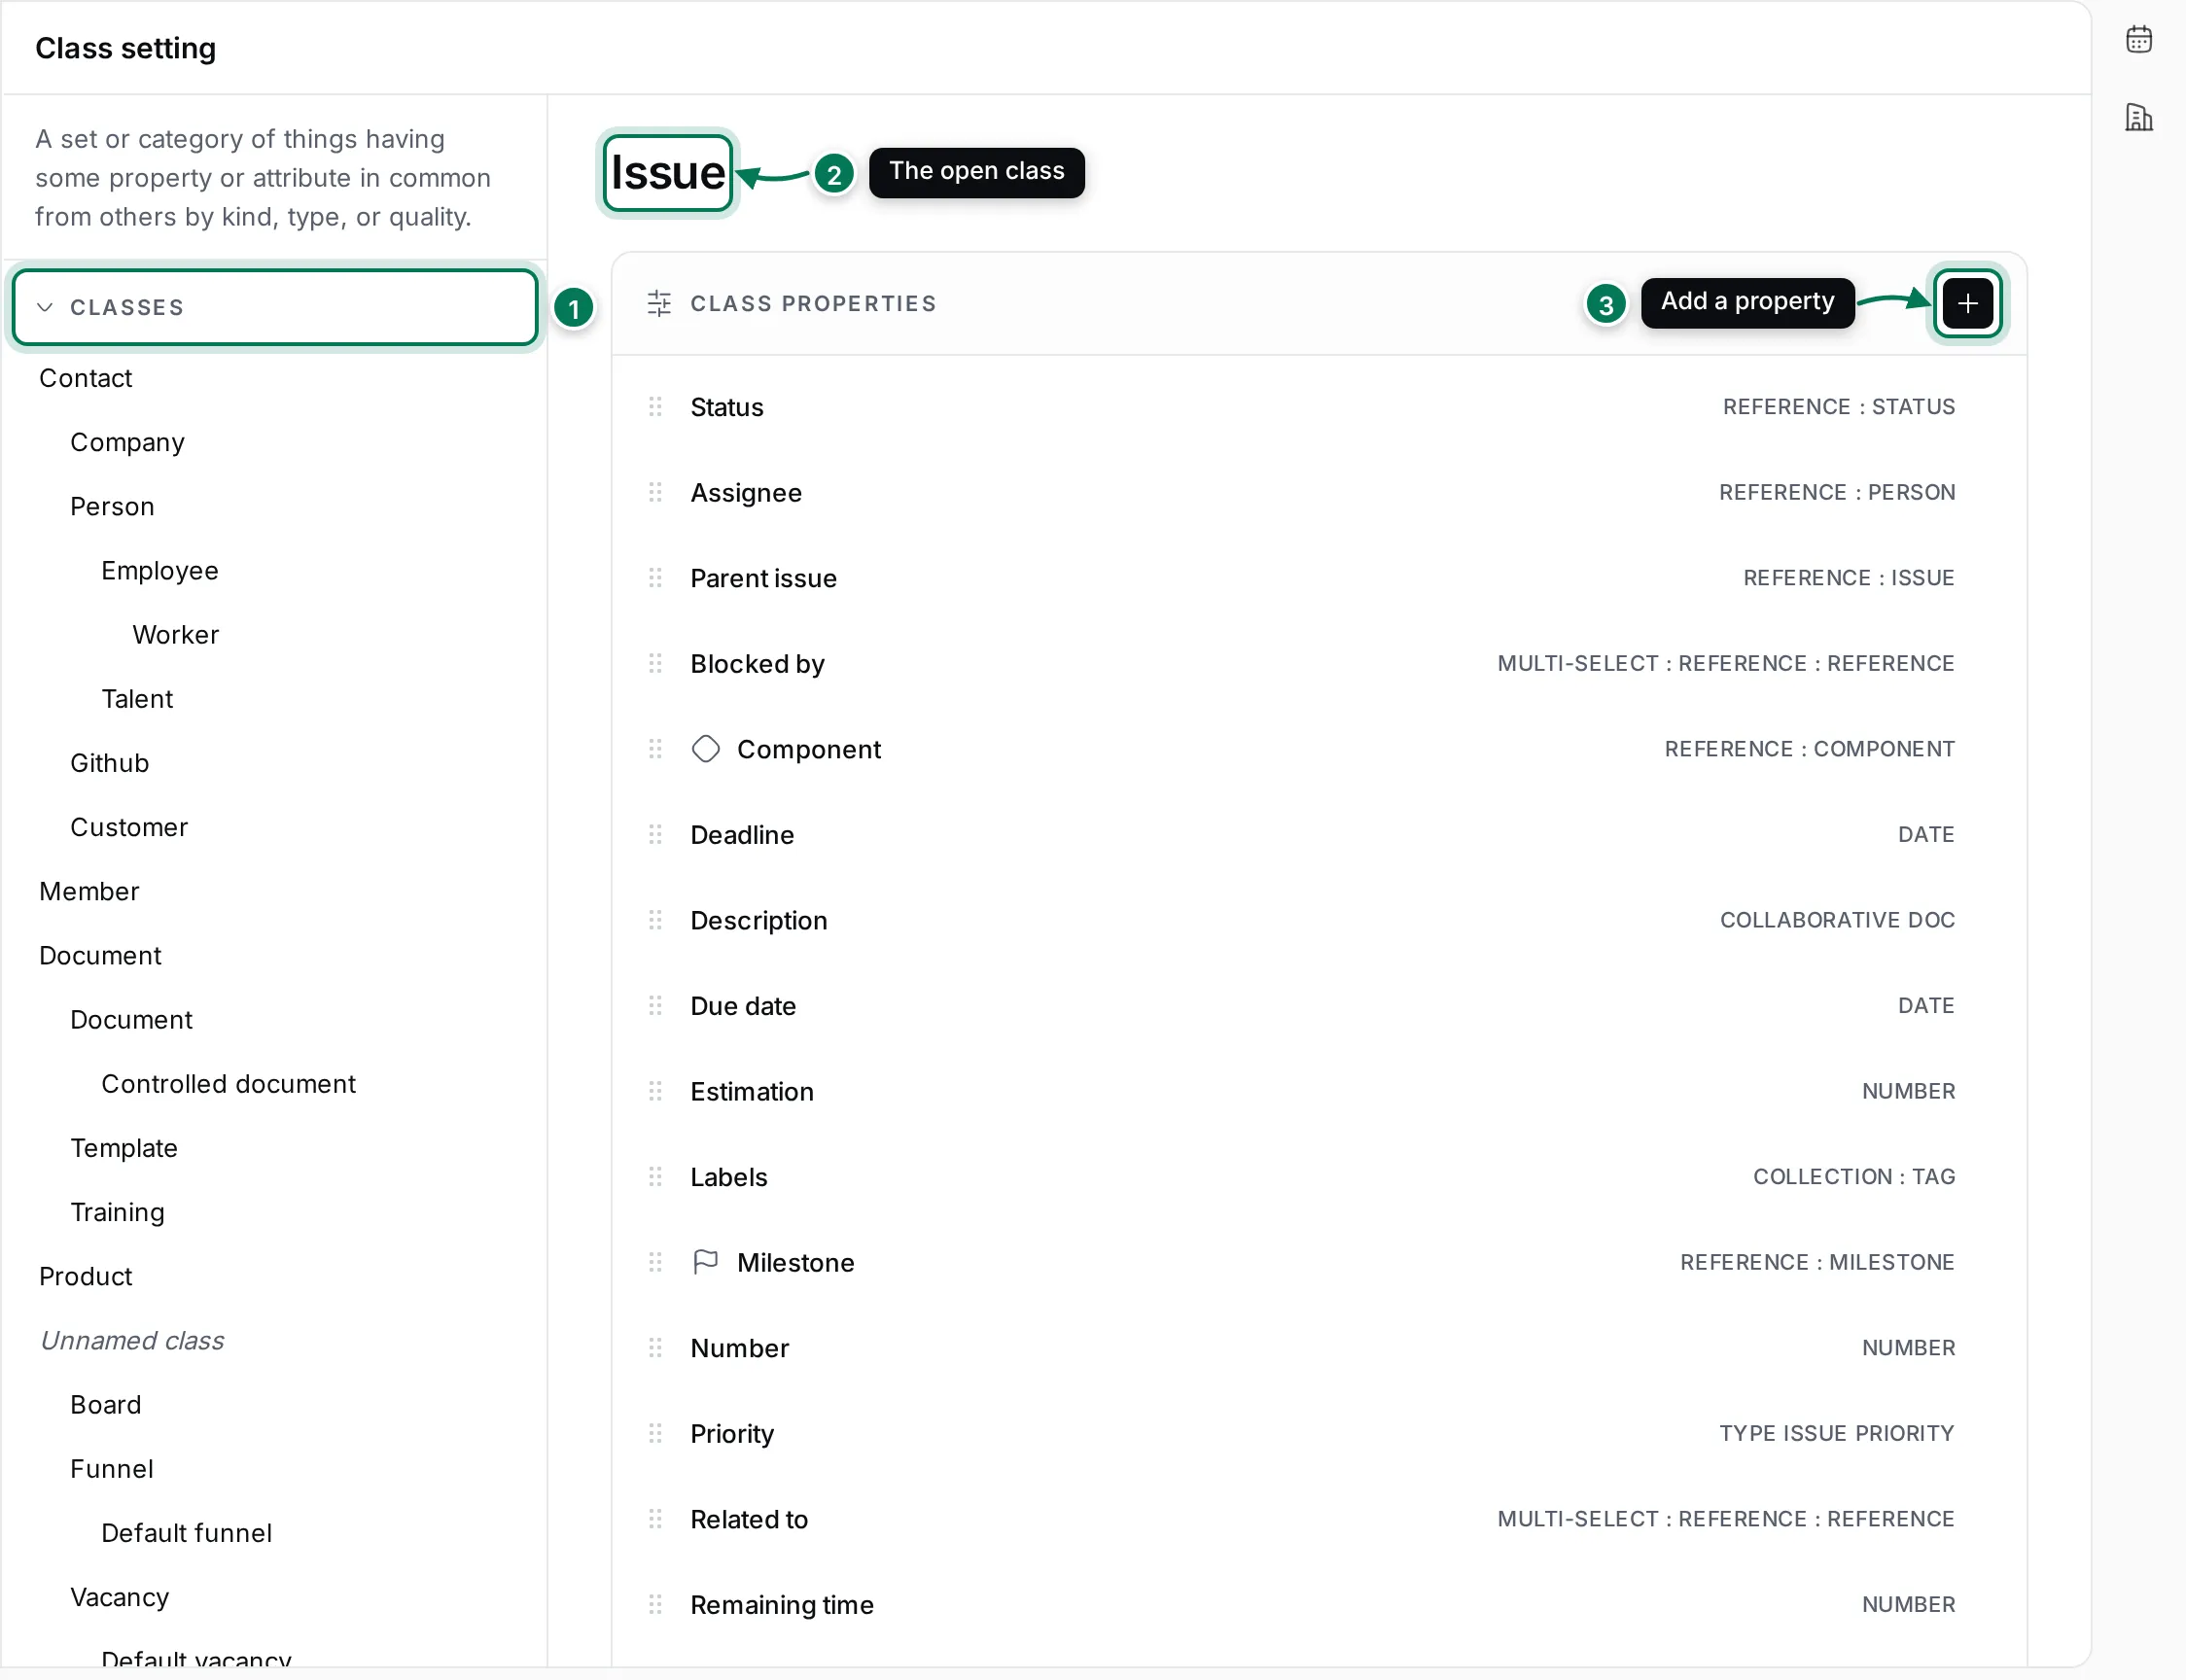
Section titled “Add a field to a class”Settings › Classes shows every class you can change, nested under the class it extends: Issue under Task, Employee under Person, and so on.
-
Find the class in the Classes tree and click it, for example Issue.
-
The page shows its Class properties: each field with its type, such as Status (REFERENCE : STATUS) or Due date (DATE).
-
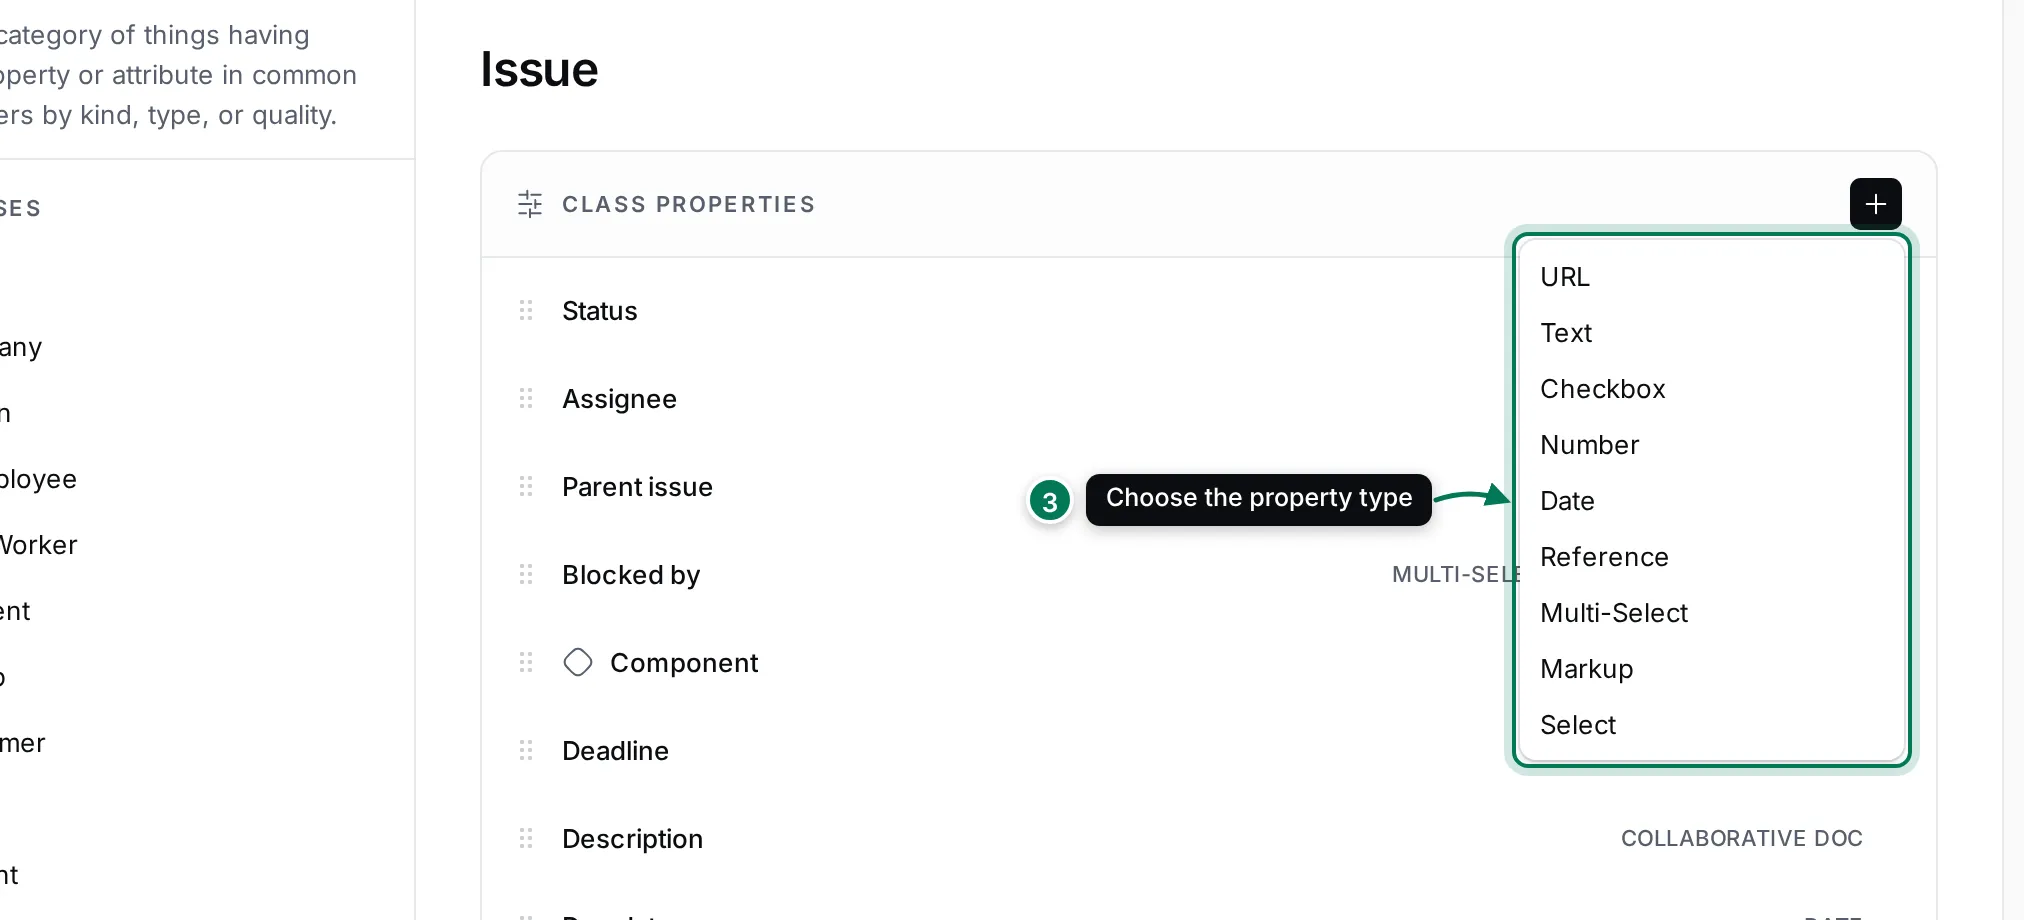
Click + and choose the field’s type.
-
Give it a name and set the options for its type (for example a default value, a minimum and maximum for a number, or the enum for a Select). Turn on Required if it must be filled in.
-
Click Create.
The new field appears on every record of that class and its sub-classes. Click a field to rename it, or right-click it to Hide attribute or Remove it (only fields you added can be removed, and their data goes with them). Drag fields to change their order.
Right-click a class to Create mixin: a set of extra fields you can add to some records of the class but not others.
Lists of options: enums
Section titled “Lists of options: enums”A Select or Multi-Select field takes its options from an enum. Settings › Enums (User and up) keeps them.
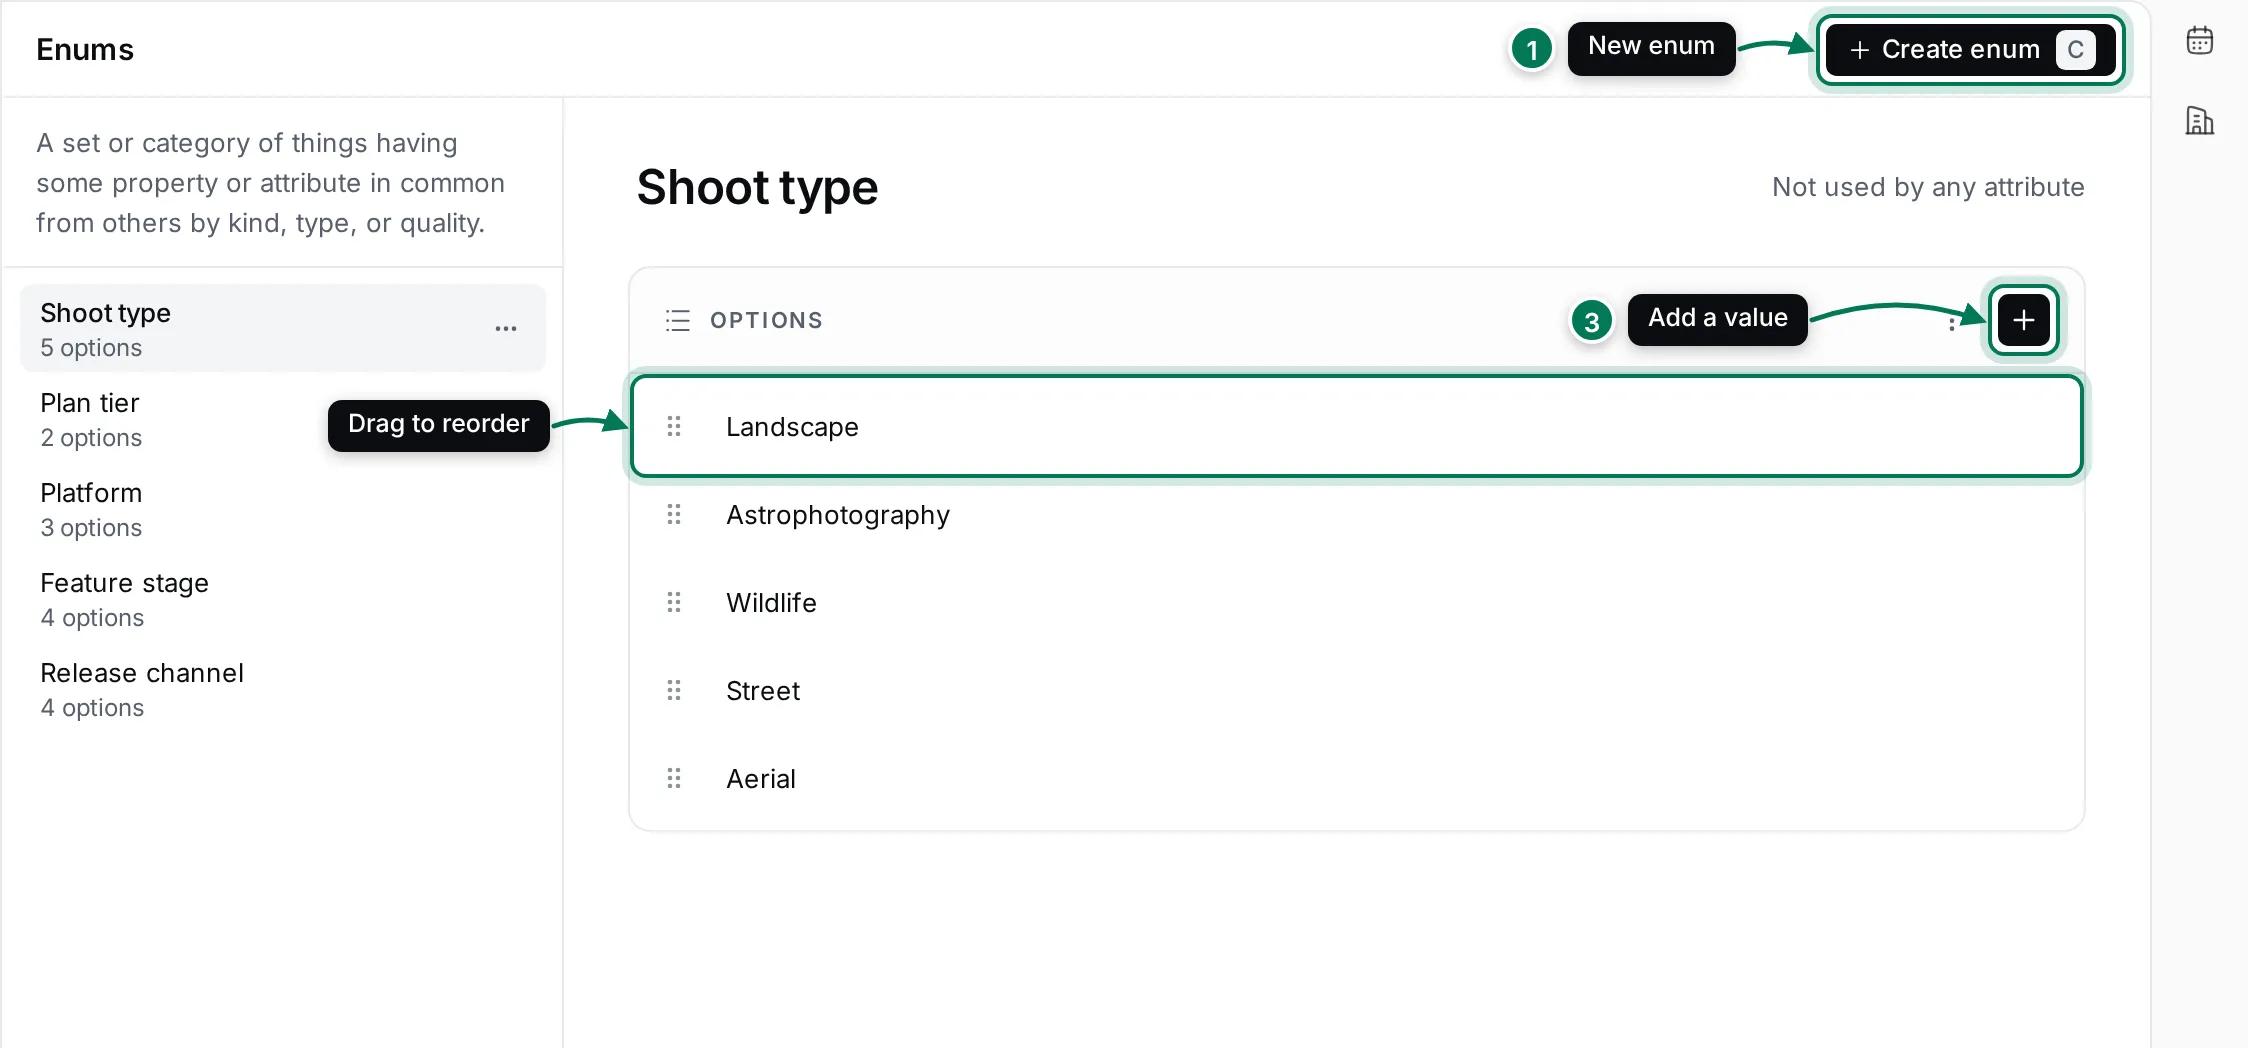
- Click Create enum (or press C).
- Type the Enum title, for example “Release channel”.
- Click + under Options and type each value, pressing Enter after each one.
- Click Save.
Open an enum to rename it, add options, drag them into a new order or delete one. The ⋮ menu on Options imports values from a text file or the clipboard, one per line. The enum’s page says how many fields use it.
Relations
Section titled “Relations”A relation links two kinds of records, for example a company to the issues raised for it. Settings › Relations (Maintainers and Owners) lists them; Tag Relations does the same for card types and tags.
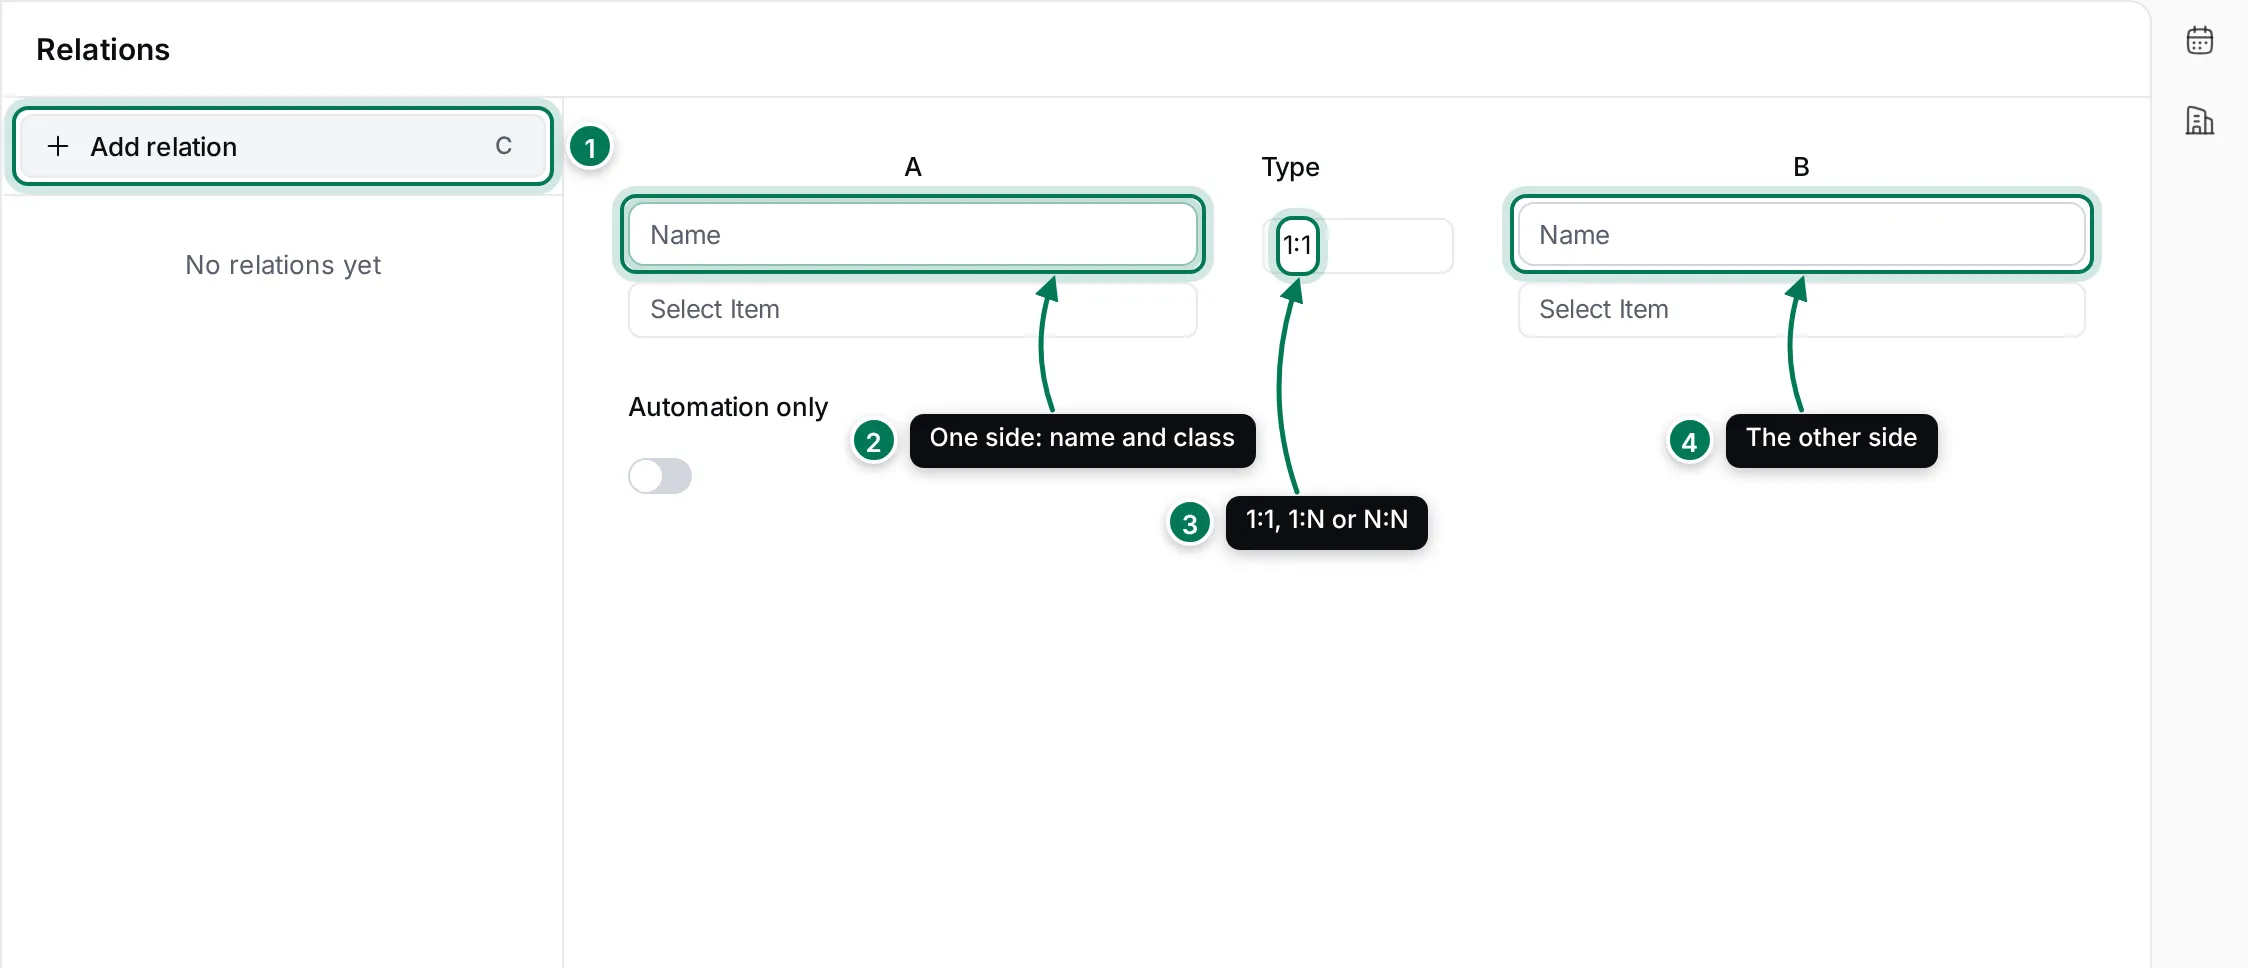
- Click Add relation.
- Name side A and pick its class.
- Choose the Type: 1:1, 1:N or N:N.
- Name side B, pick its class, and click Save.
Card types
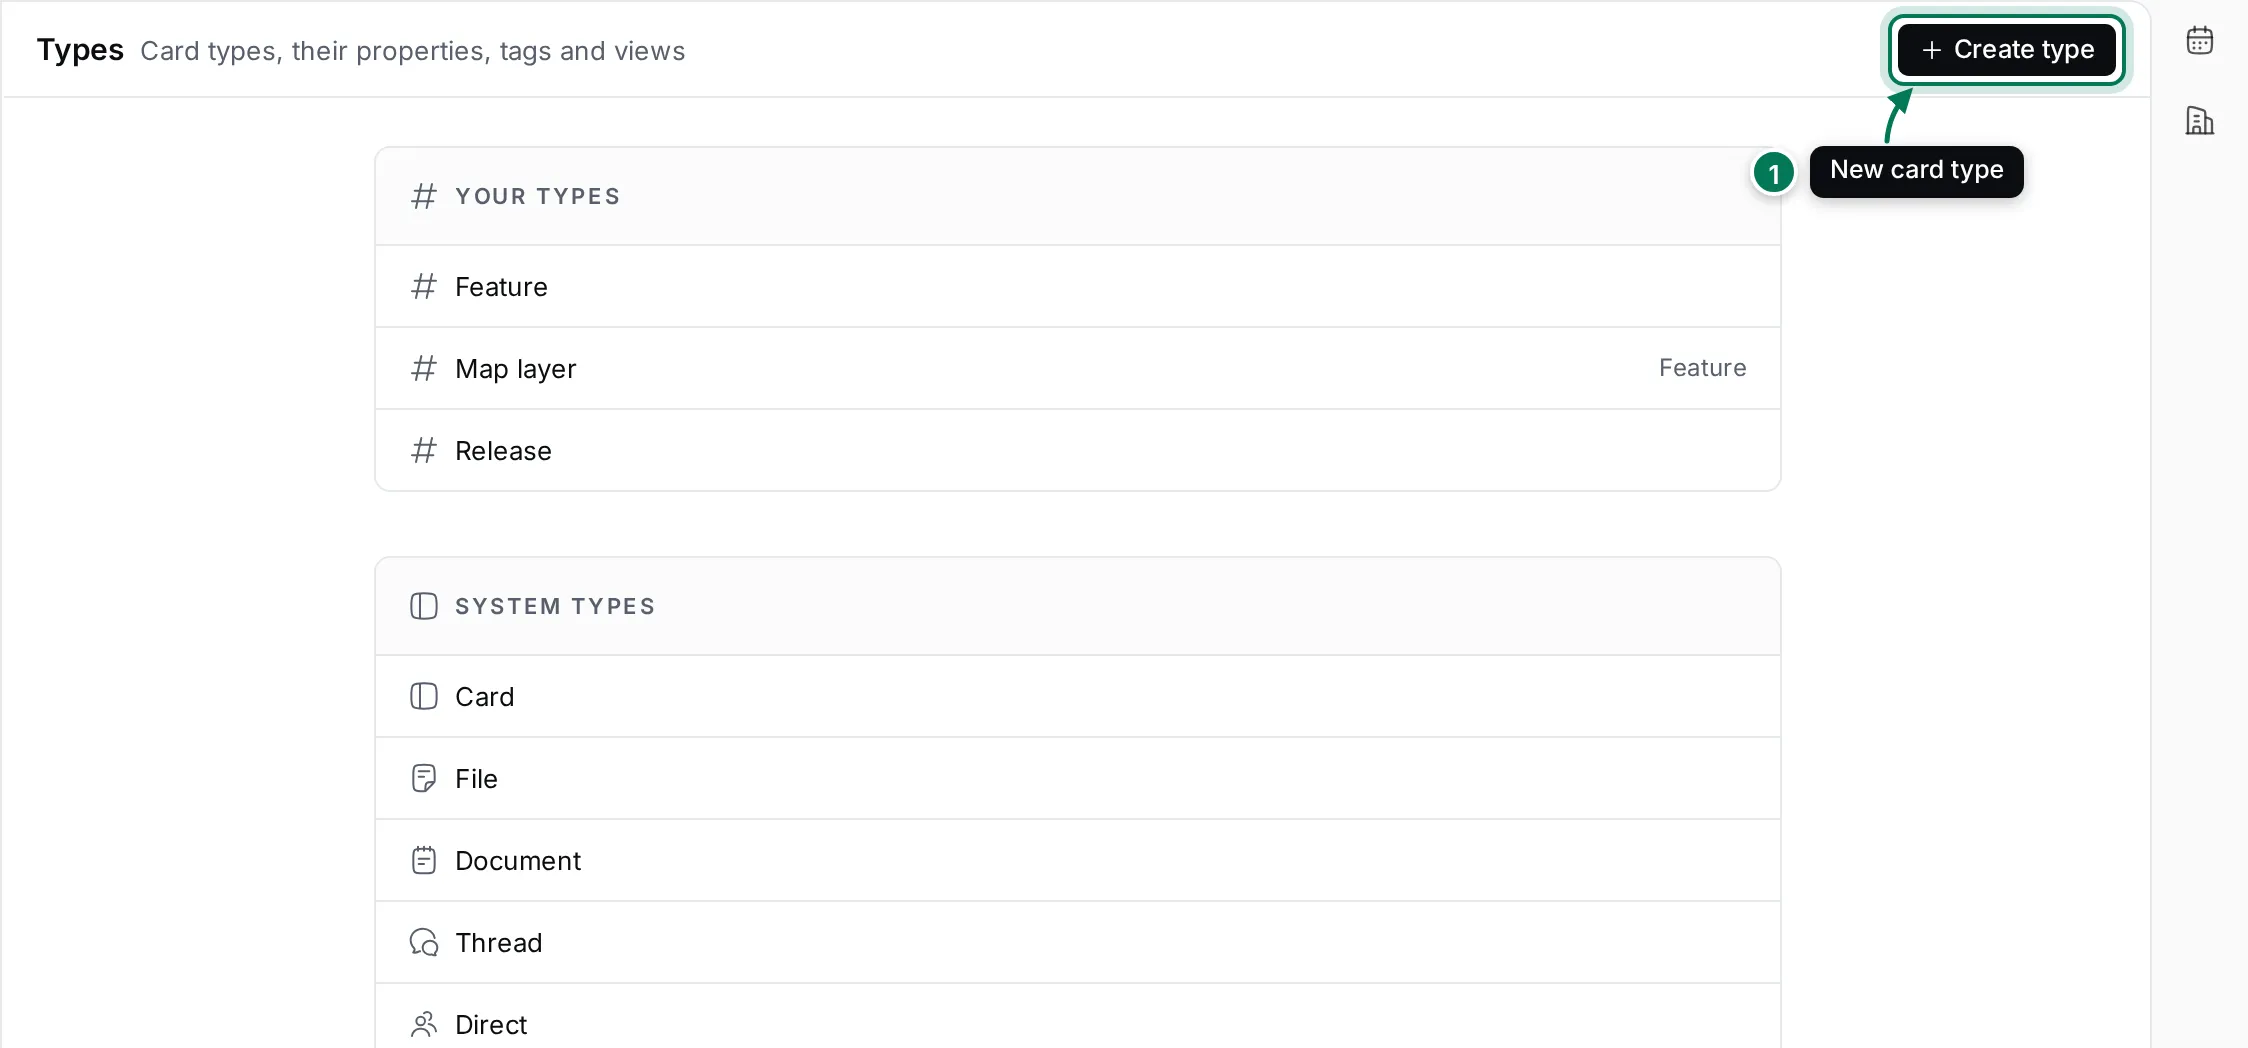
Section titled “Card types”Card types (Settings › Types, Maintainers and Owners) define the kinds of cards your workspace uses, with their properties, tags, relations, roles, views and processes. Create type adds one.
Space types, roles and statuses
Section titled “Space types, roles and statuses”A space type is the template for a kind of space: the project type for Tracker projects, Default teamspace type for documents, Default drive type for drives. Open one from Space types at the bottom of the Settings navigator.
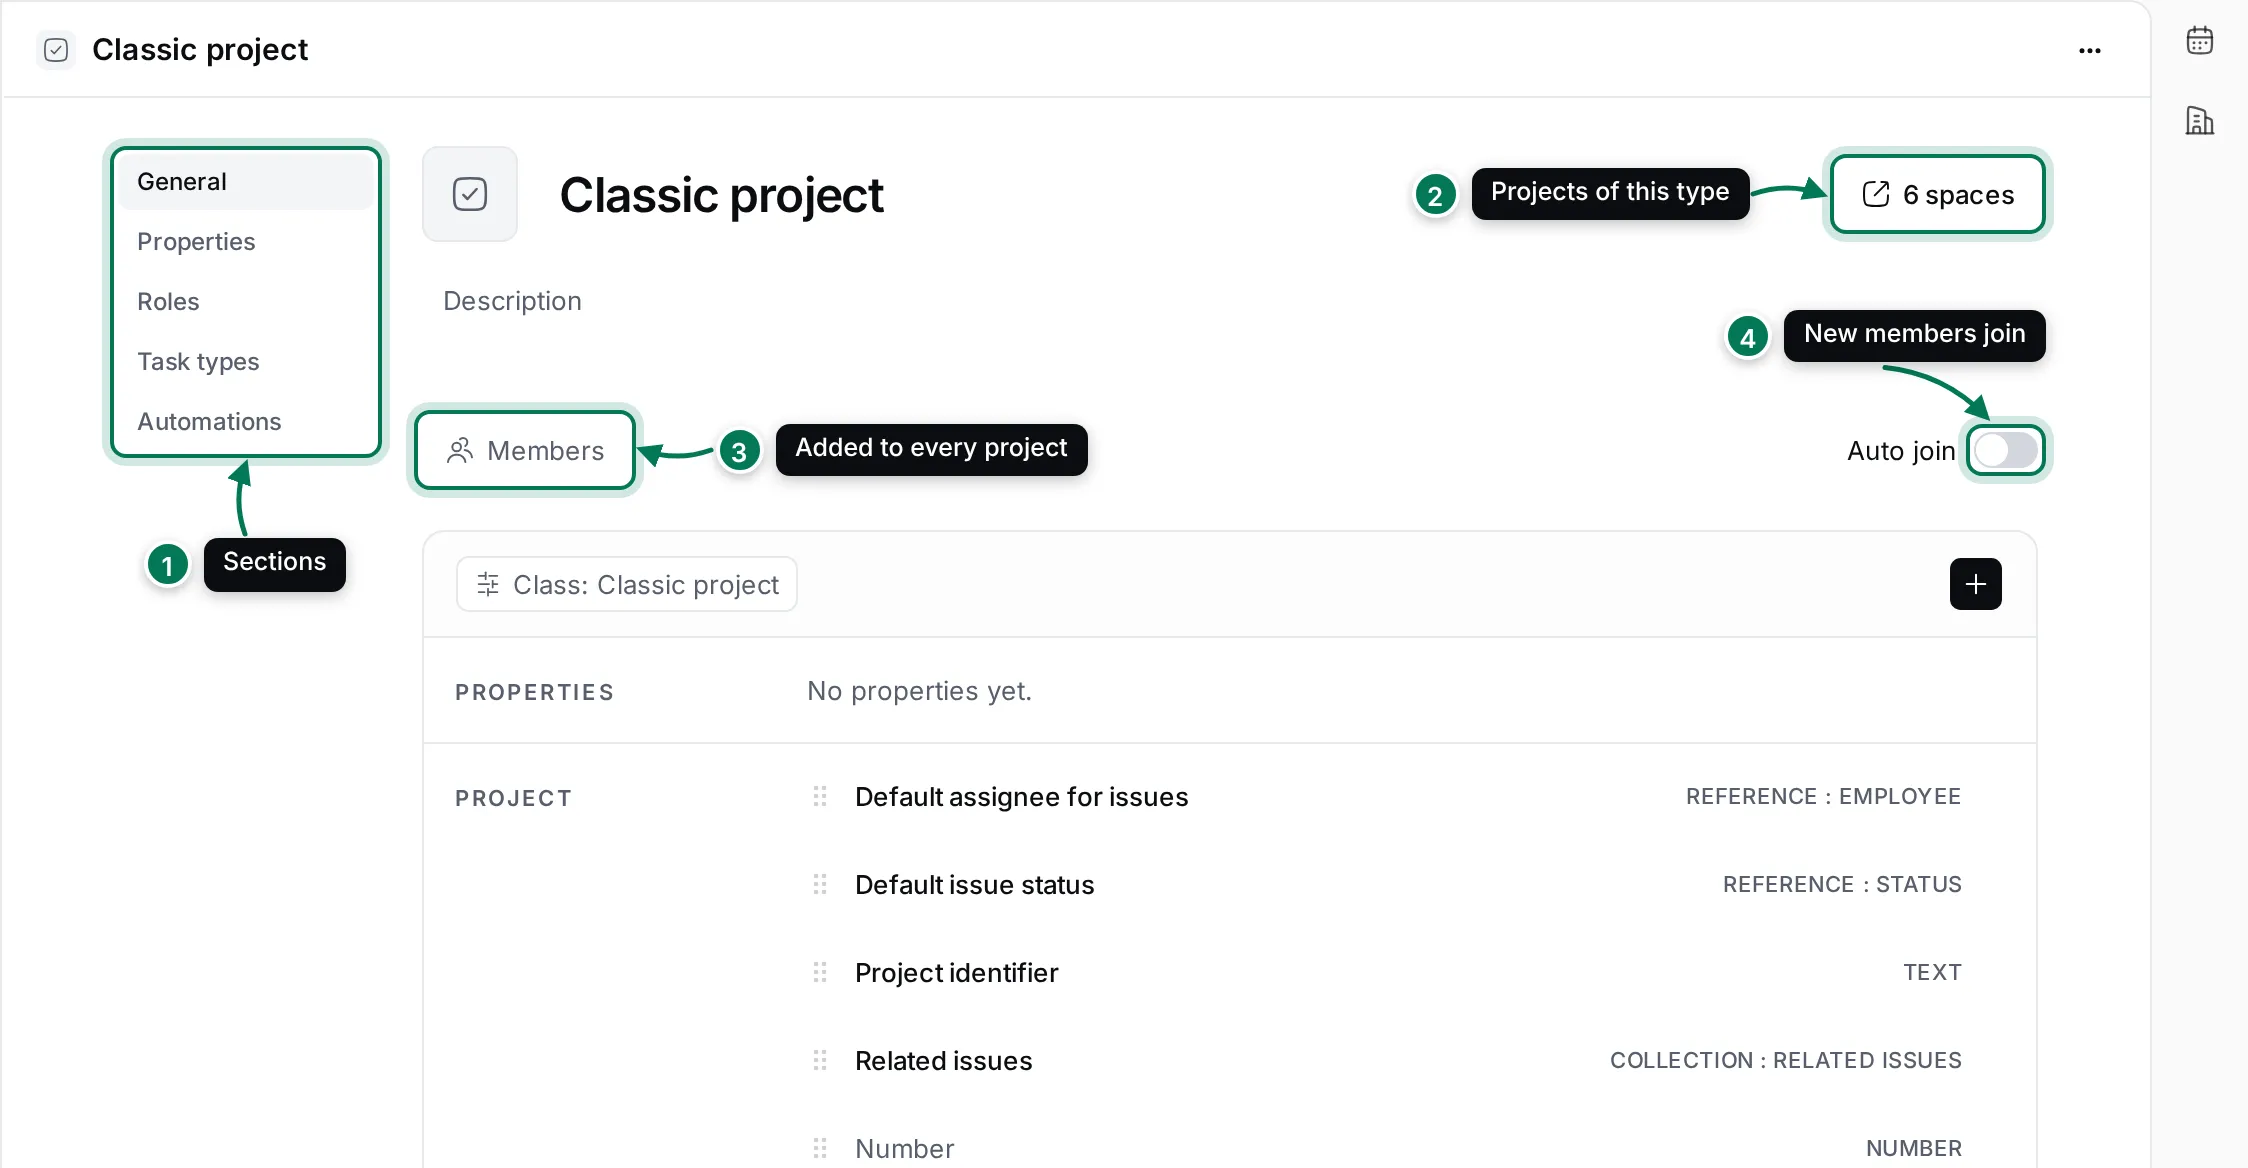
- The sections: General, Properties, Roles, Task types and Automations.
- How many spaces use this type. Click to list them.
- Members added here join every space of this type.
- Auto join adds new workspace members to spaces of this type.
Roles lists the roles a space of this type can give, such as a project’s managers. Click + to add a role, then open it and use the pencil to choose its permissions. People are given these roles in each space.
Task types (project types) holds the kinds of issues and their statuses. Open a task type, for example Issue, to see its Process states: the statuses in each category (Backlog, Unstarted, Active, Done, Canceled).
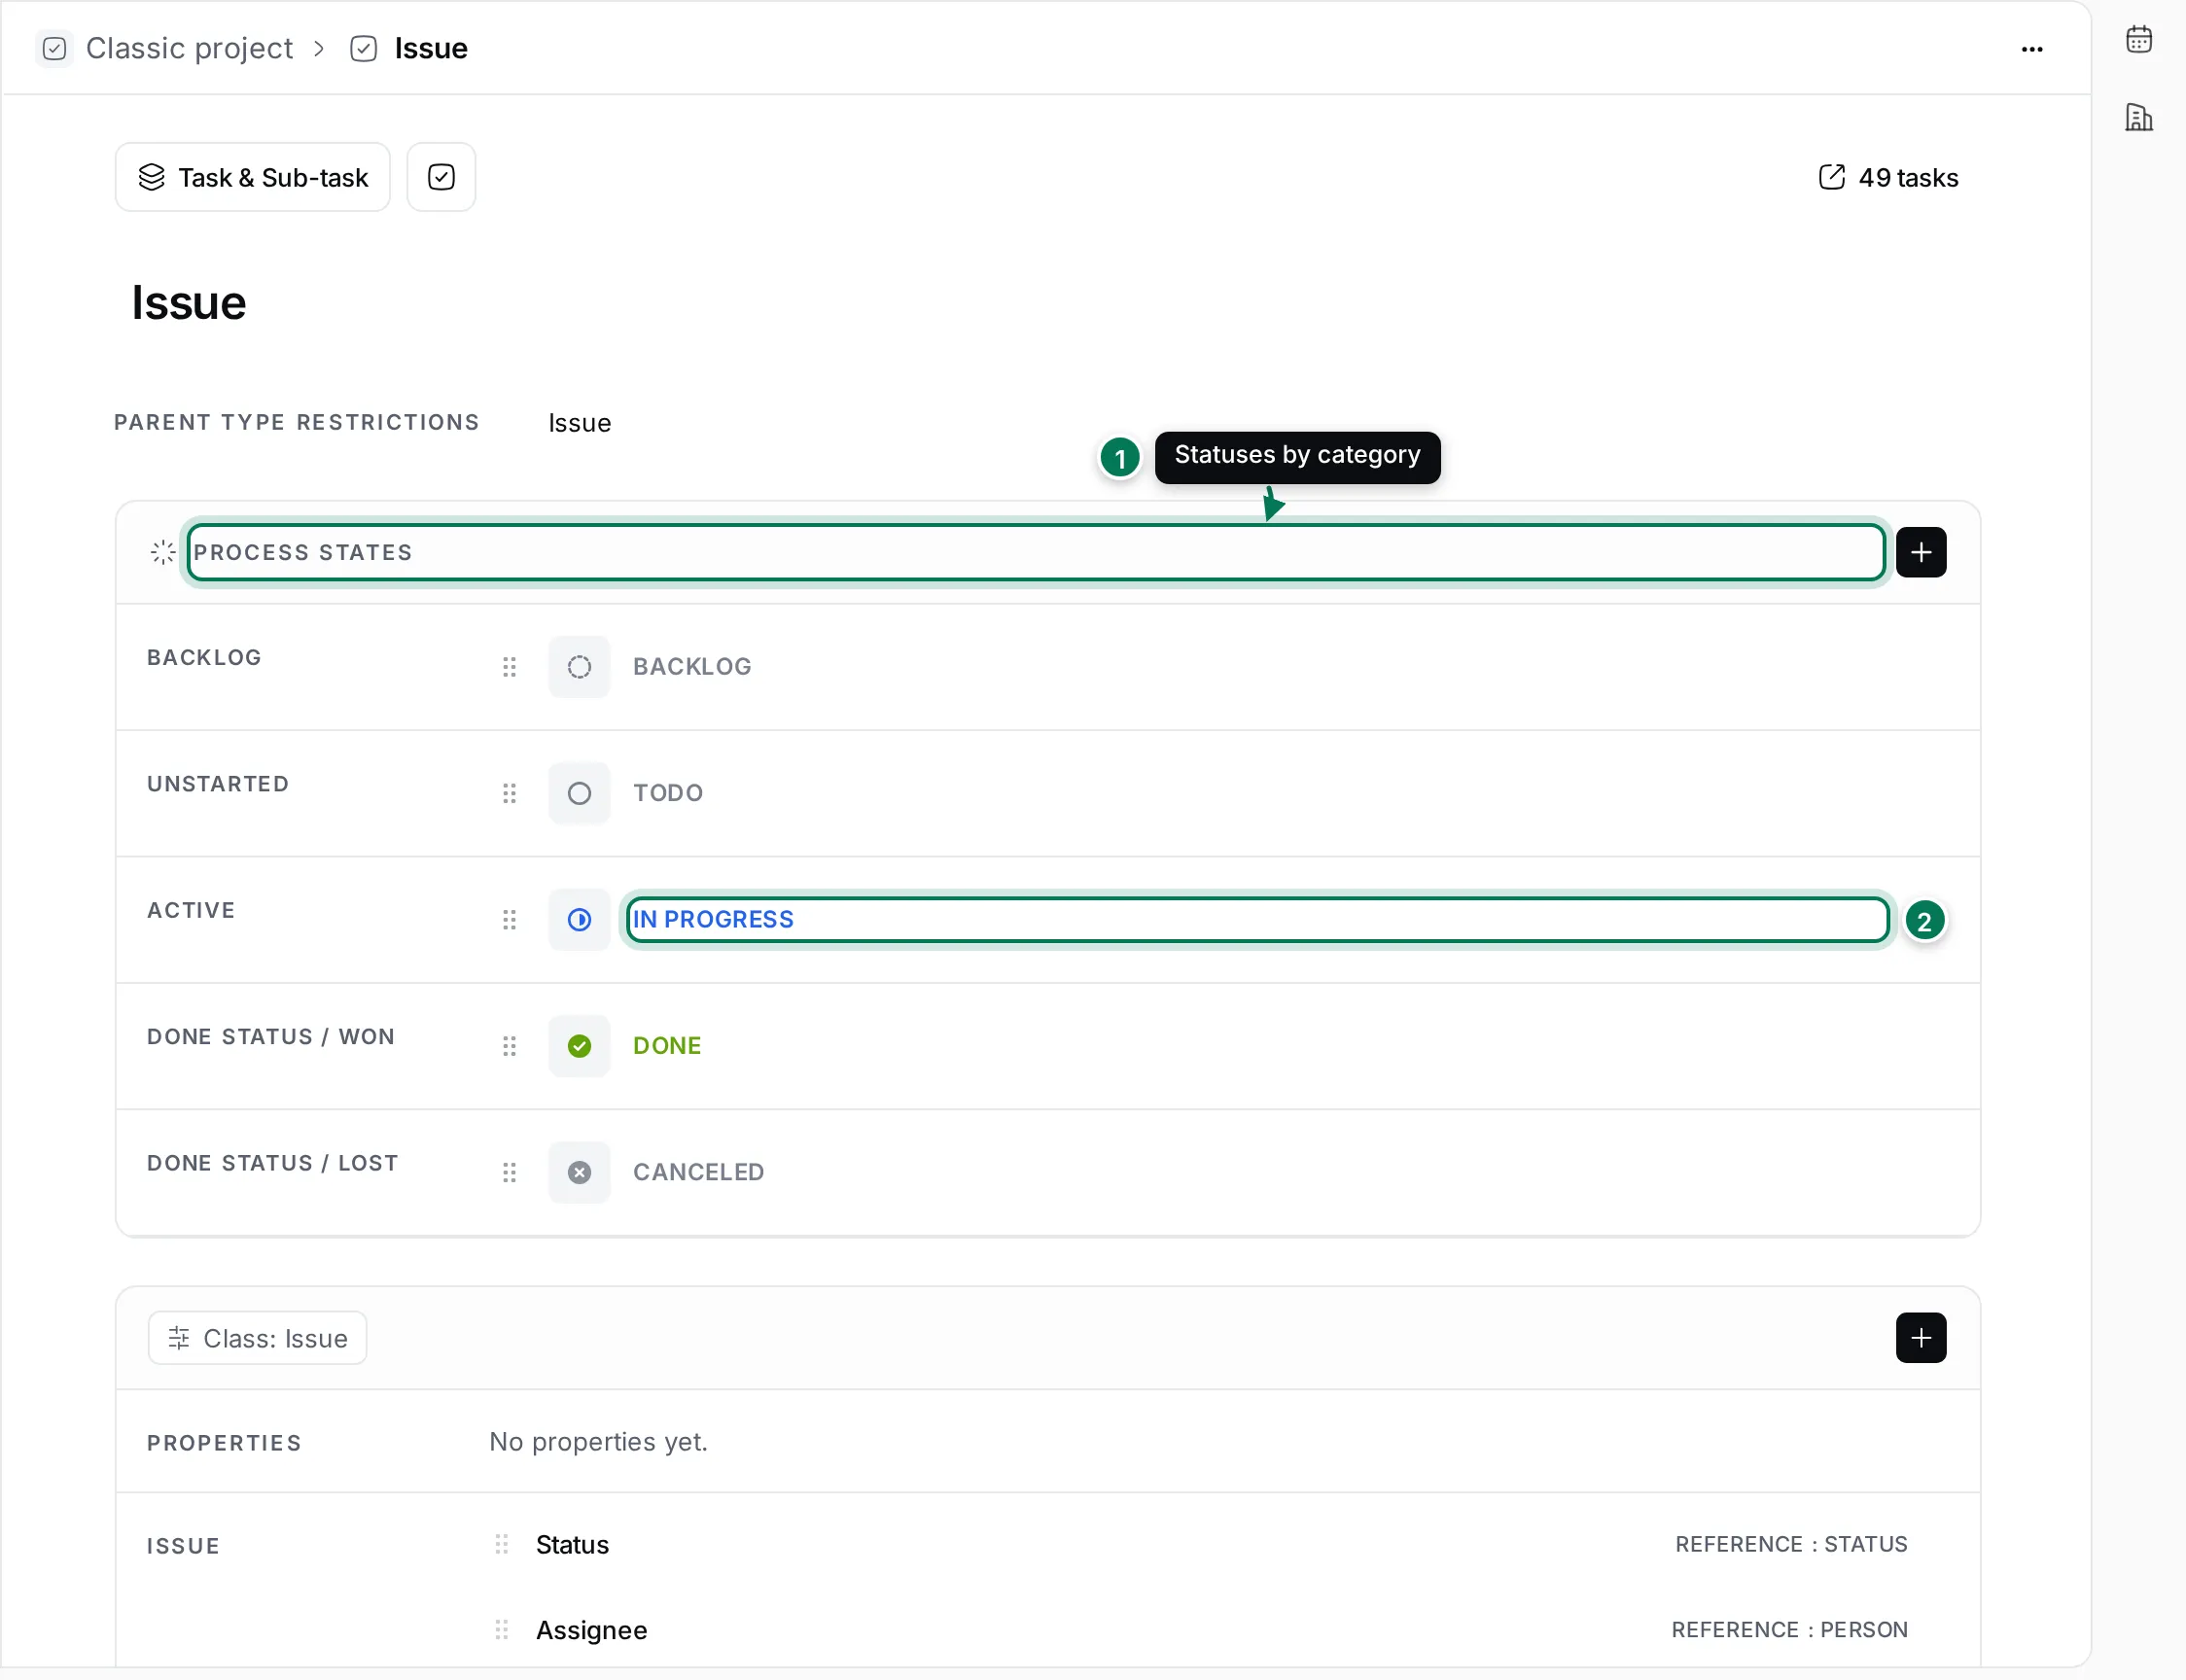
- Click + in Process states to add a status: name, description, category and colour.
- Click a status (2) to rename or recolour it. Renaming one that issues use asks you to confirm.
- Drag a status within its category to reorder it.
- Deleting a status in use asks which status its issues should move to.
The tracker’s “Edit issue statuses” opens this page; see projects.