Create and organize documents
Every document belongs to a teamspace. A document can also hold other documents, so you can build a tree: a product brief with its pricing notes inside it, or an architecture overview with one page per part.
Create a document
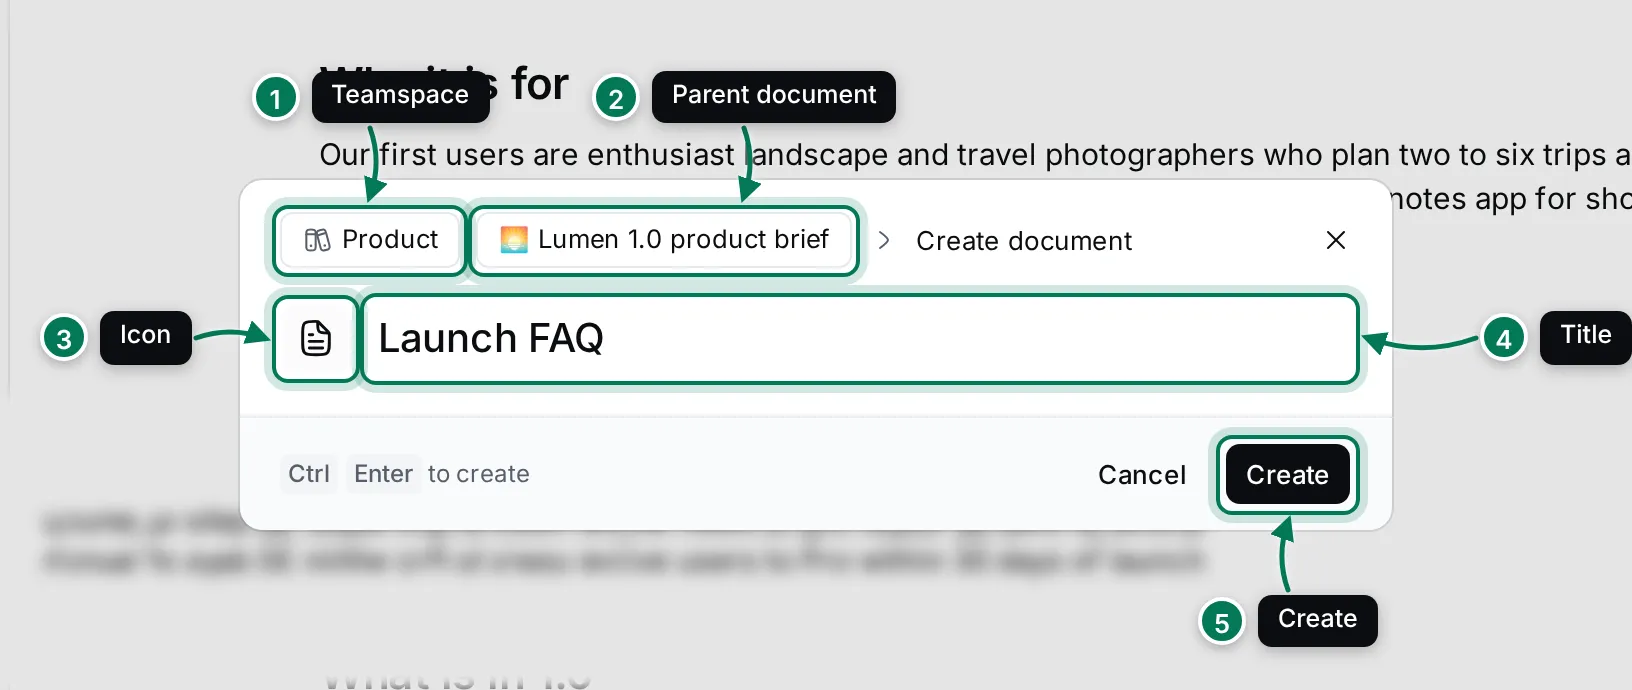
Section titled “Create a document”In Documents, click Create document, or press C. Then, in the dialog:
- Check the teamspace chip at the top. Click it to pick another teamspace.
- Check the parent document chip. If a document was open, the new one goes inside it. Click the chip and choose No parent document to put it at the top of the teamspace instead.
- If you like, click the page icon to choose an emoji for the document.
- Type a title.
- Press Enter or click Create. The new document opens, ready for you to write.
Rename a document or change its icon
Section titled “Rename a document or change its icon”- Click the title at the top of the document and type. The navigator and the browser tab update as you type. Press Enter to move into the text, or Esc to undo the change.
- Click the icon before the title to choose another emoji. Remove icon goes back to the plain page icon.
Actions on a document in the navigator
Section titled “Actions on a document in the navigator”Hover a document in the navigator to show its buttons.
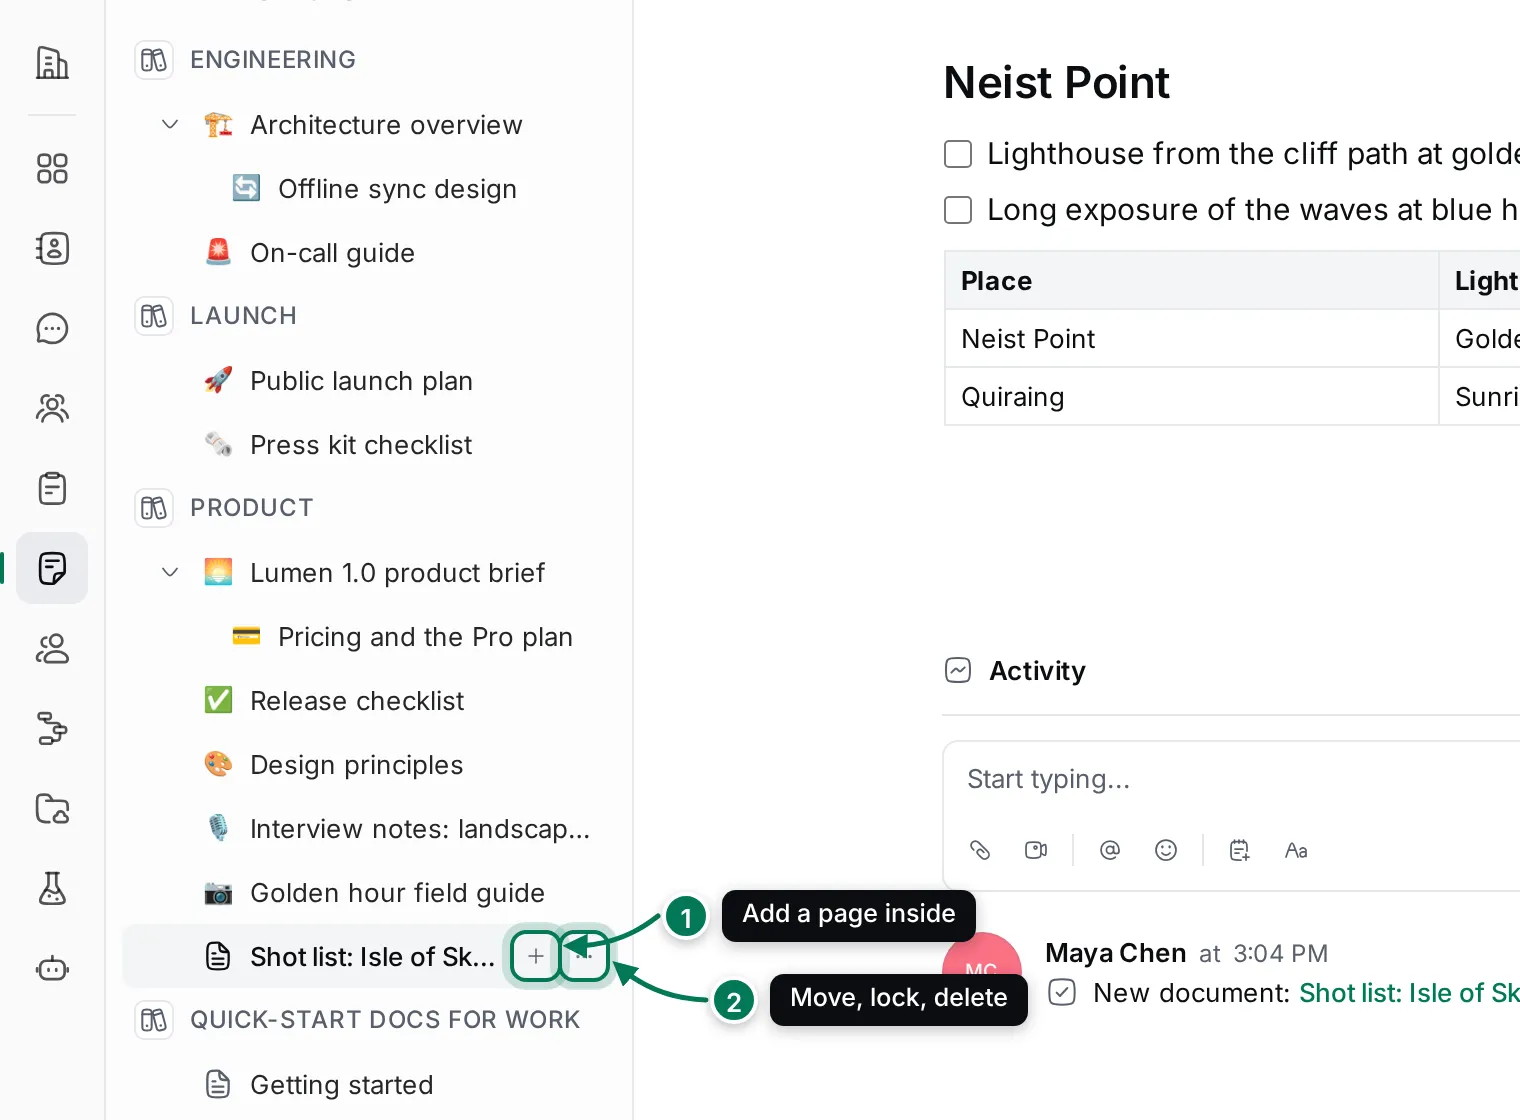
- + creates a page inside this document.
- ⋯ opens the document’s menu. You can also right-click the document.
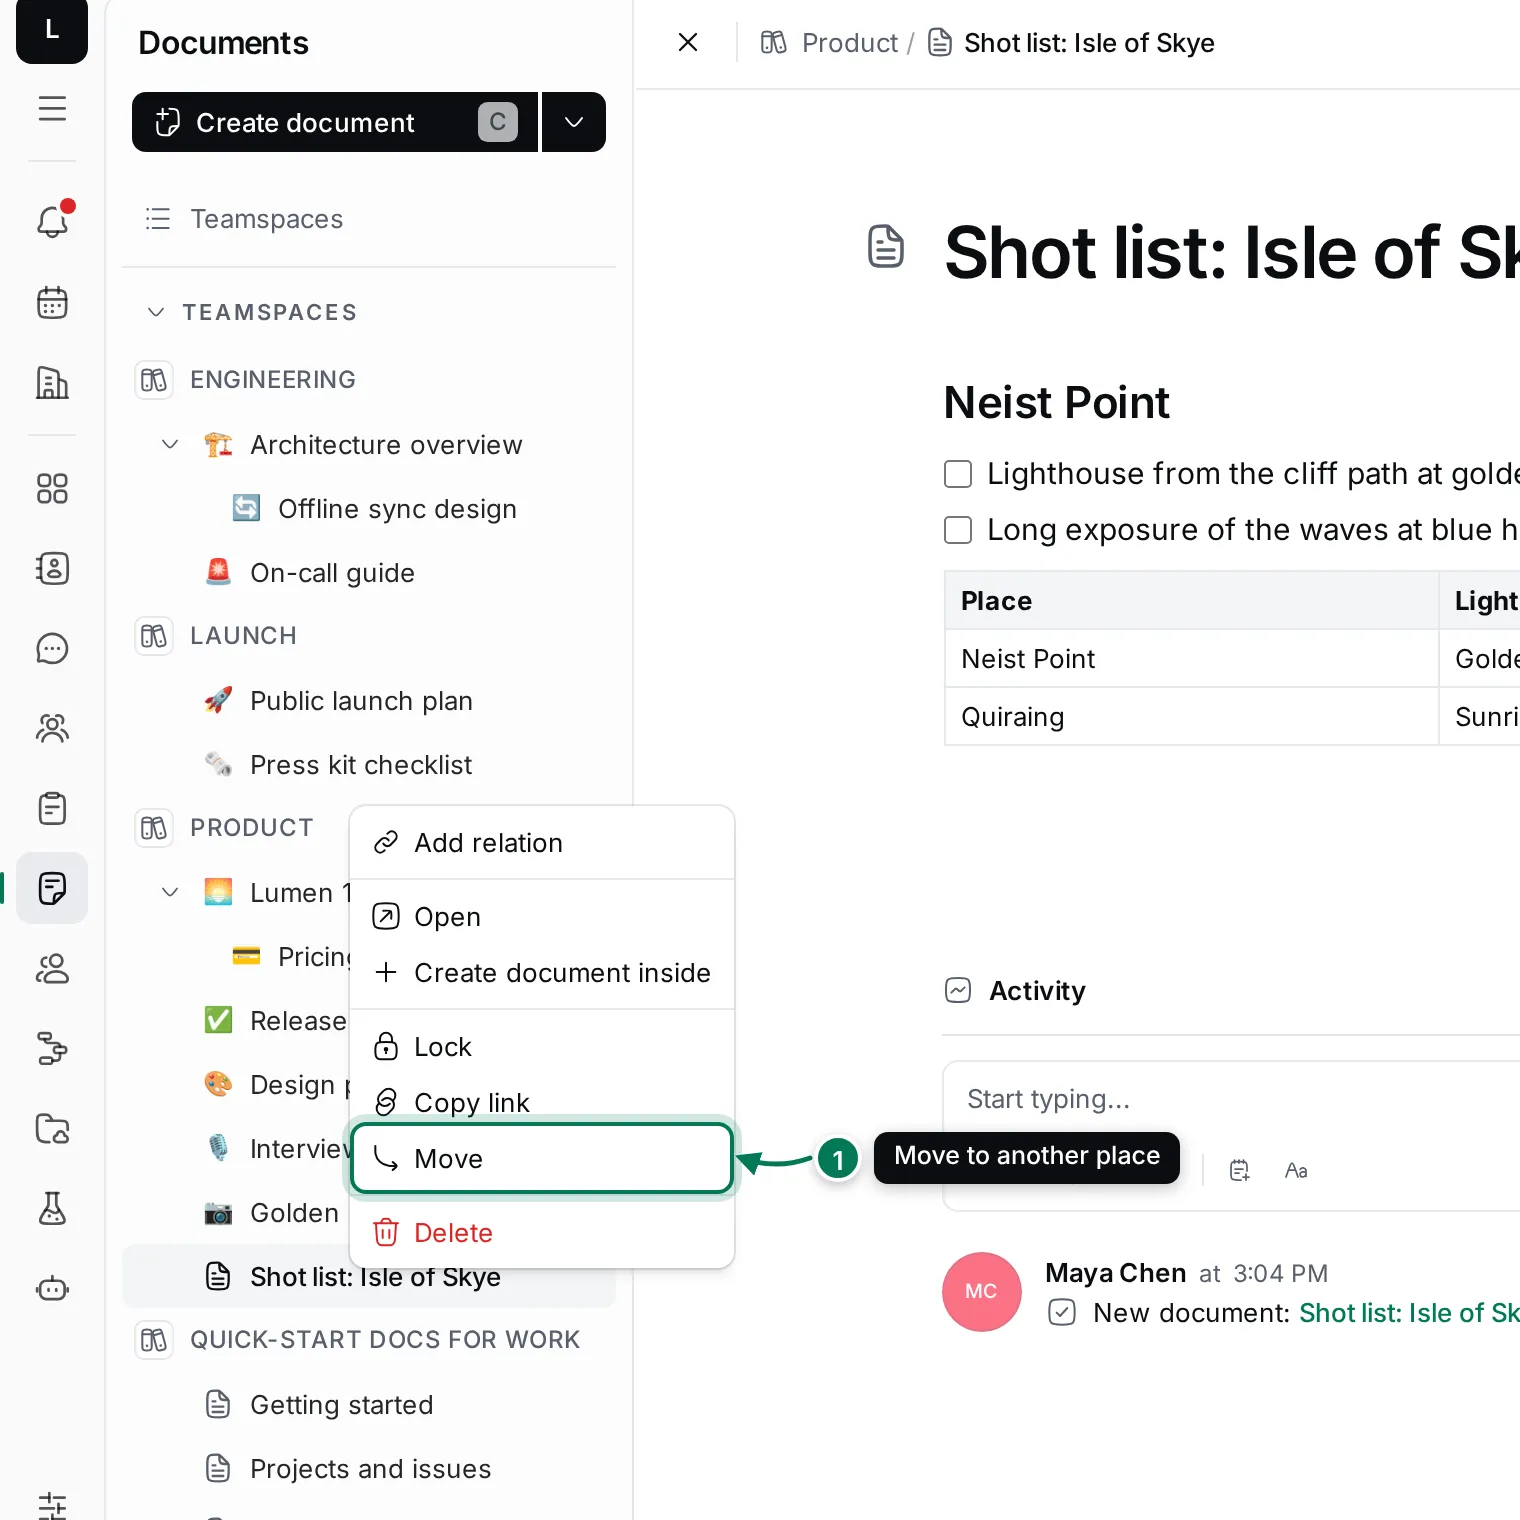
The menu has Add relation, Open, Create document inside, Lock, Copy link, Move and Delete. The same actions are in More actions (⋯) at the top right of an open document.
Move a document
Section titled “Move a document”You can drag documents in the navigator:
- Drop a document on the middle of another document to put it inside that document.
- Drop it on the top or bottom edge of a document to place it before or after it.
- Drop it on a teamspace to move it to that teamspace’s top level.
A line or a ring shows where the document will land.
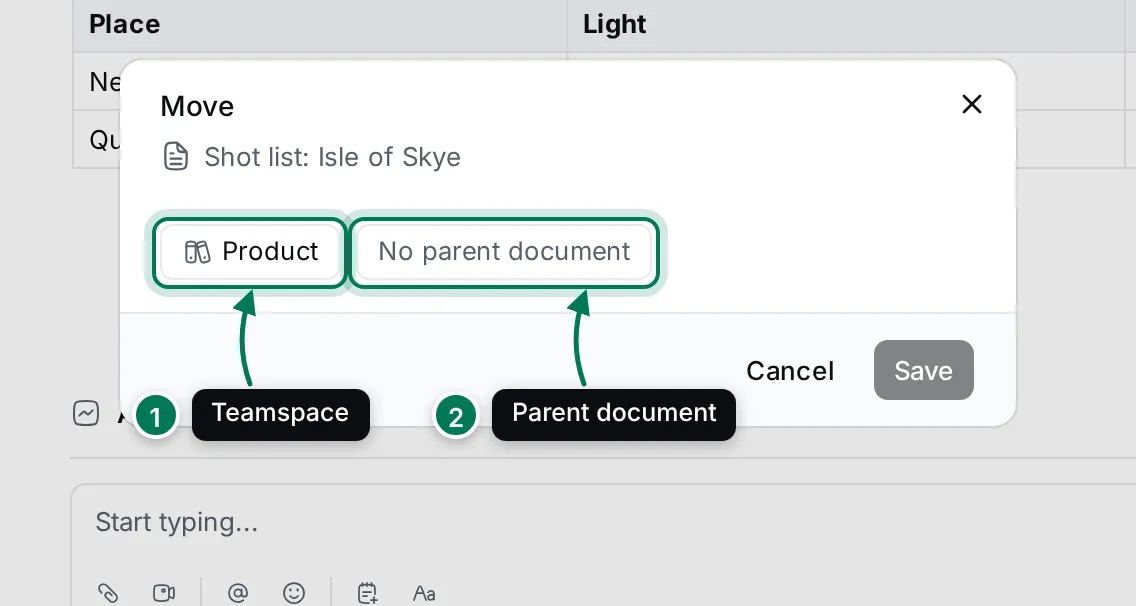
To move it without dragging, right-click the document and choose Move (or use More actions › Move in the open document). Then, in the Move dialog:
- Click the teamspace chip to choose a teamspace.
- Click the parent document chip to choose the document it goes inside, or No parent document.
- Click Save.
Pages inside the document move with it, including to another teamspace. A document can’t be moved inside itself or one of its own pages, so those don’t appear in the list.
Delete a document
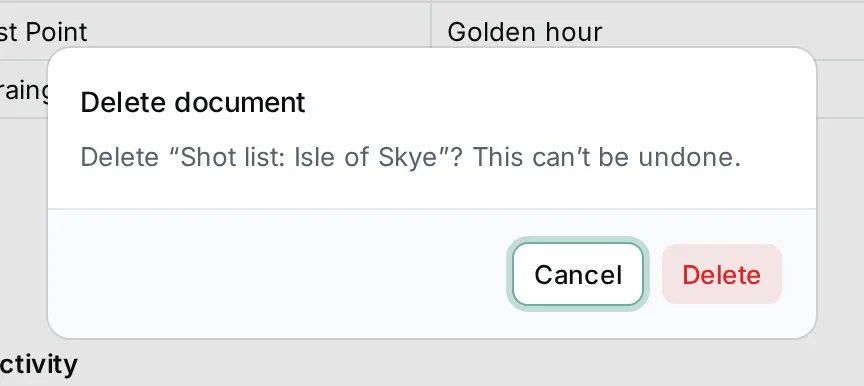
Section titled “Delete a document”Right-click the document and choose Delete, then confirm. If the document has pages inside it, the message says how many go with it.
Next: write and format the text.