Request time off
A request puts time off, overtime or a remote day on the schedule, so everyone knows who is away. Requests appear on the schedule as soon as you create them.
Add a request
Section titled “Add a request”- Open Human resources and find your row on the schedule.
- Drag across the days you’ll be away. For a single day, click its cell.
- In the dialog, check the type (1). It starts as Vacation; click it to pick another.
- Add a note in Description (2) if it helps, such as where you’ll be.
- Check the first day (3) and the last day (4). Click a date to change it.
- Click Create (5), or press Ctrl Enter.
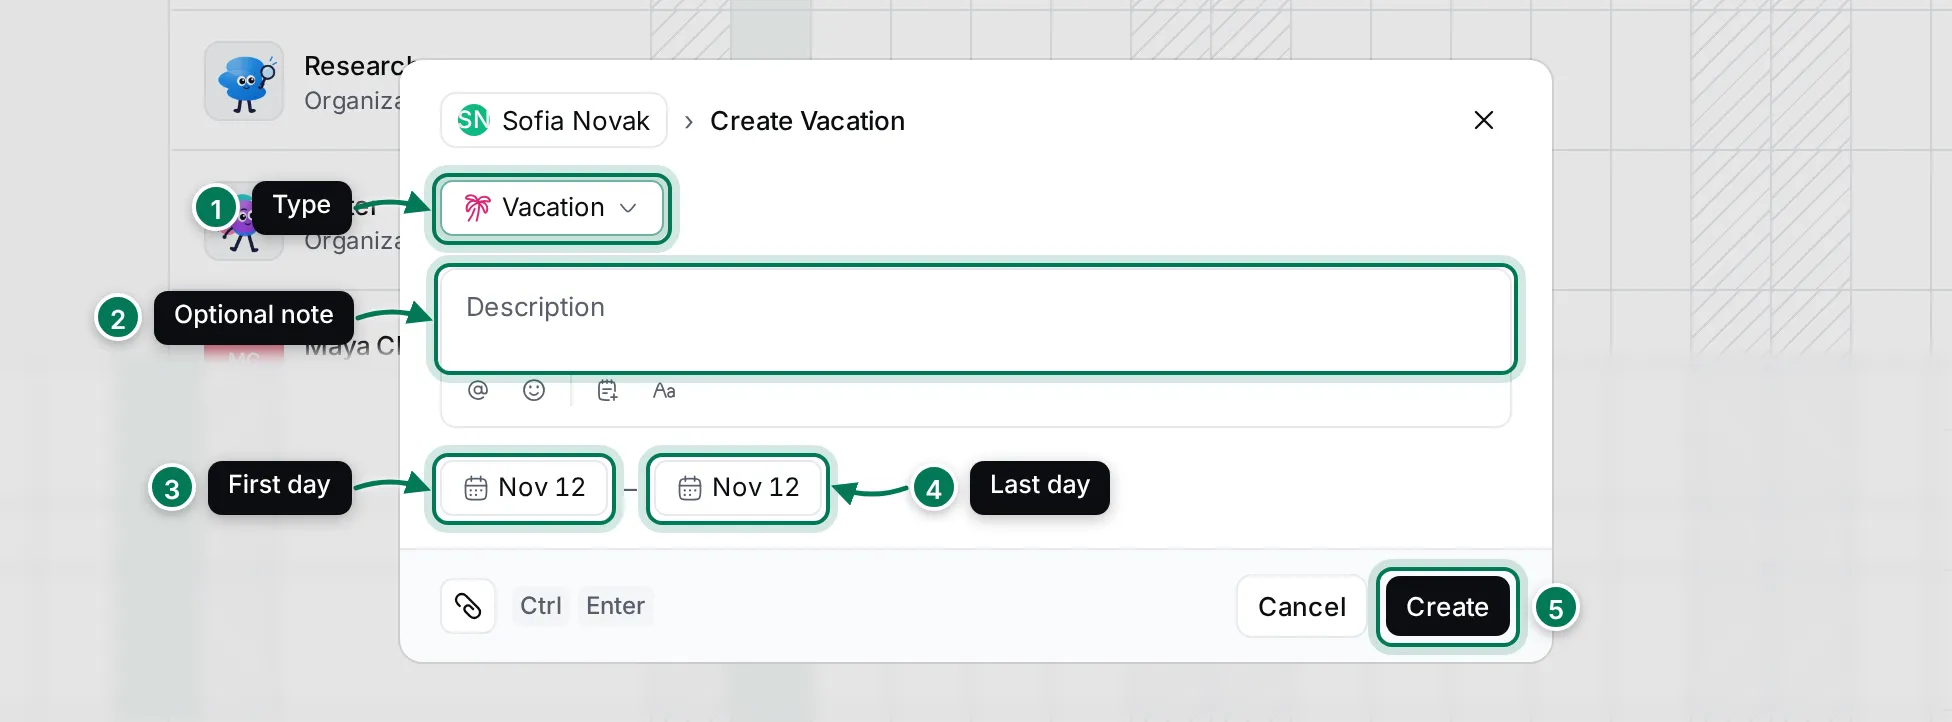
The dialog’s title follows the type, such as Create Vacation or Create Sick, and starts with the name of the person the request is for. Attach a file, such as a doctor’s note, with the paperclip at the bottom.
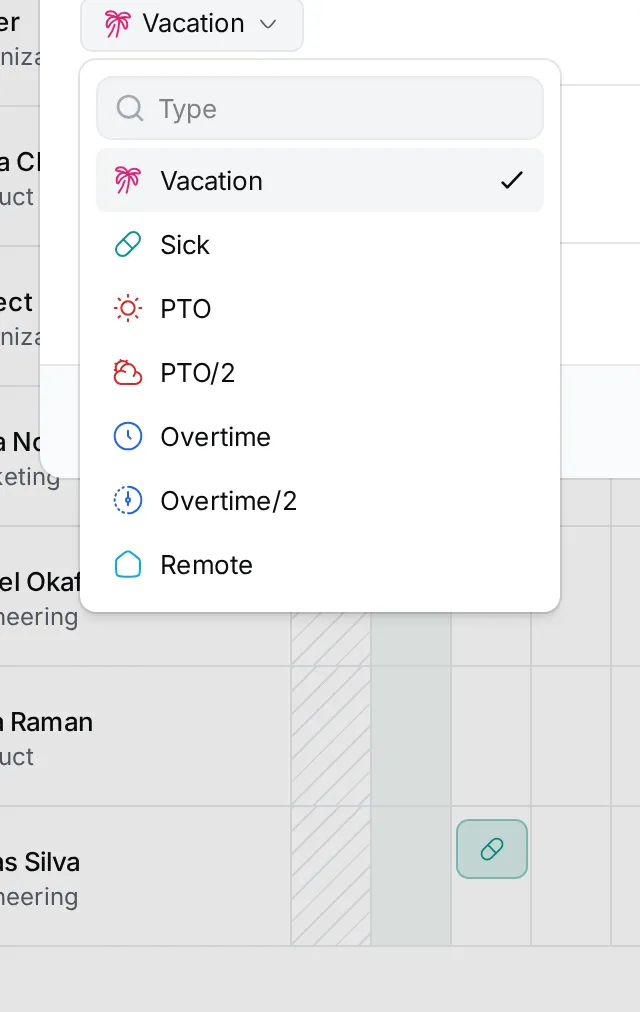
You can also add requests with the keyboard: click into the schedule, move with the arrow keys, hold Shift with ← or → to select several days, and press Enter.
Change or delete a request
Section titled “Change or delete a request”Click a request’s bar on the schedule to open its menu.
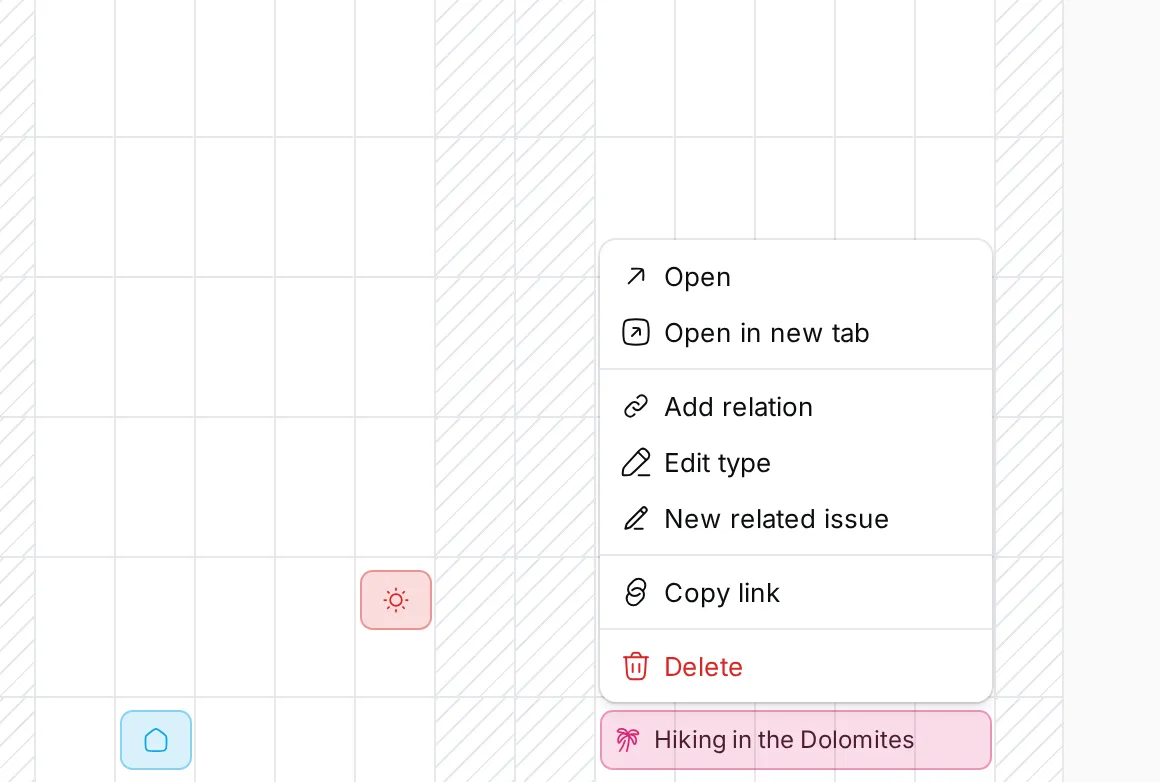
- Open shows the request’s page (see below); Open in new tab opens it in a new tab.
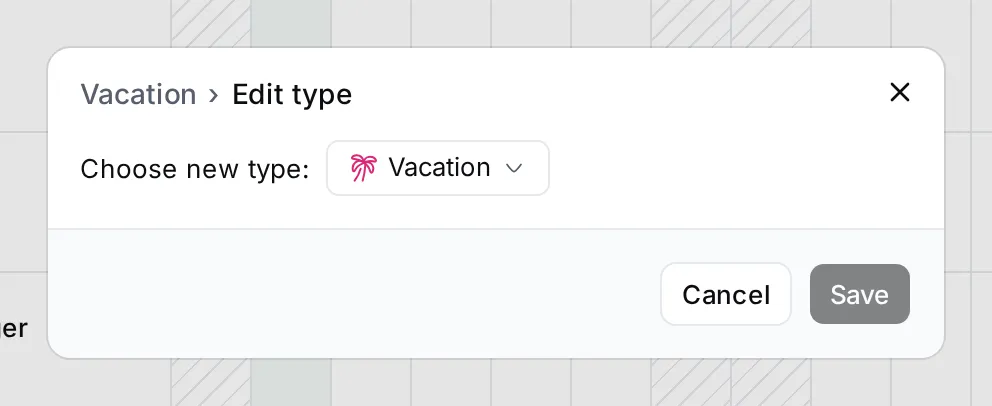
- Edit type changes the type, for example from Vacation to Sick. Pick the new type under Choose new type: and click Save.
- Add relation and New related issue link the request to other work, such as the issues someone else covers while you’re away.
- Copy link copies a link to the request.
- Delete removes it, after you confirm.
The request page
Section titled “The request page”The request page shows the type and dates, the description, attachments and the activity feed. You can comment there, for example to agree on who covers for you.
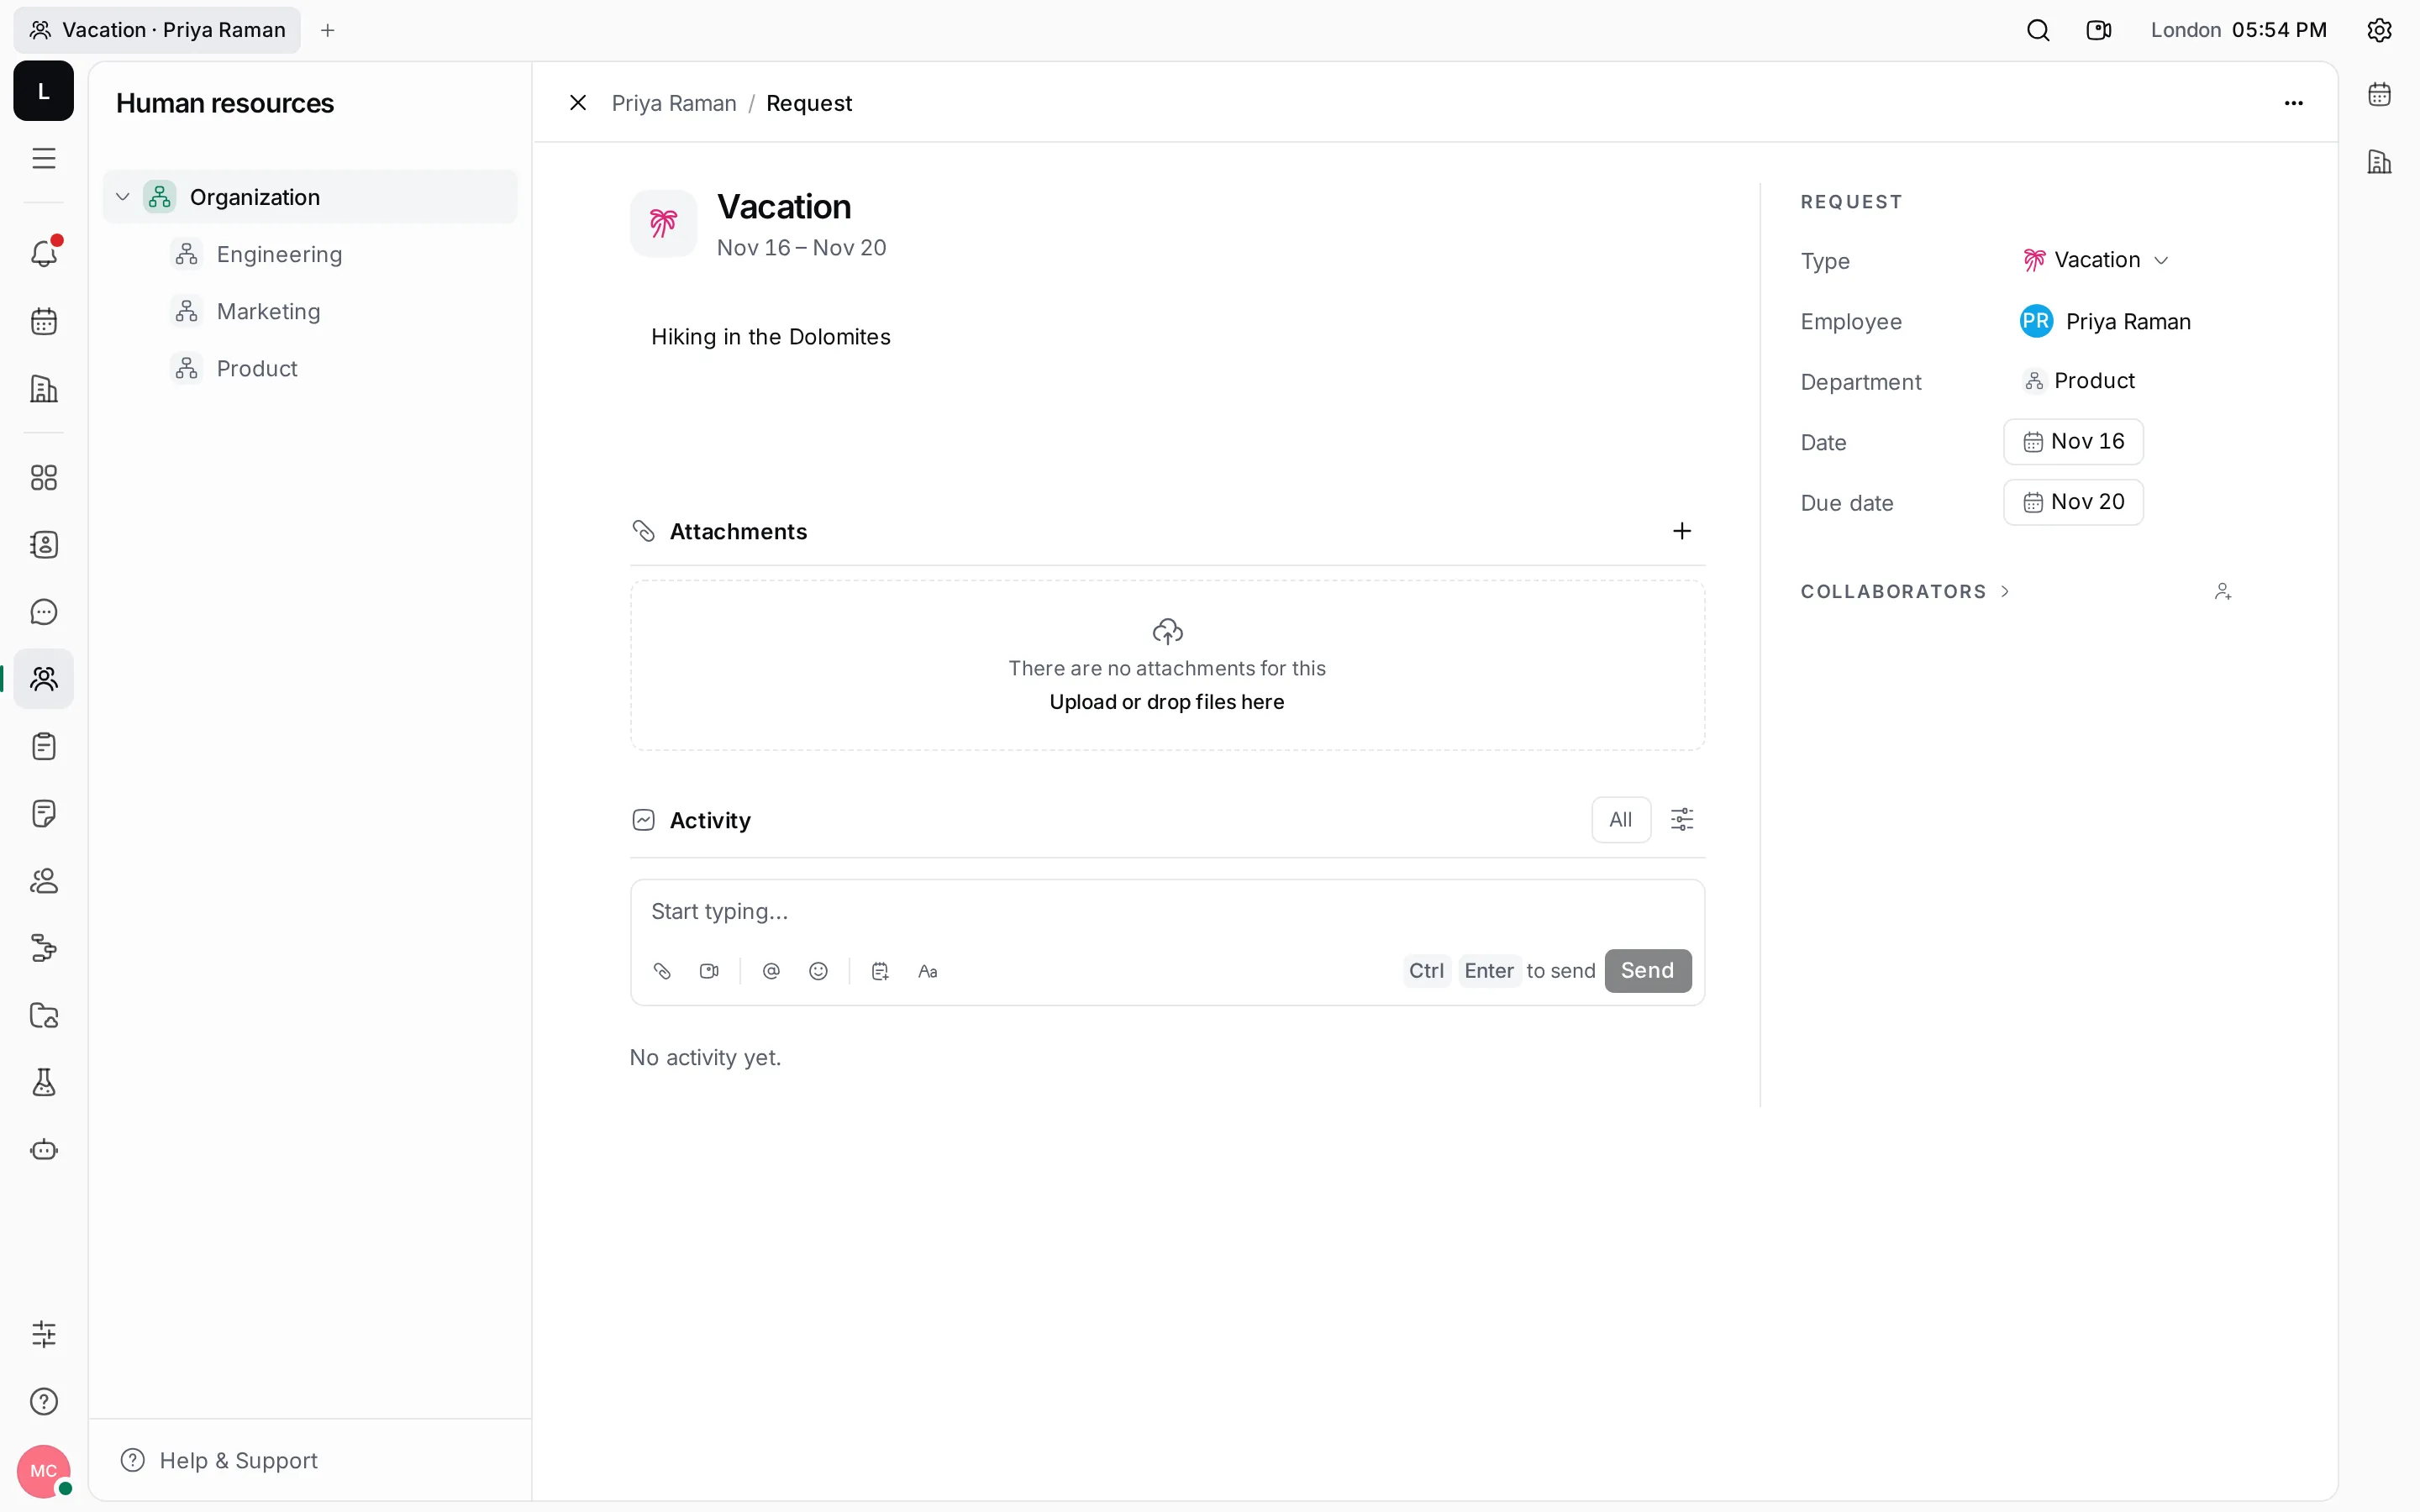
The sidebar on the right holds the Type, the Employee, the Department and the first and last day (Date and Due date). You can change all of them except the employee. Close the page with × or Esc.