Labels, components and milestones
Three ways to organize issues, each answering a different question:
- Labels say what kind of work an issue is, such as Bug or Design. They’re shared by all projects, and an issue can have several.
- Components say which part of the product an issue belongs to, such as Map or Weather. Each project has its own, and each has a lead.
- Milestones say when the work should be done, such as Beta 1.0. Each project has its own, with a status and a target date.
An issue can have one component and one milestone. Set them on the issue page, in the New issue dialog, or for many issues at once with bulk changes.
Labels
Section titled “Labels”-
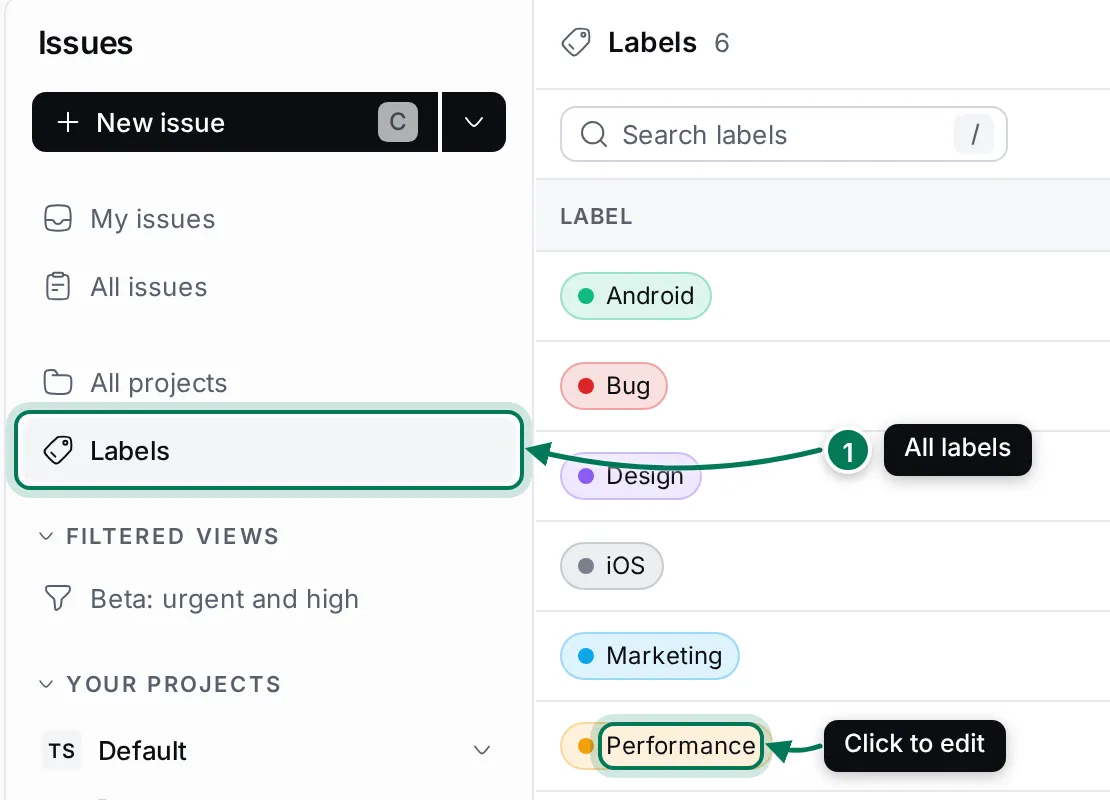
In the navigator, click Labels (1).
-
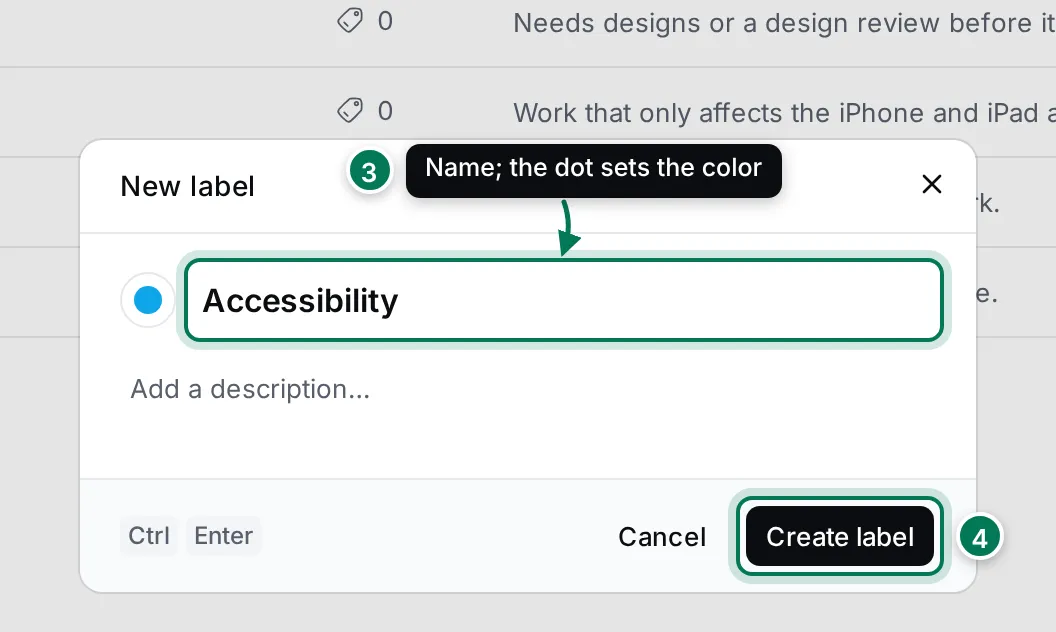
Click New label at the top right.
-
Type the label’s name (3). Click the dot beside it to choose a color, and add a description if it helps others use it well.
-
Click Create label (4).
You can also create a label while labelling an issue: click Add label, type a name that doesn’t exist yet and click +.
On the Labels page, the Issues column counts the issues with each label; click it to see them in All issues. Click a label to change its name, color or description. To delete a label, click … on its row. Deleting removes it from every issue that has it.
Components
Section titled “Components”-
In the navigator, open Components under the project (1).
-
Click New component (2).
-
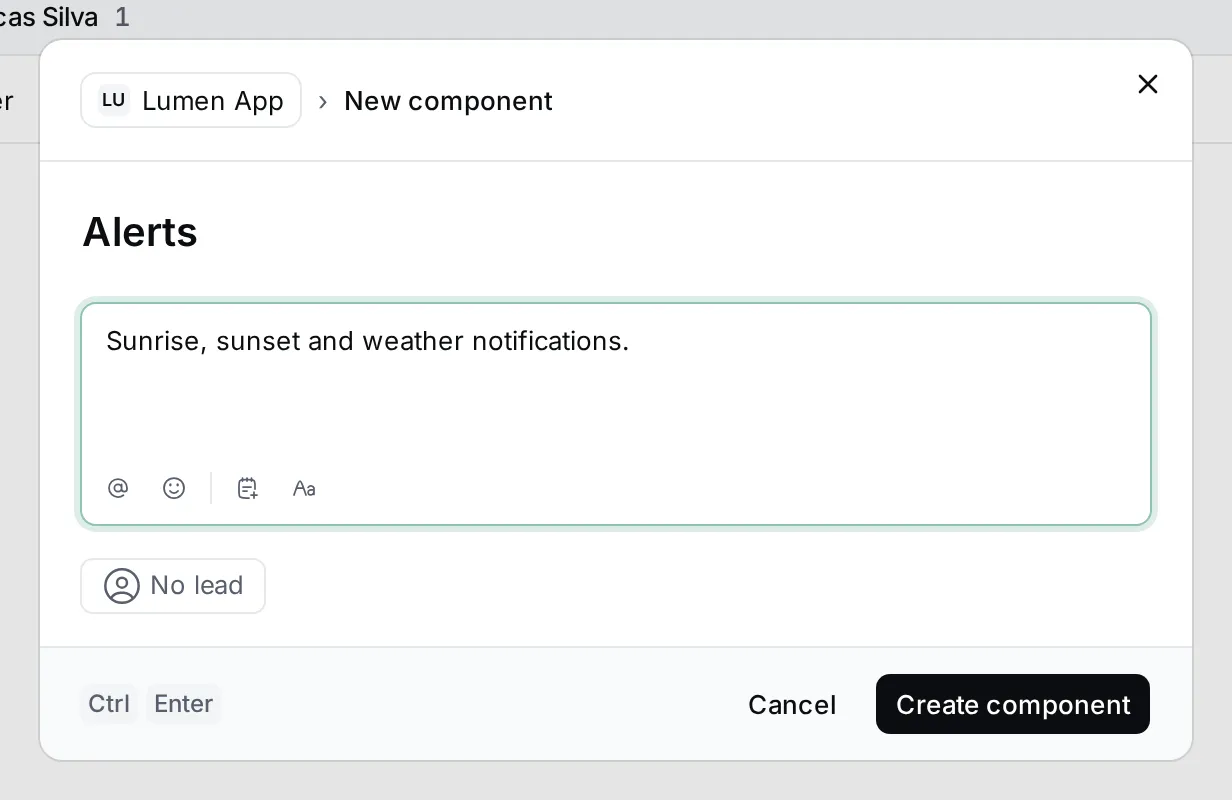
Type the Component name, an optional description, and pick a Lead: the person who looks after this part of the product.
-
Click Create component.
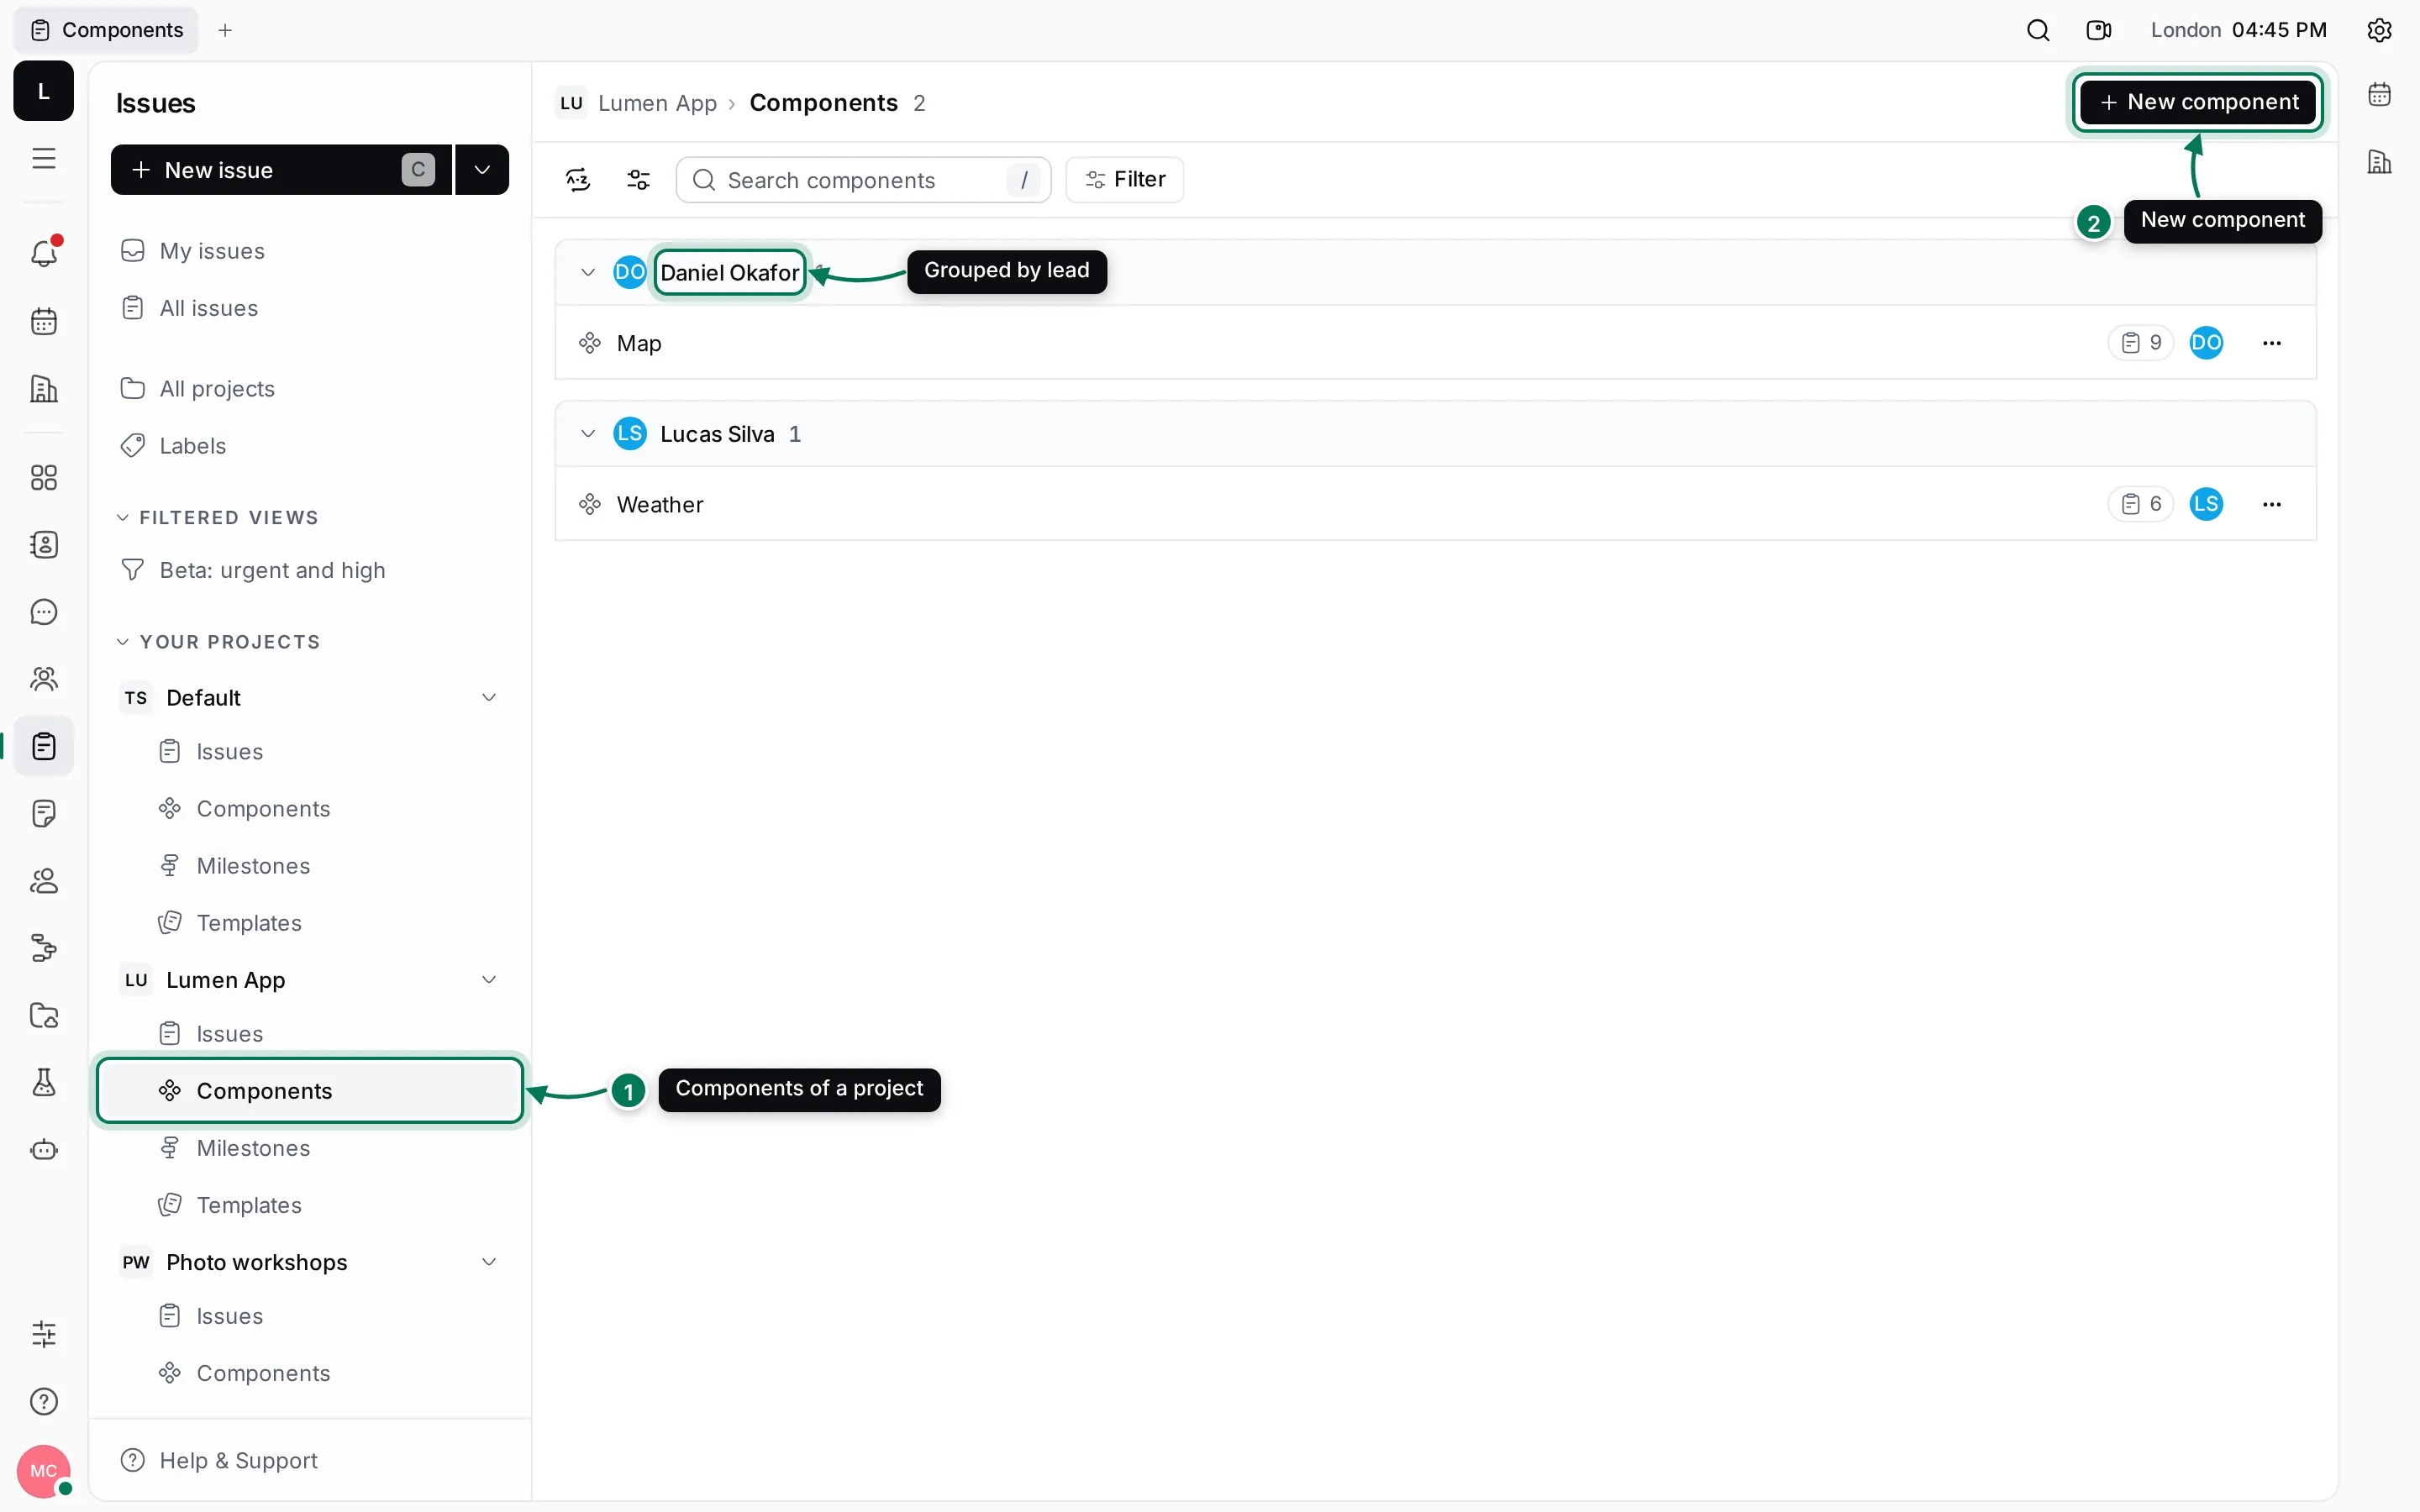
The list shows how many issues each component has. Use Customize view to group components by lead or creator, and Filter to narrow the list. Click … on a row to show its issues, edit it or delete it. When you delete a component, its issues are kept, without a component.
Milestones
Section titled “Milestones”-
In the navigator, open Milestones under the project and click New milestone (1).
-
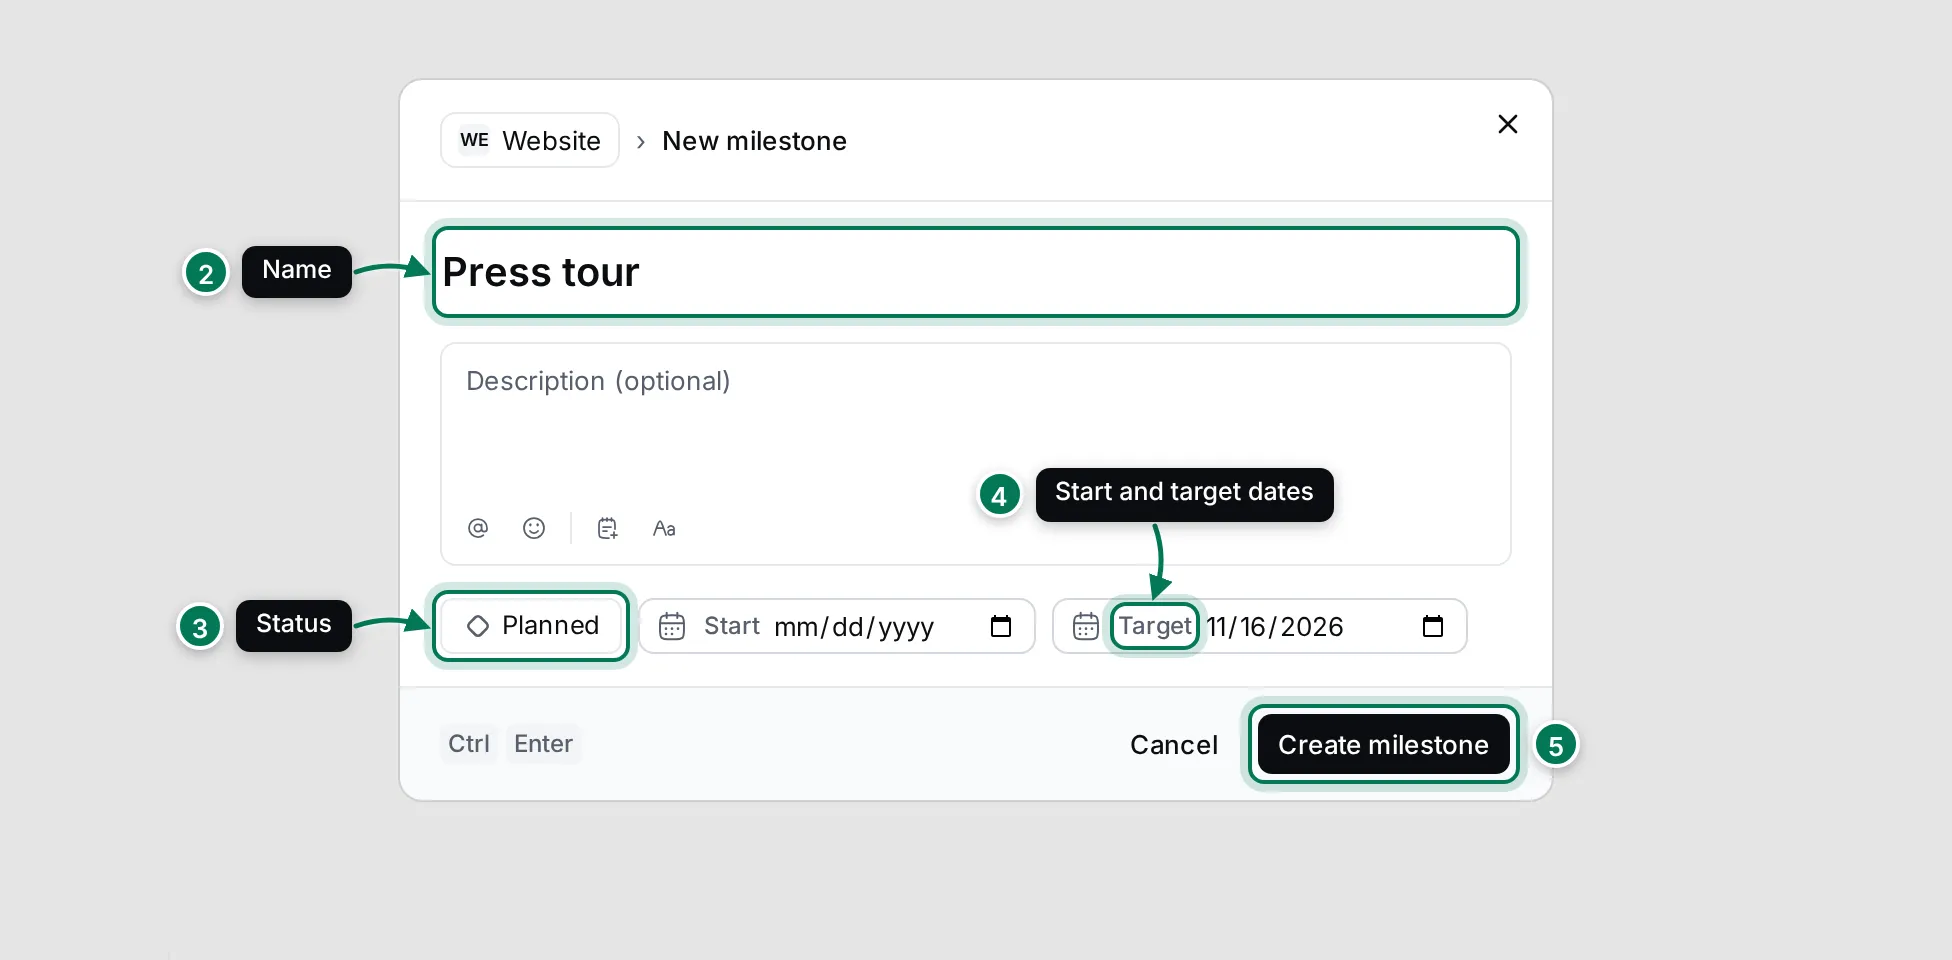
Type the Milestone name (2) and an optional description.
-
Set the status (3): Planned, In progress, Completed or Canceled.
-
Set the Start and Target dates (4). The target starts two weeks ahead.
-
Click Create milestone (5).
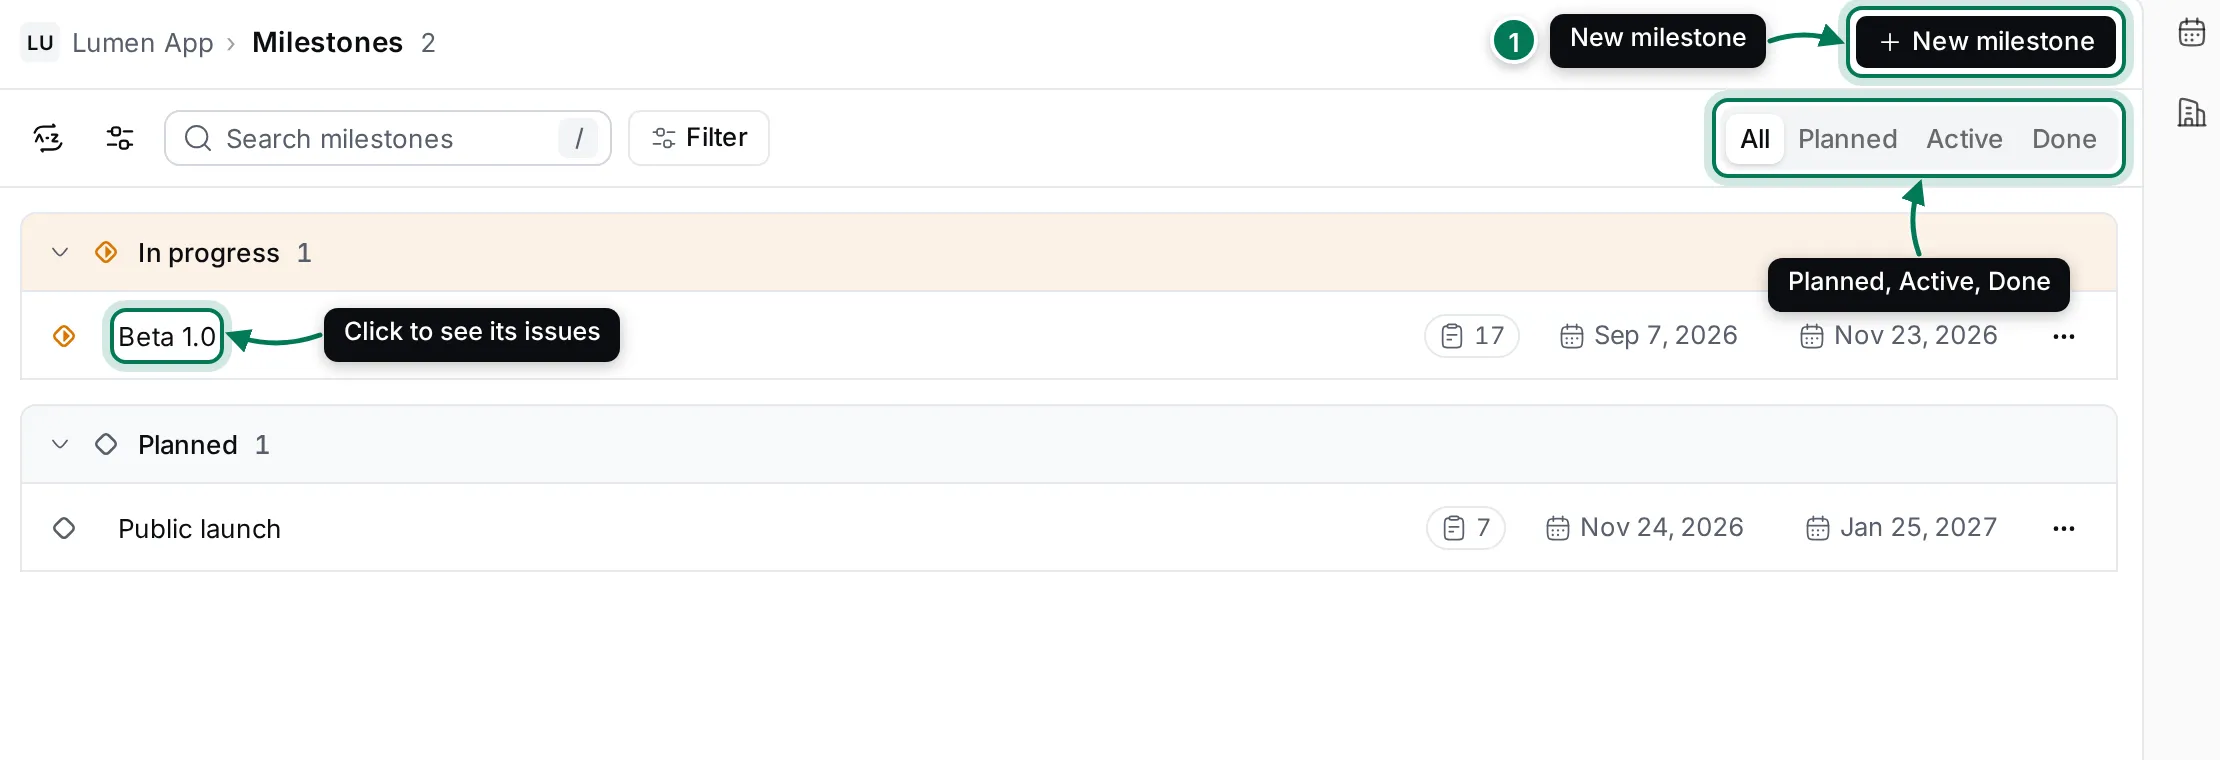
Milestones are grouped by status. The Planned, Active and Done tabs show one kind at a time. Each row shows the number of issues and the start and target dates.
Click … on a row to show the milestone’s issues, or choose Edit… to change its dates or status. When you delete a milestone that has issues, you can move them to another milestone.