Teamspaces
A teamspace is a shared home for a group of documents, such as “Product” or “Engineering”. Everyone who is a member of a teamspace sees its documents in their navigator and can edit them. A private teamspace is visible only to its members.
Create a teamspace
Section titled “Create a teamspace”In Documents, click the arrow next to Create document and choose Create teamspace. You can also hover the TEAMSPACES heading and click +, or click Create teamspace in the Teamspaces list. Then, in the New teamspace dialog:
- Type a Teamspace title, and add a Description if it helps people know what belongs there.
- Click the icon next to Choose icon to pick an emoji. It shows next to the teamspace’s name.
- Turn on Make private if only the members should see the teamspace and its documents.
- Click the Members field and pick the people who should be in it. Owners can change the teamspace’s settings.
- Click Create, or press Ctrl + Enter.
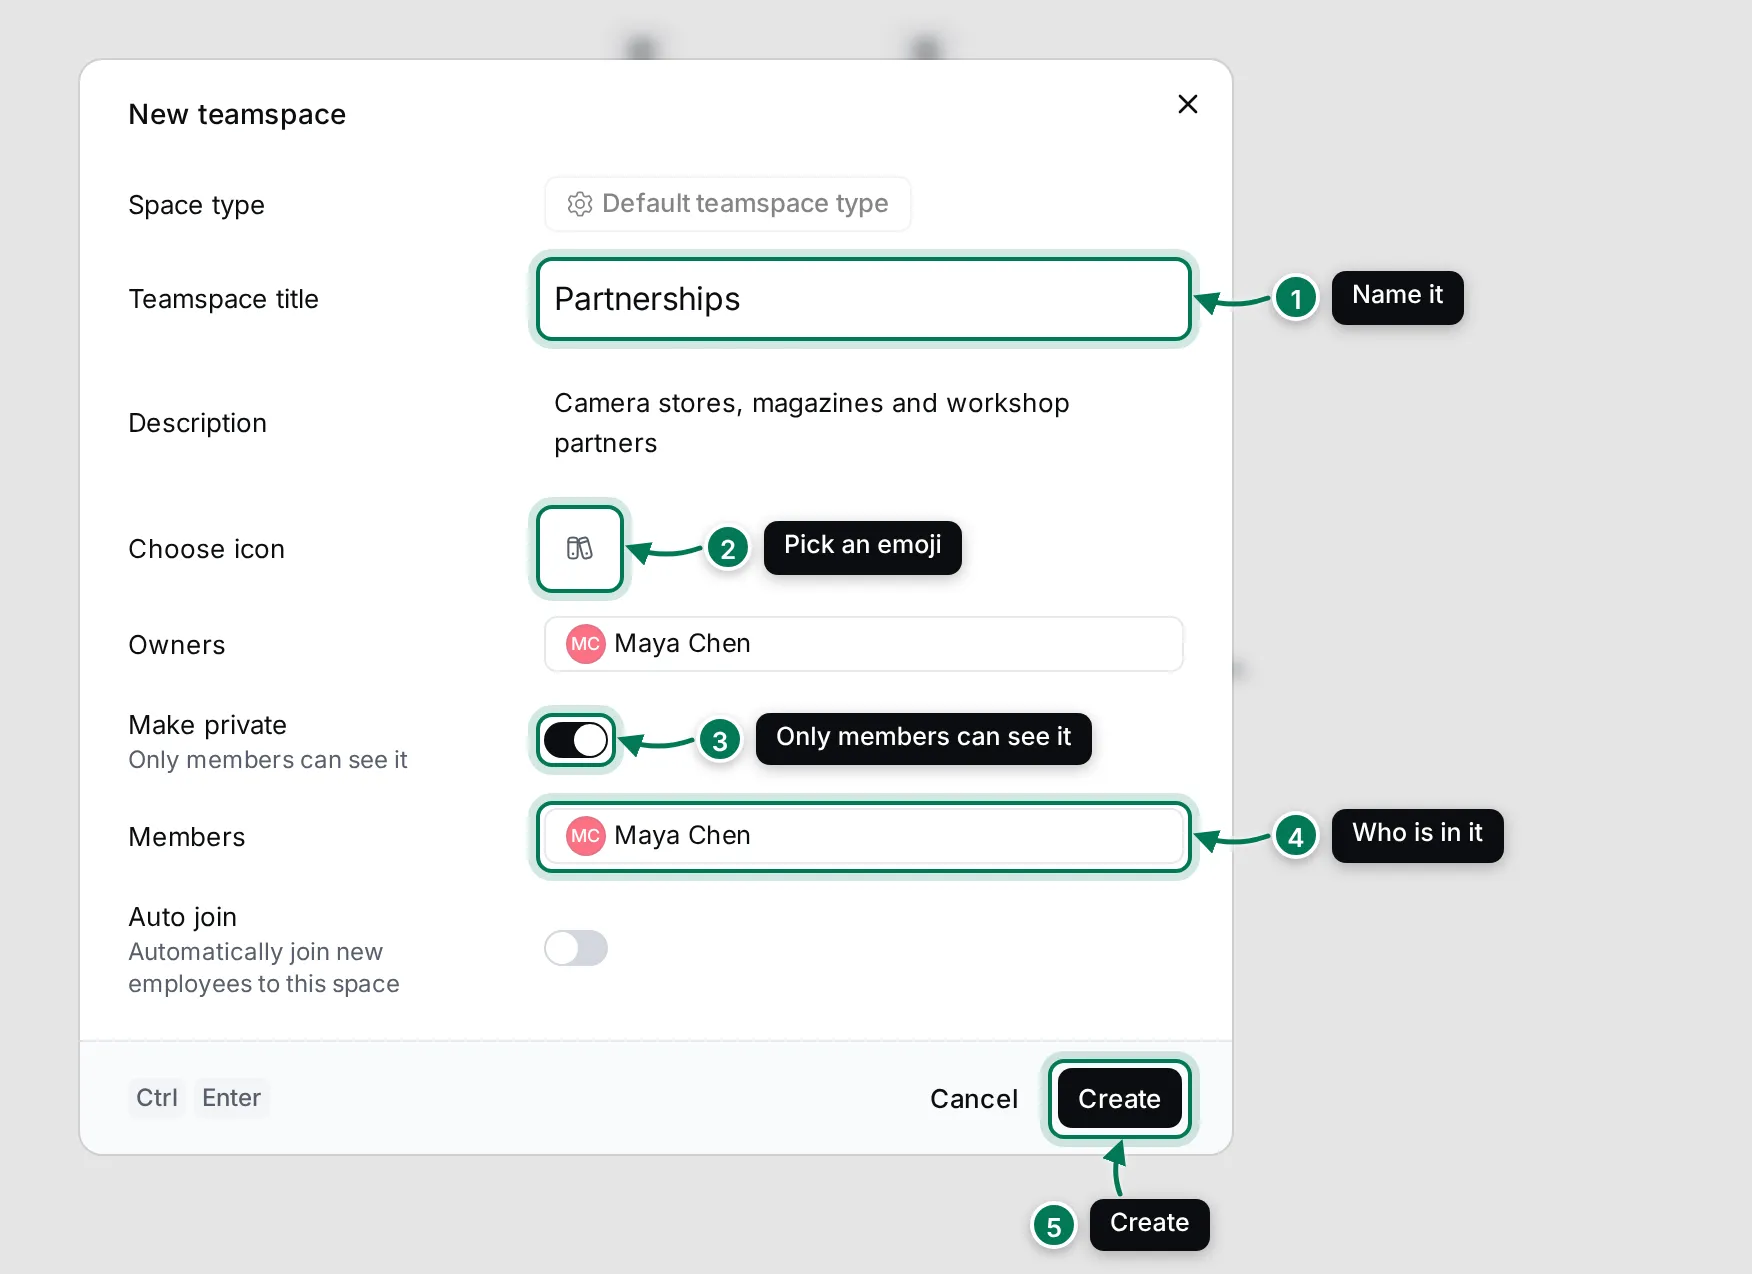
Turn on Auto join to add every new employee to the teamspace when they join the workspace. This suits teamspaces the whole company uses, such as a handbook.
See all teamspaces
Section titled “See all teamspaces”Click Teamspaces at the top of the navigator to see every teamspace in the workspace, including public ones you have not joined.
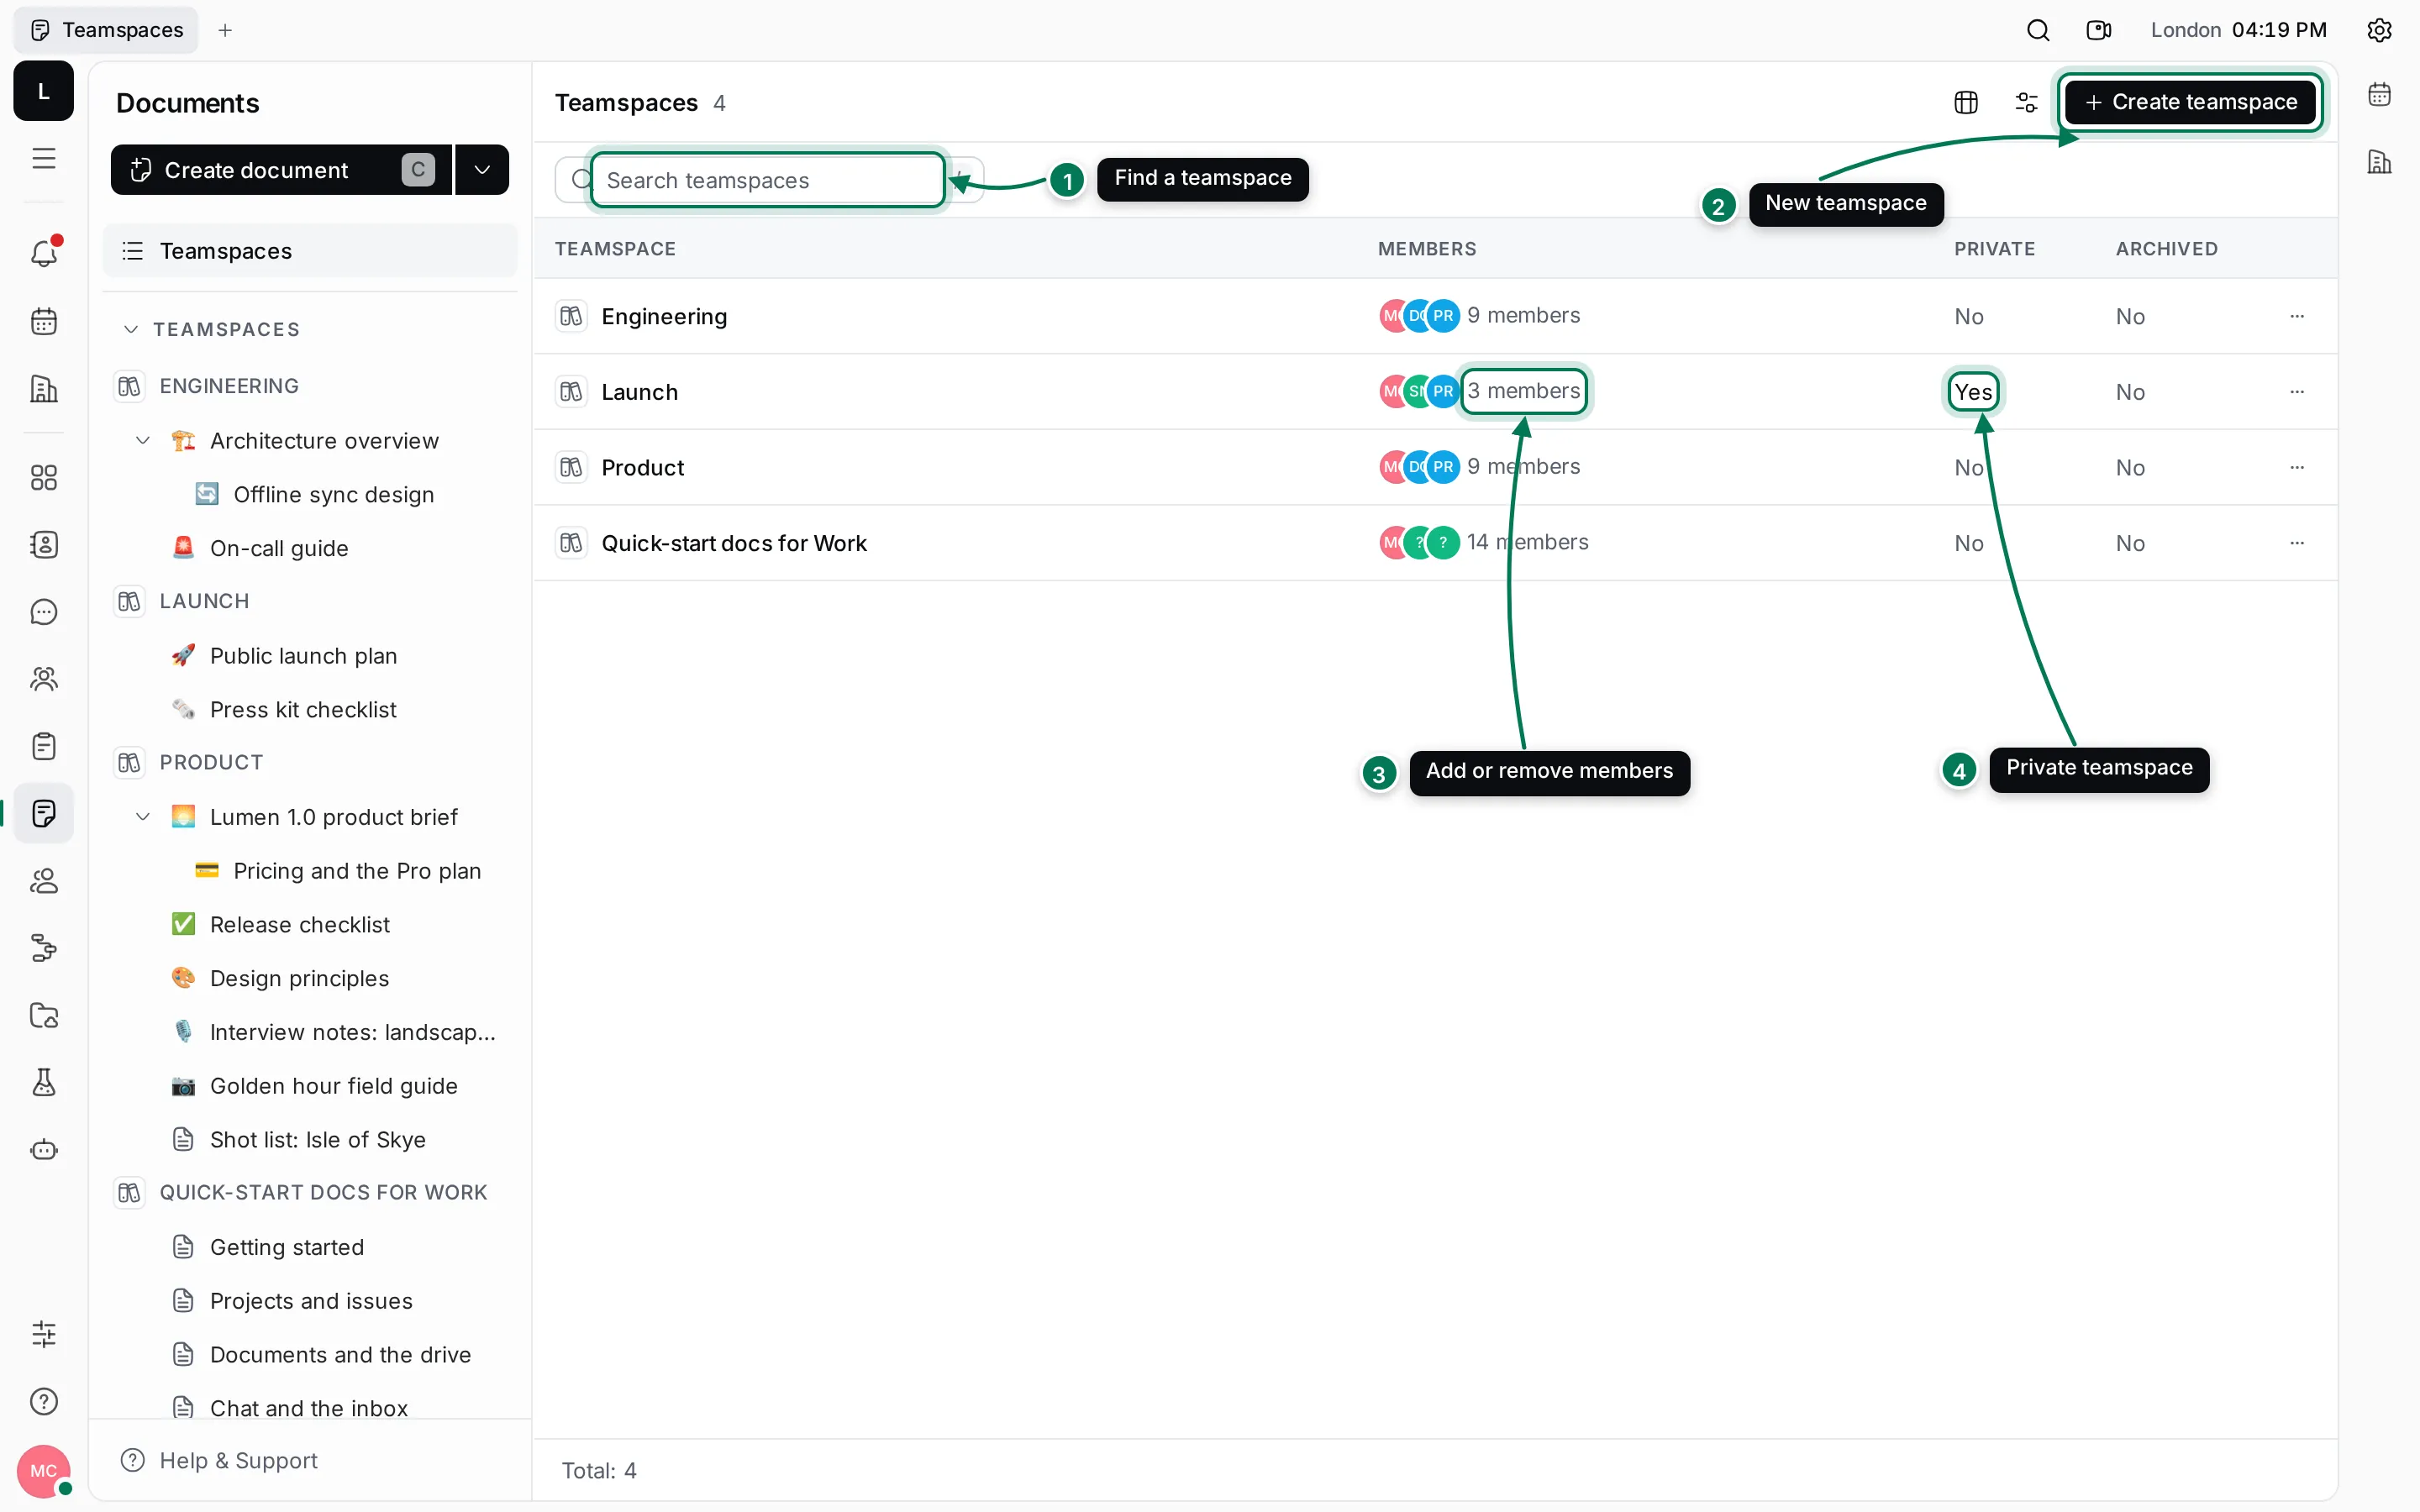
- Type in Search teamspaces to find one by name. Press / to jump to the search field.
- Create teamspace opens the same dialog as above.
- Click the members in a row to add or remove people straight from the list.
- Private says whether only members can see the teamspace.
Right-click a row, or click ⋯ at its end, for Create document, Edit teamspace, Add relation, Archive, Leave or Join, and Copy link. The settings buttons at the top choose which columns show (for example Owners, Created date or Auto join) and whether archived teamspaces are hidden.
Change, star, archive or leave a teamspace
Section titled “Change, star, archive or leave a teamspace”Right-click a teamspace in the navigator, or hover it and click ⋯.
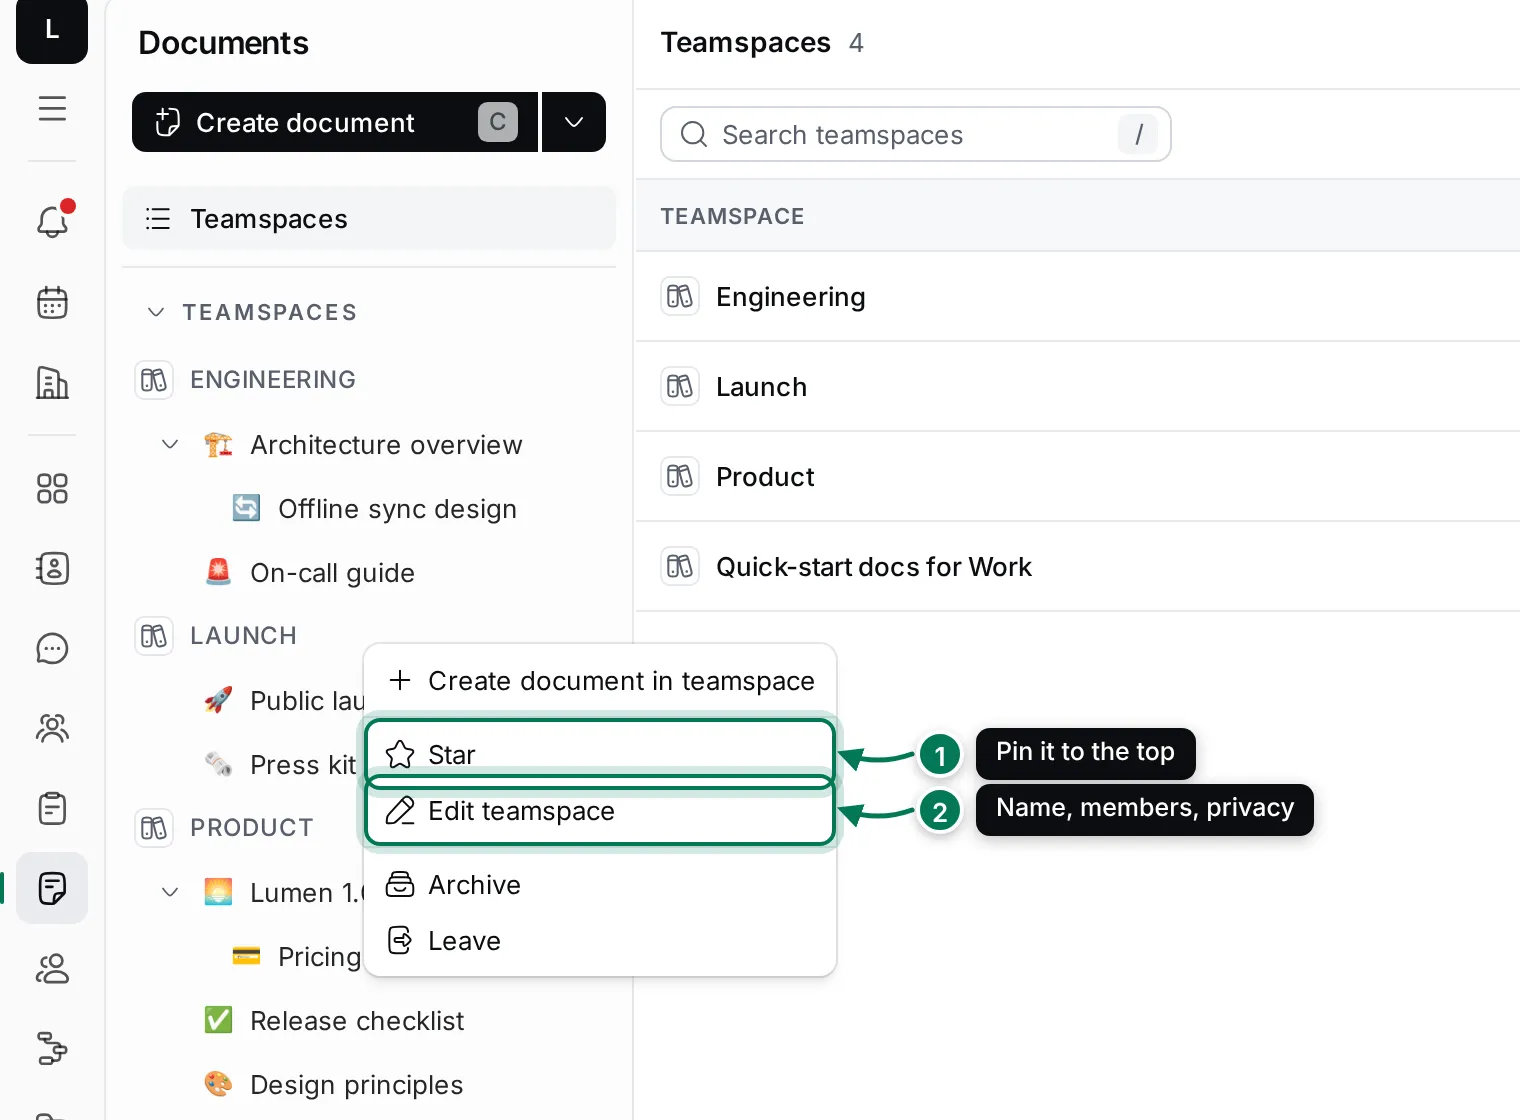
- Create document in teamspace adds a document at the teamspace’s top level.
- Star pins the teamspace to a Starred section at the top of the navigator. Unstar puts it back.
- Edit teamspace opens the same form you used to create it. Change the title, icon, members or privacy and click Save.
- Archive hides the teamspace from everyone’s navigator after you confirm. Its documents are kept.
- Leave takes you out of the teamspace straight away, without asking.
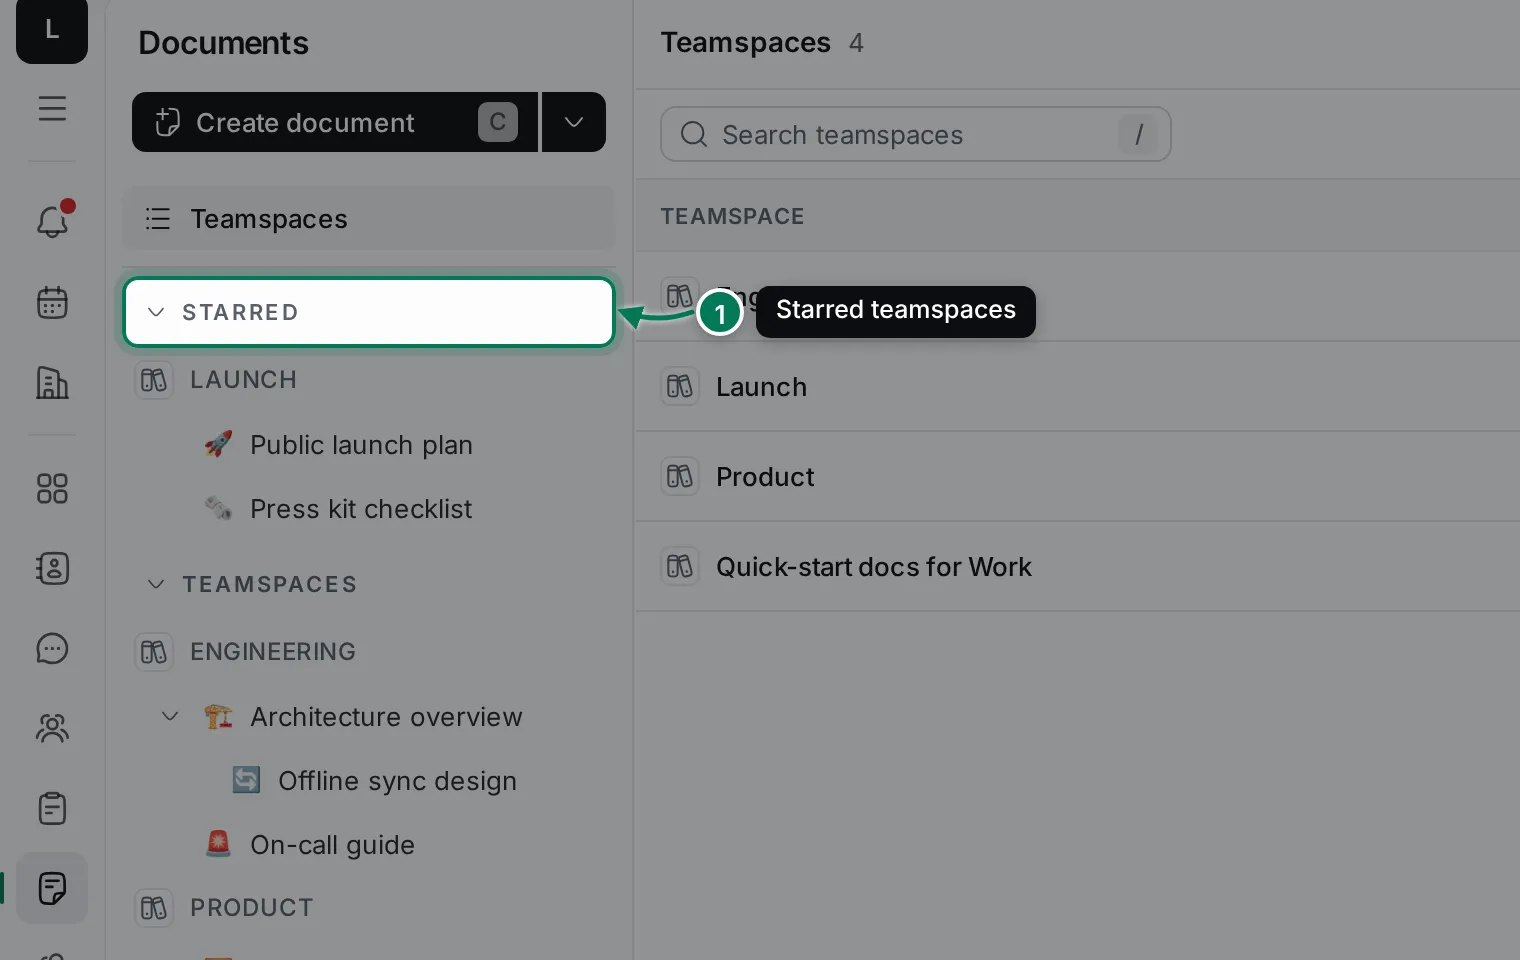
Stars are personal: starring a teamspace changes only your own navigator.
Next: create and organize documents inside your teamspace.