Upload and organize files
Files go into the drive or folder you have open. You can pick files, pick a whole folder, or drag them in from your computer, and keep working while they upload.
Upload files
Section titled “Upload files”- Open the drive or folder the files belong in.
- Click Upload files.
- Pick one or more files and confirm.
You can also drag files from your computer onto the folder. A dashed outline shows where they will go; drop them to upload.
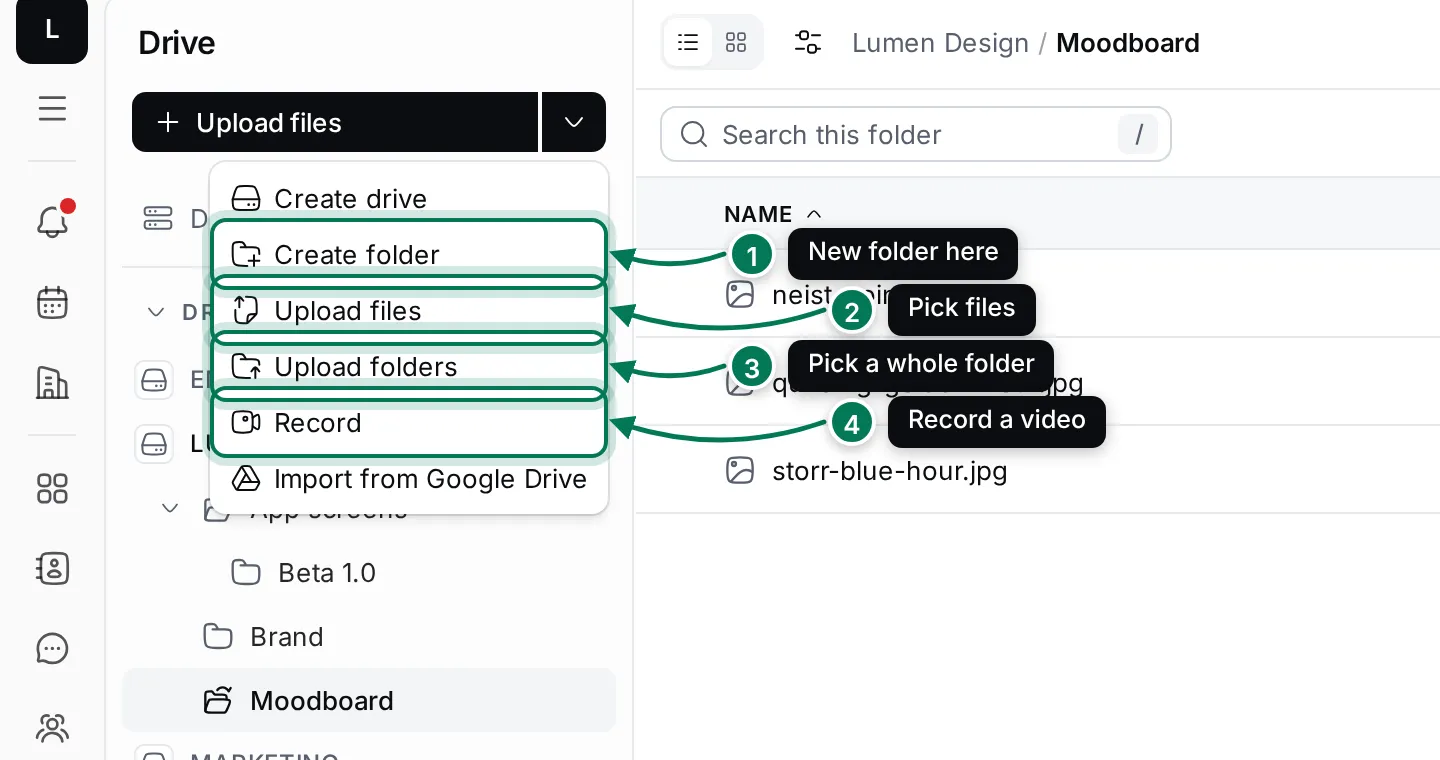
The arrow next to Upload files has more ways to add things:
- Create folder makes a new folder in the open drive or folder.
- Upload files picks files, like the button itself.
- Upload folders picks a folder from your computer and uploads it with all its subfolders. You can also drag a folder onto the drive.
- Record records a video with your camera or screen and saves it here.
Follow the progress
Section titled “Follow the progress”While files upload, a panel in the bottom corner shows each file with how much has been sent. Uploads go on while you open other pages; a chip in the top bar shows the overall percentage.
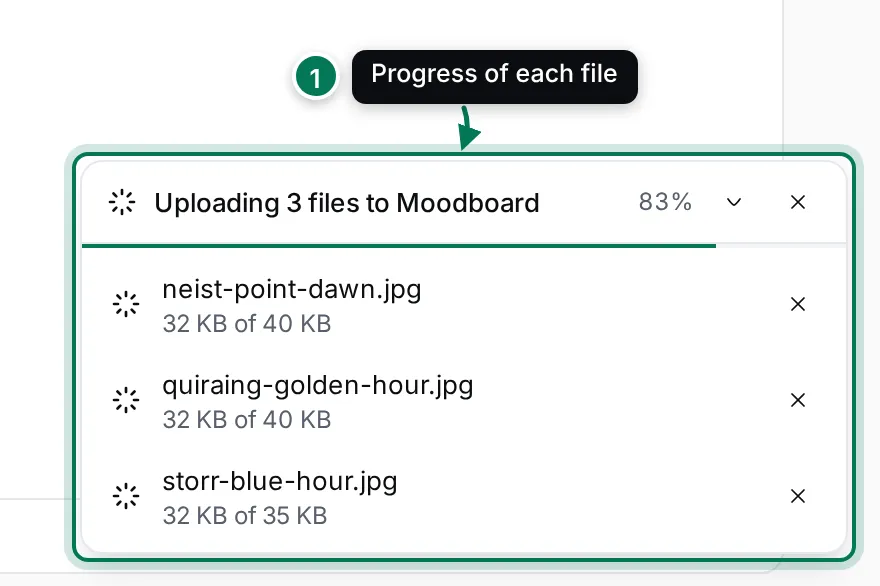
If a file fails, its row shows the error with Retry. You can cancel a file that is still waiting or uploading, and the panel closes by itself when everything has finished.
Record a video
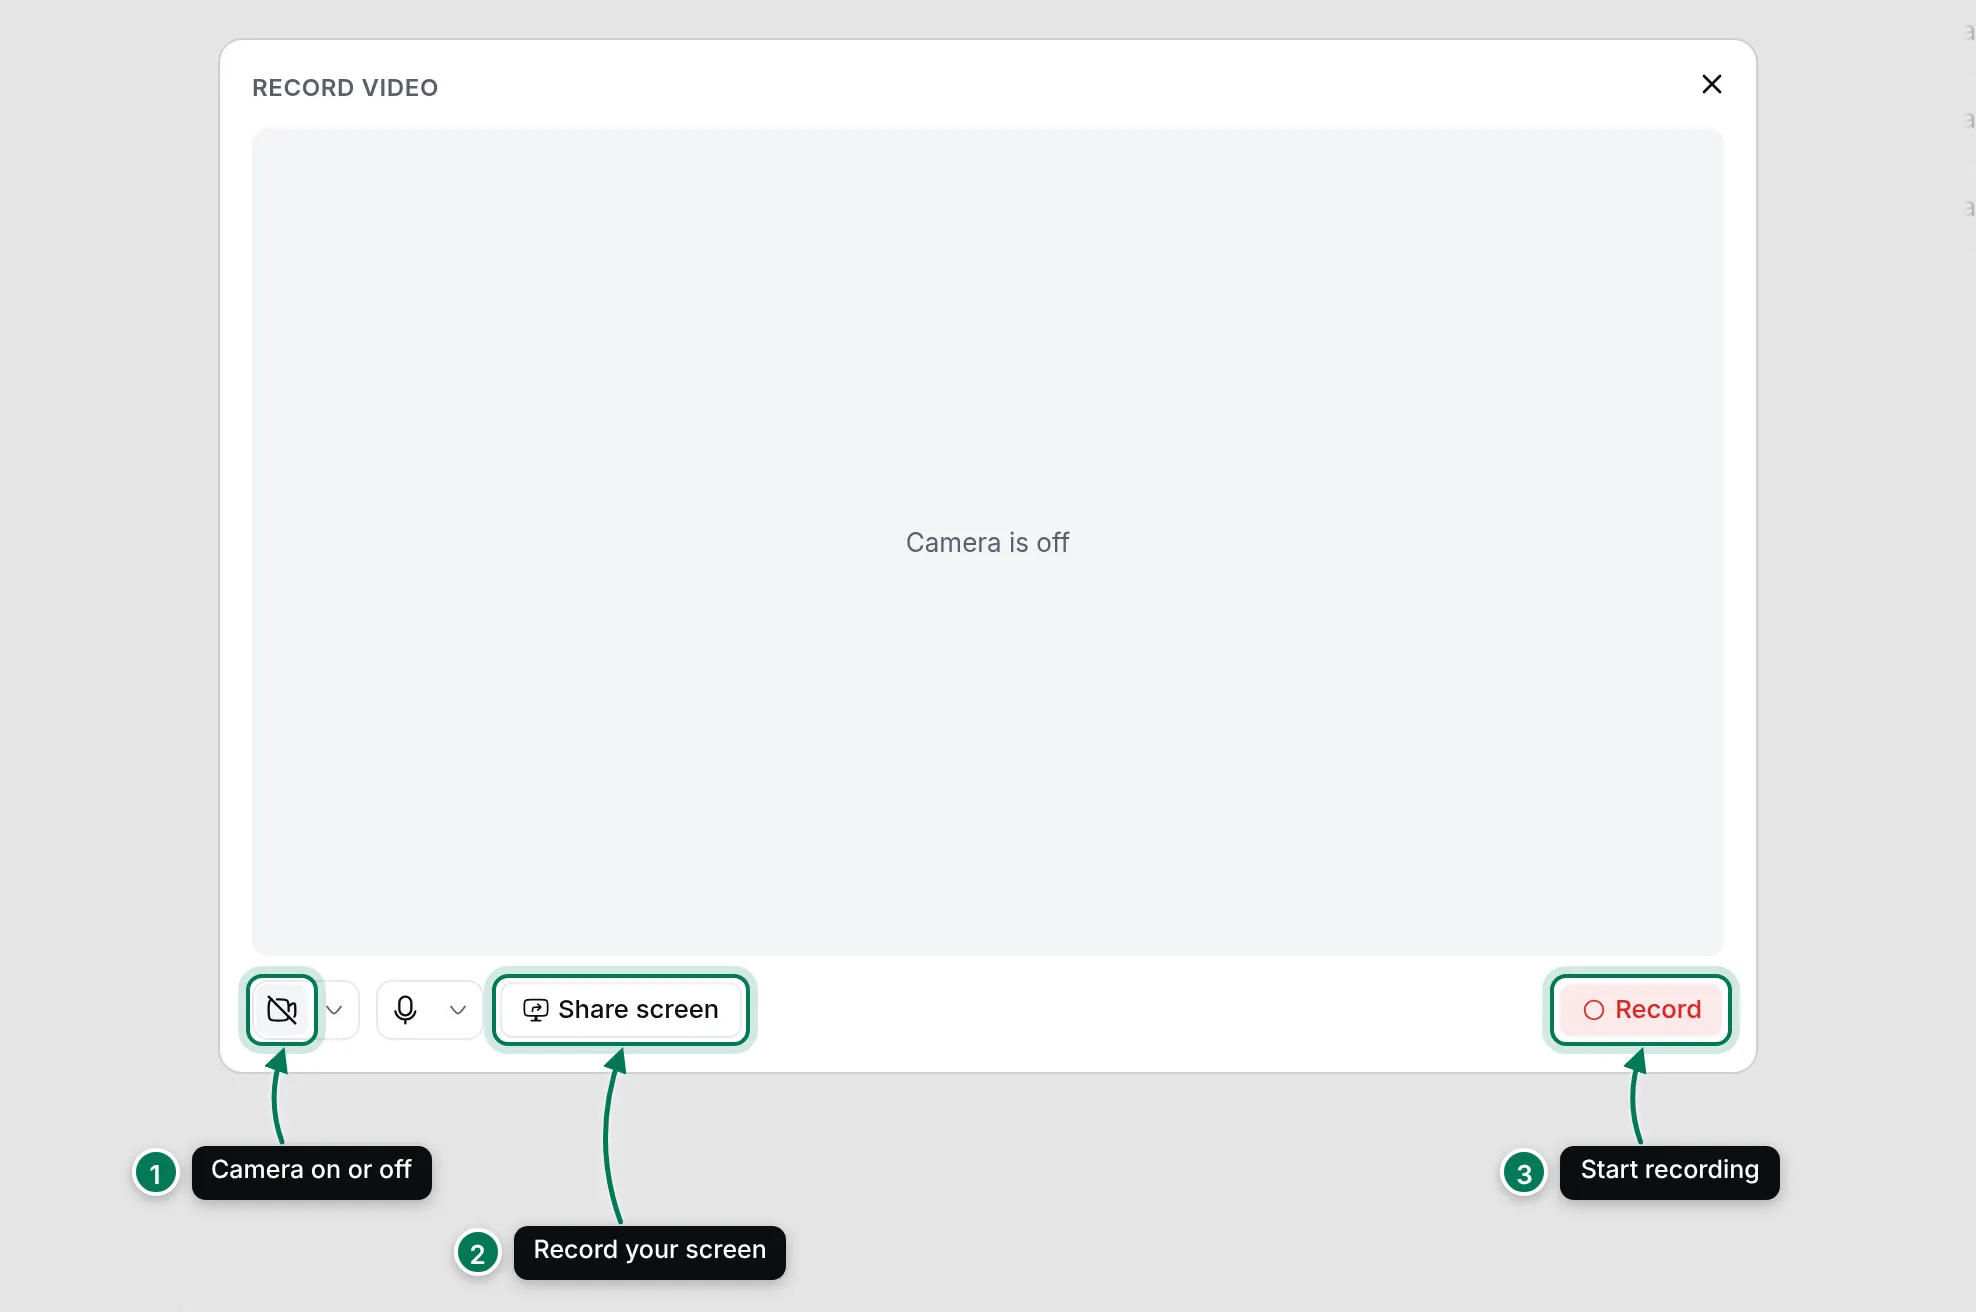
Section titled “Record a video”Open the folder the video should go in, click the arrow next to Upload files and choose Record. Allow the browser to use your camera and microphone if it asks. Then, in the Record video dialog:
- Turn the camera on or off. The microphone button next to it does the same for sound, and the small arrows pick another camera or microphone.
- To record a window or your whole screen instead, click Share screen.
- Click Record, and Stop when you are done. The video uploads into the folder.
Create a folder
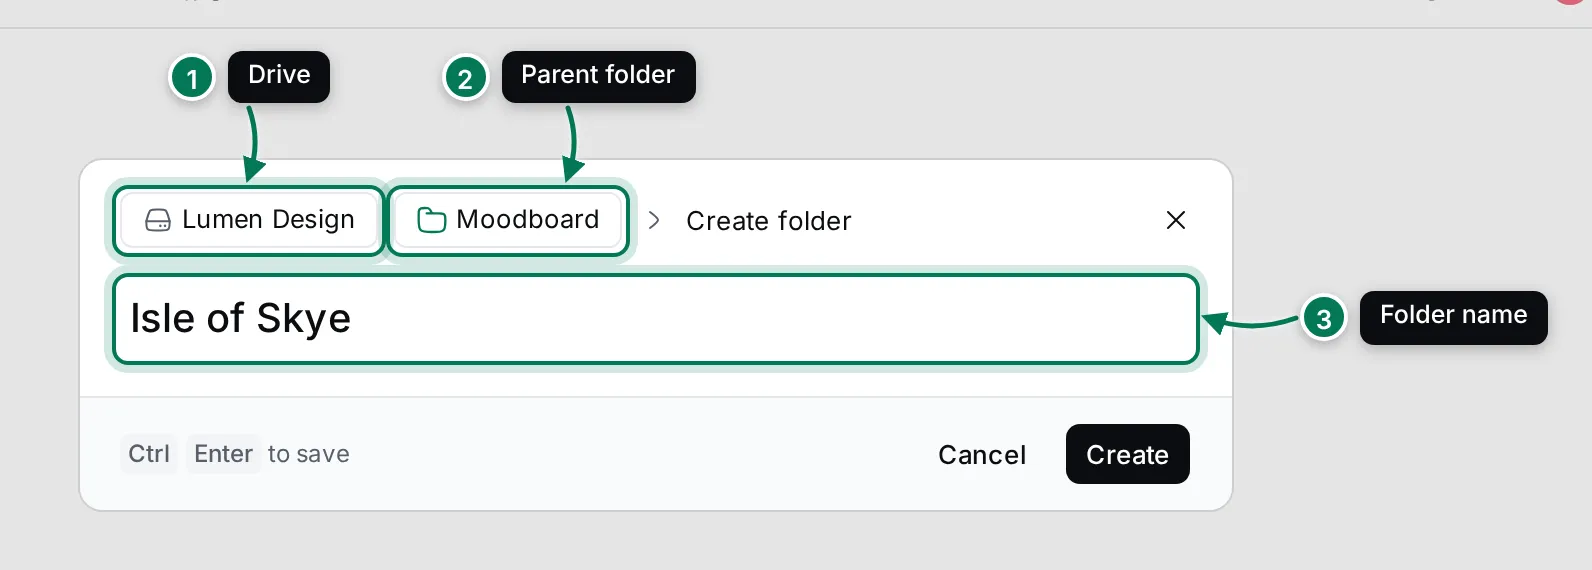
Section titled “Create a folder”Open the drive or folder where the new folder should go, click the arrow next to Upload files and choose Create folder. Then:
- Check the drive chip. Click it to put the folder in another drive.
- Check the parent folder chip. Click it to put the folder somewhere else in the drive.
- Type the folder’s name and press Enter, or click Create.
Rename, move or delete
Section titled “Rename, move or delete”Right-click a file or folder, or hover it and click ⋯ at the end of its row.
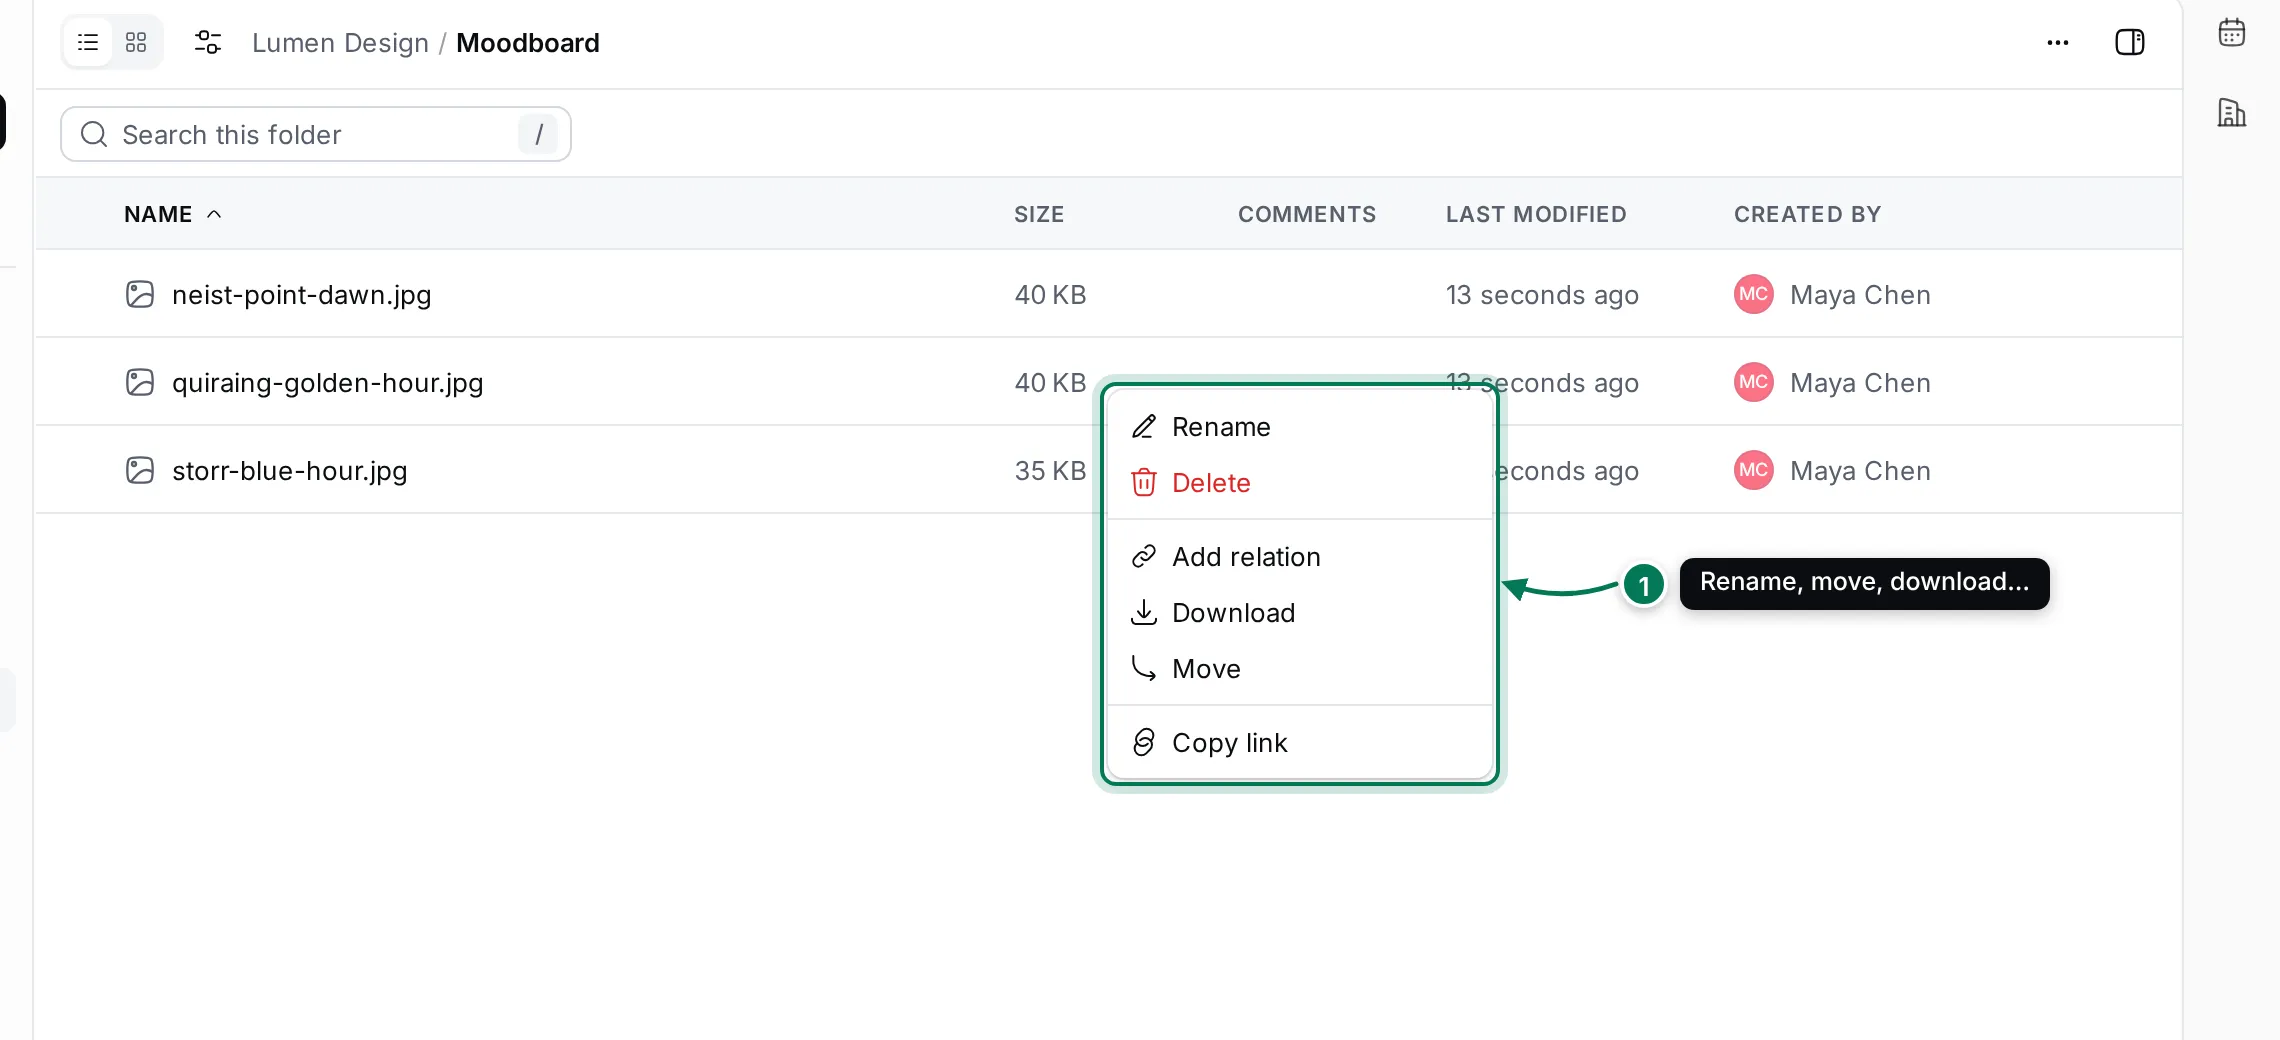
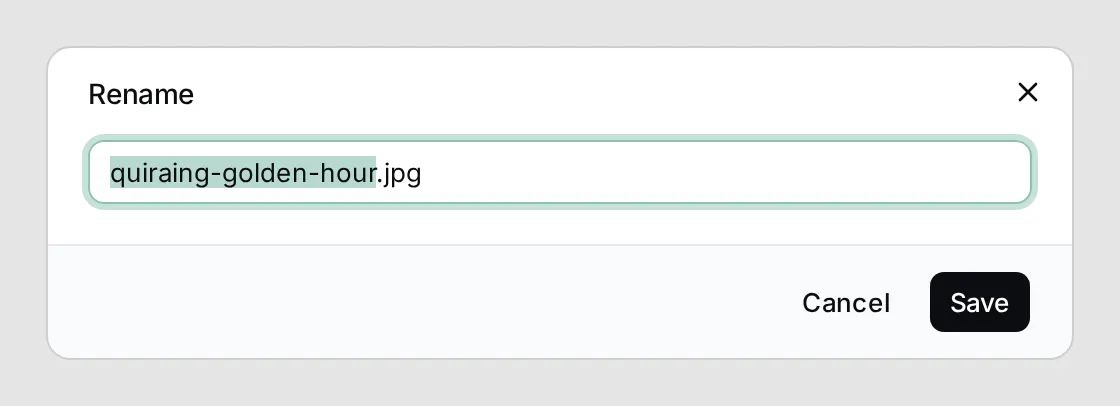
- Rename opens the name with the part before the extension selected, so you can type the new name straight away. Click Save.
- Move asks for a drive and a folder. Click Save to move it there. Everything inside a folder moves with it.
- Download saves a copy of the file. Copy link copies a link to it.
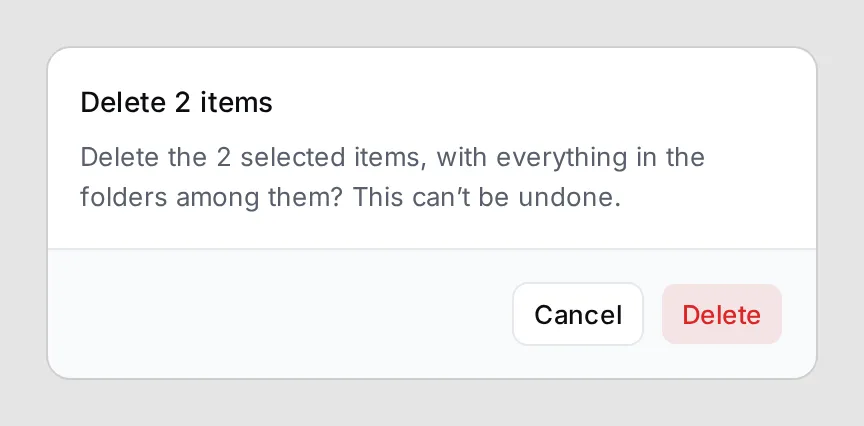
- Delete asks you to confirm. Deleting a folder deletes everything in it.
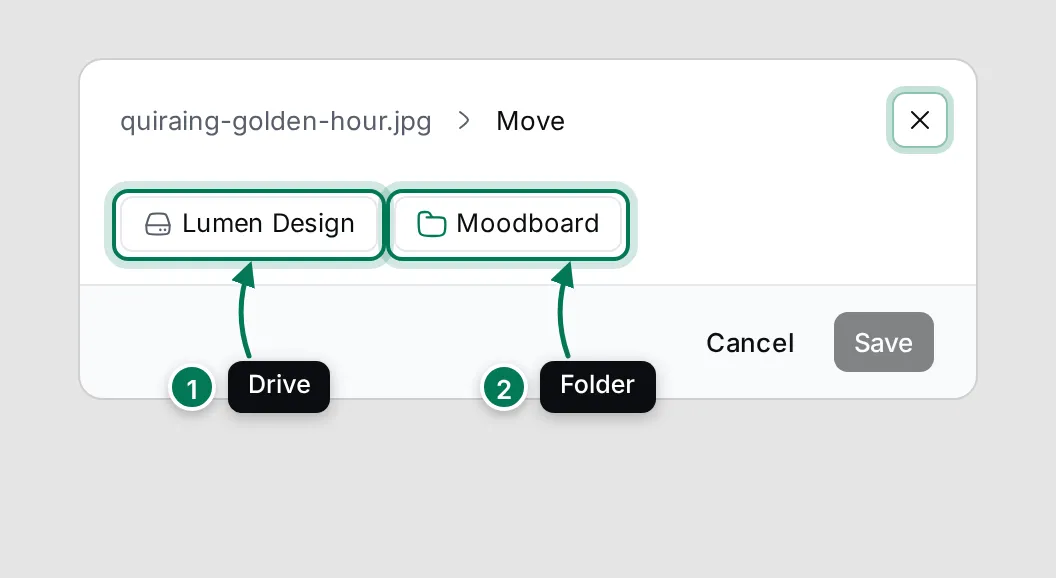
- Click the drive chip to choose a drive.
- Click the folder chip to choose a folder in it, shown with its path.
Work with several items at once
Section titled “Work with several items at once”Hover a row and tick the box before its name, or press X on the focused row. Press Ctrl + A to select everything in the folder.
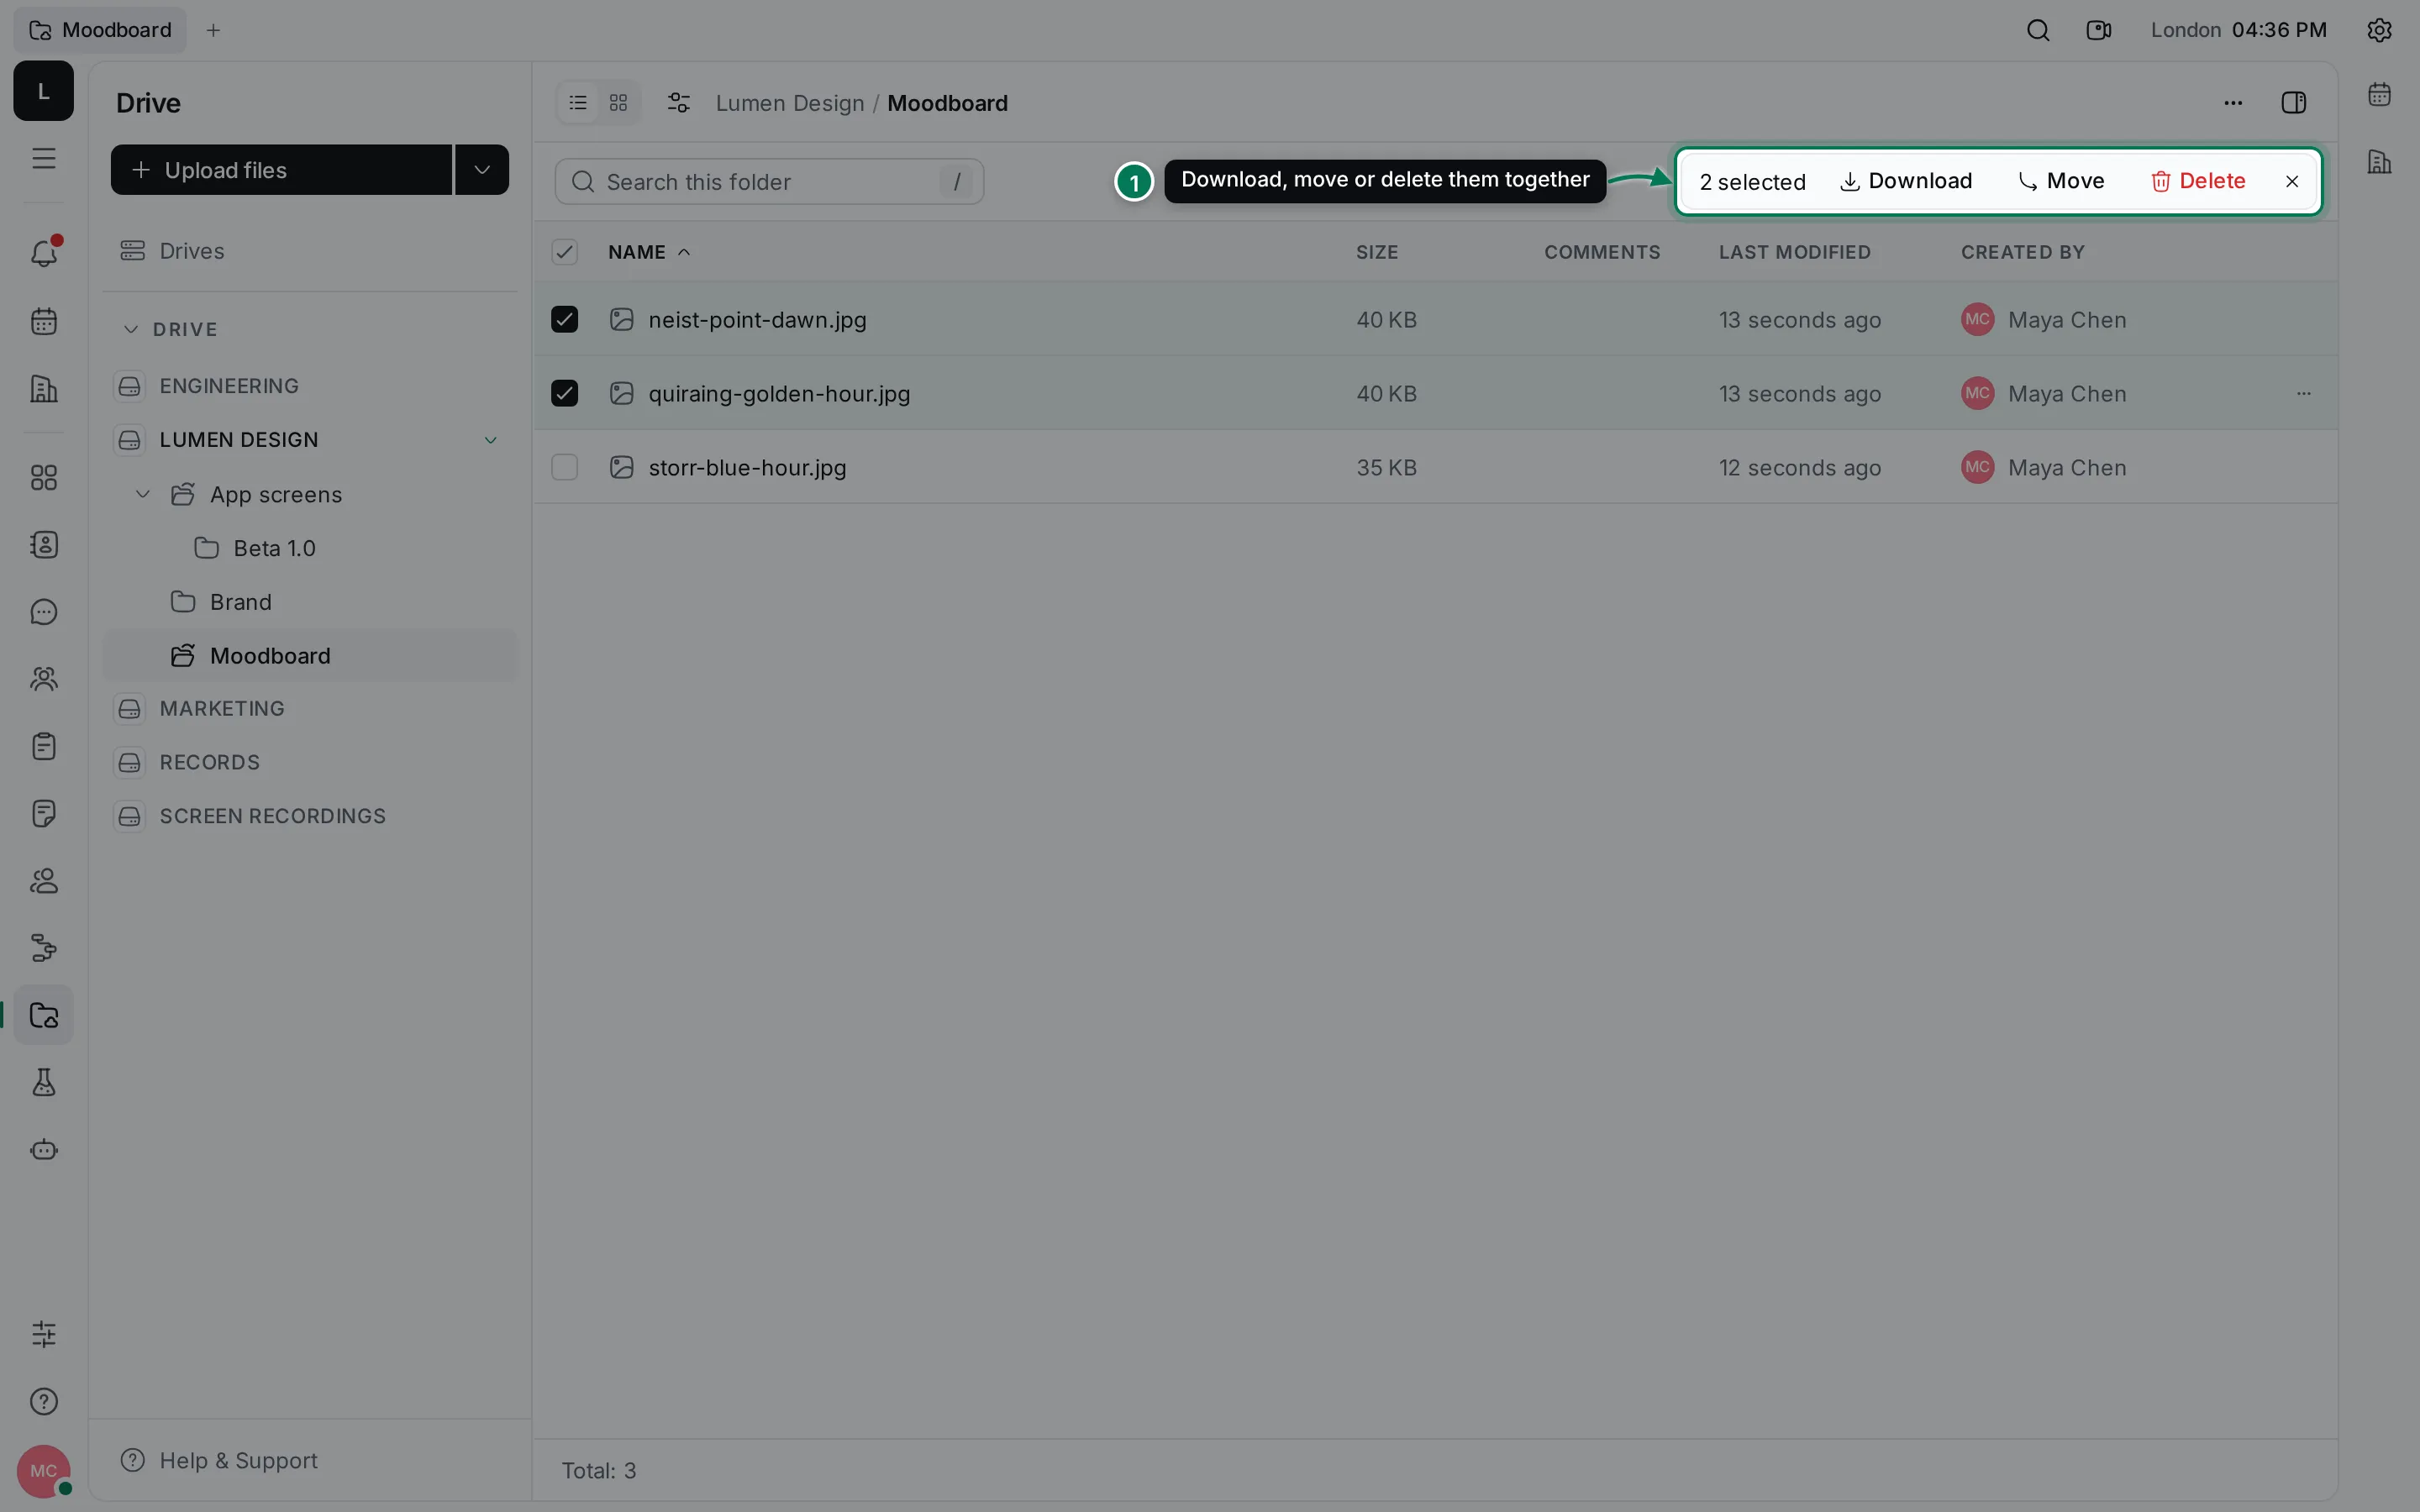
The bar at the top shows how many items are selected, with Download, Move and Delete for all of them. Press Ctrl + Backspace (⌘ + Backspace on a Mac) to delete the selected items, or Esc to clear the selection.
Next: browse and preview your files.