Calls
Every room in Office has its own call. Entering a room joins its call; going back to your office leaves it. There’s nothing to schedule and no link to send: people see you in the room and come in.
The call bar
Section titled “The call bar”While you’re in a call, a bar at the bottom of Office shows the room, the call’s state (Connecting…, Connected or Reconnecting…) with a timer, the faces of the others, and buttons for the microphone, camera, devices and Leave. On other pages the same controls float in a corner, so you can keep talking while you work in Tracker or Documents.
Click the room’s name in the bar to open the full call page.
The call page
Section titled “The call page”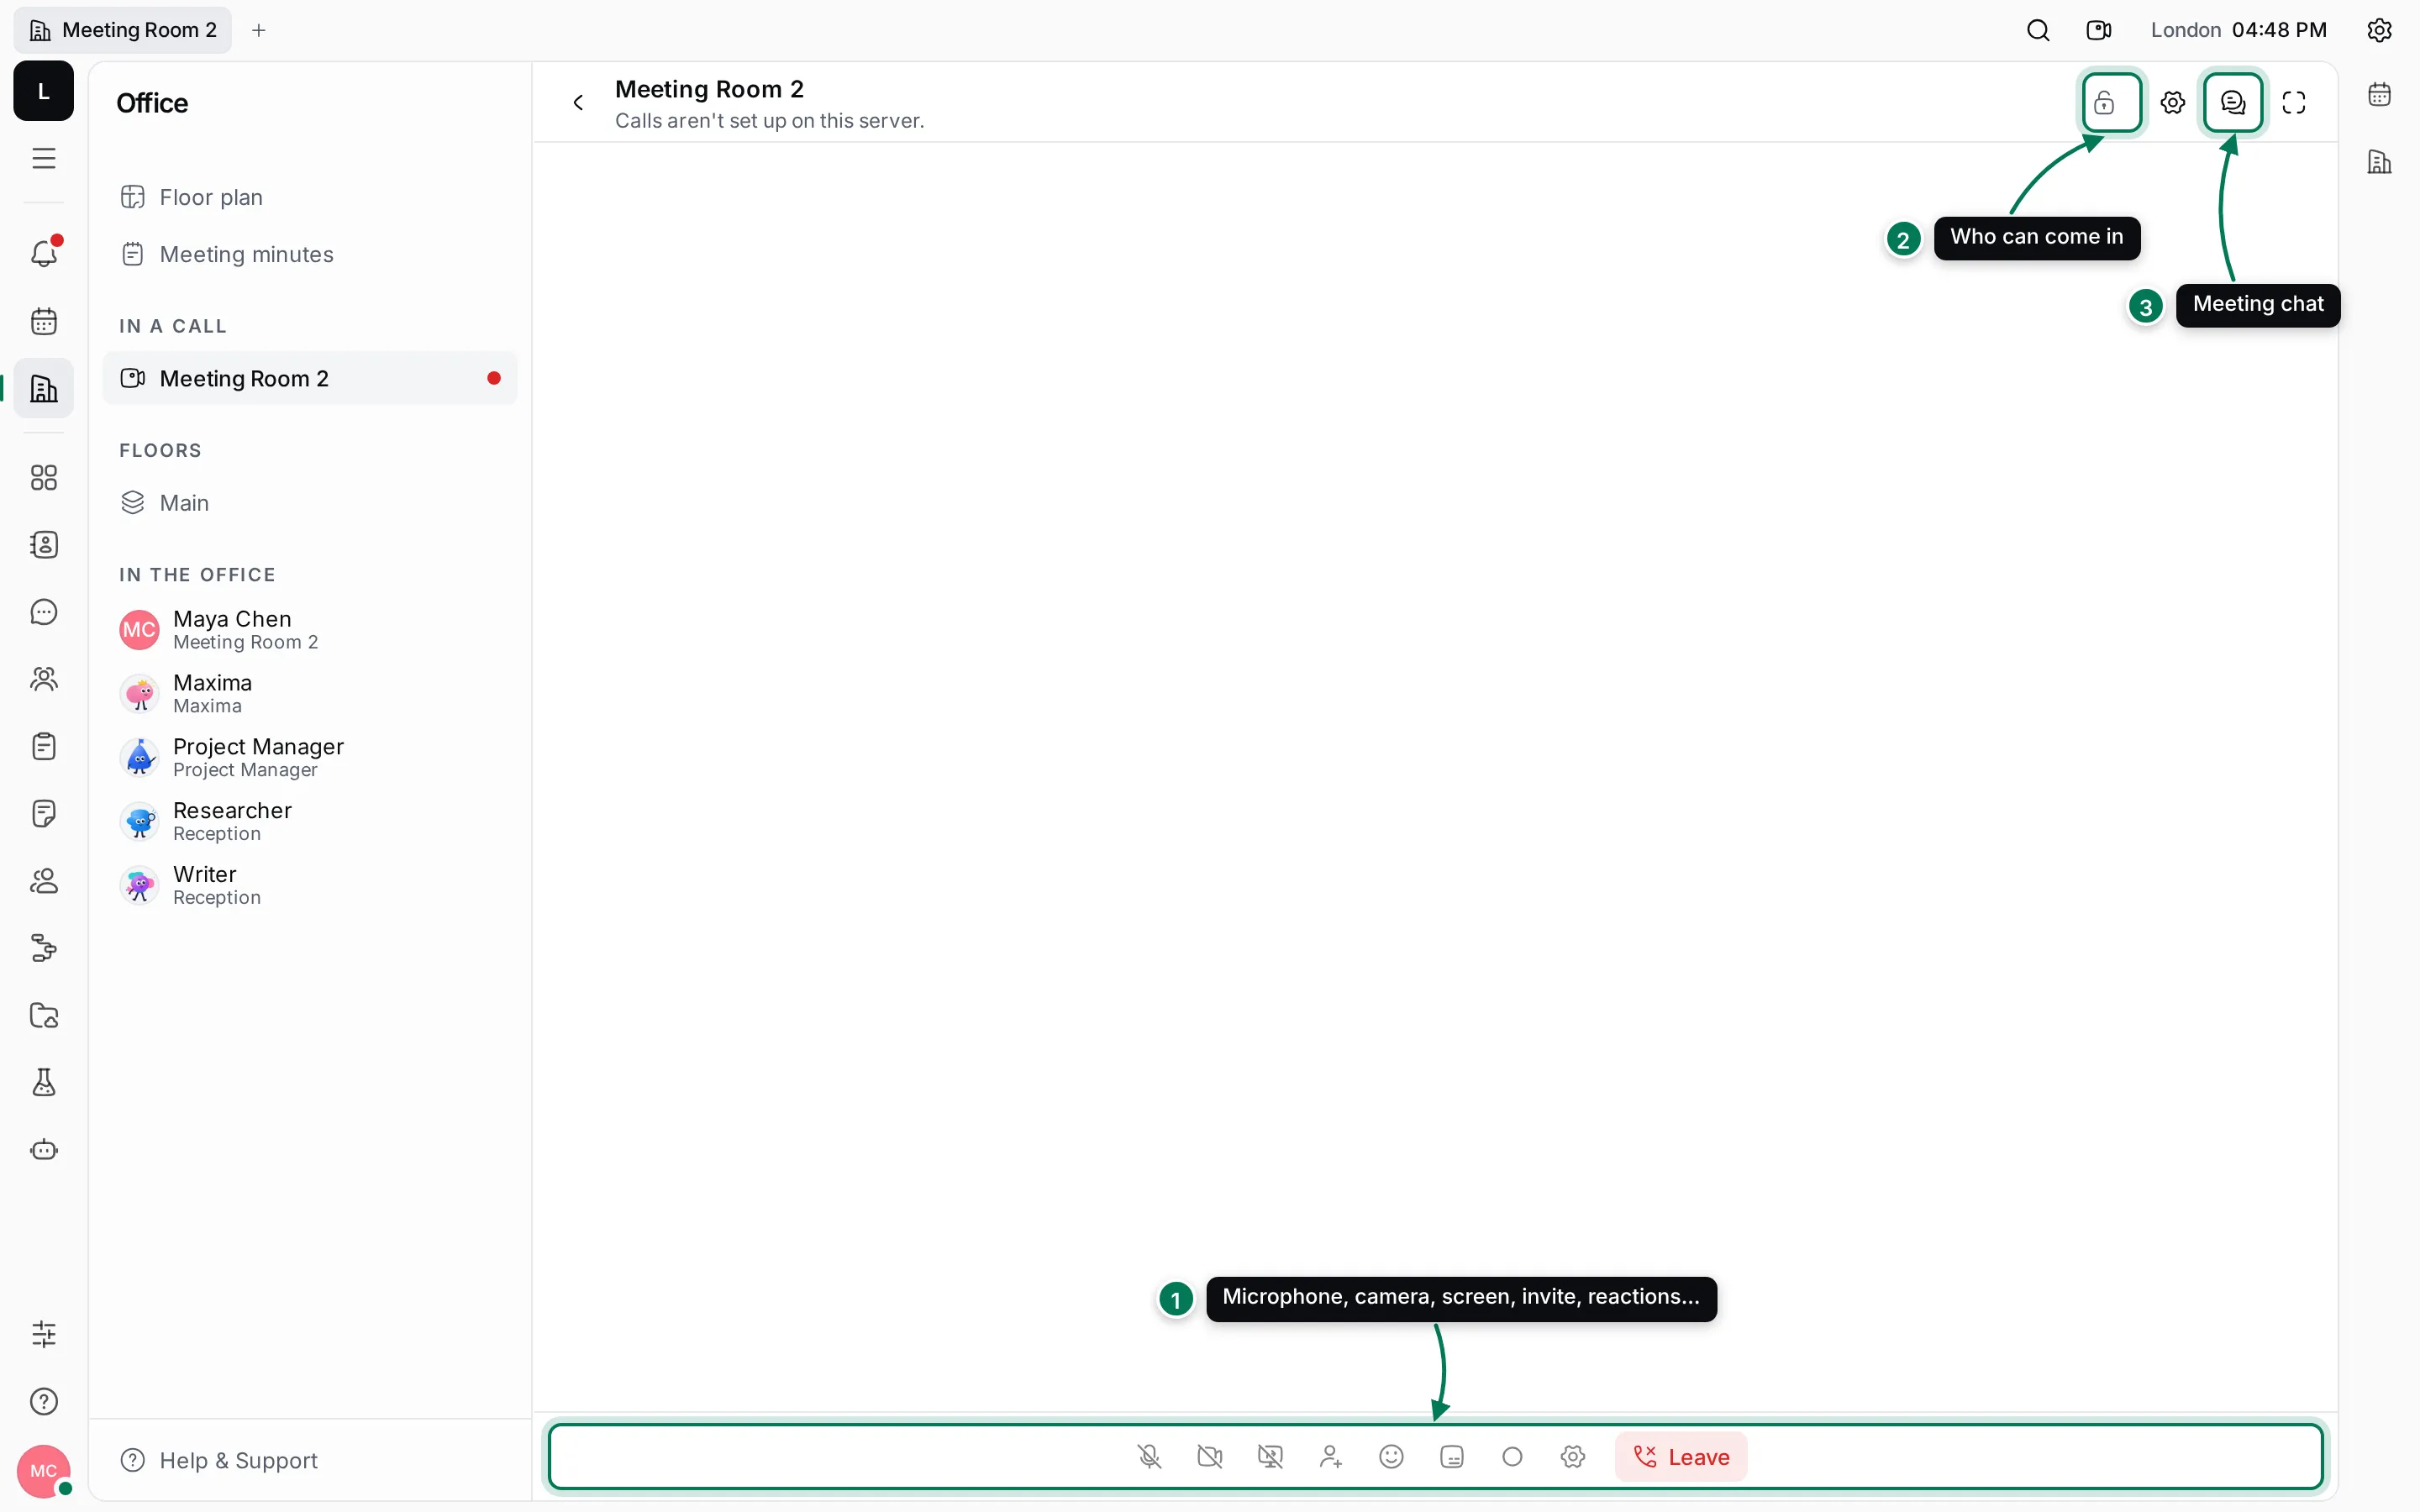
- Call controls at the bottom:
- Microphone on or off (Ctrl+D, ⌘+D on a Mac).
- Camera on or off (Ctrl+E, ⌘+E on a Mac).
- Share screen: the shared screen fills the page with the people beside it.
- Invite to this call: see Rooms, presence and knocking.
- Reactions: pick an emoji; it floats over your tile for everyone.
- Start transcription and Start recording.
- Devices: see below.
- Leave: back to the floor plan and your office.
- Change access: Open, Knock or Do not disturb for the room you’re in. Next to it, Room settings….
- Chat and transcription opens a side panel with the meeting’s chat and its live transcript.
Full screen (or F) shows the call on the whole screen. Each person has a tile with their camera or their avatar; a coloured ring shows who is speaking, and a crossed-out microphone shows who is muted.
Choose your devices
Section titled “Choose your devices”- In a call, click Devices (the gear in the call controls).
- Pick your Microphone, Camera and Speaker.
- Turn on Background blur to blur what’s behind you, and Include system audio to share your computer’s sound with your screen.
You can also pick devices outside a call from the camera button at the top right of the app. Noise cancellation settings in the Devices panel opens your Office settings.
Transcription and recording
Section titled “Transcription and recording”Start transcription brings an AI Worker into the call to take notes. While it runs, the call header says Transcribing, and the lines appear in the Chat and transcription panel and later in the meeting minutes. If AI Workers aren’t set up, the button is disabled and says so.
Start recording records the call; the header shows Recording. If the workspace can’t store recordings, the button is disabled with “Recording isn’t available on this server”.
Settings
Section titled “Settings”Your own defaults are in Settings › Office:
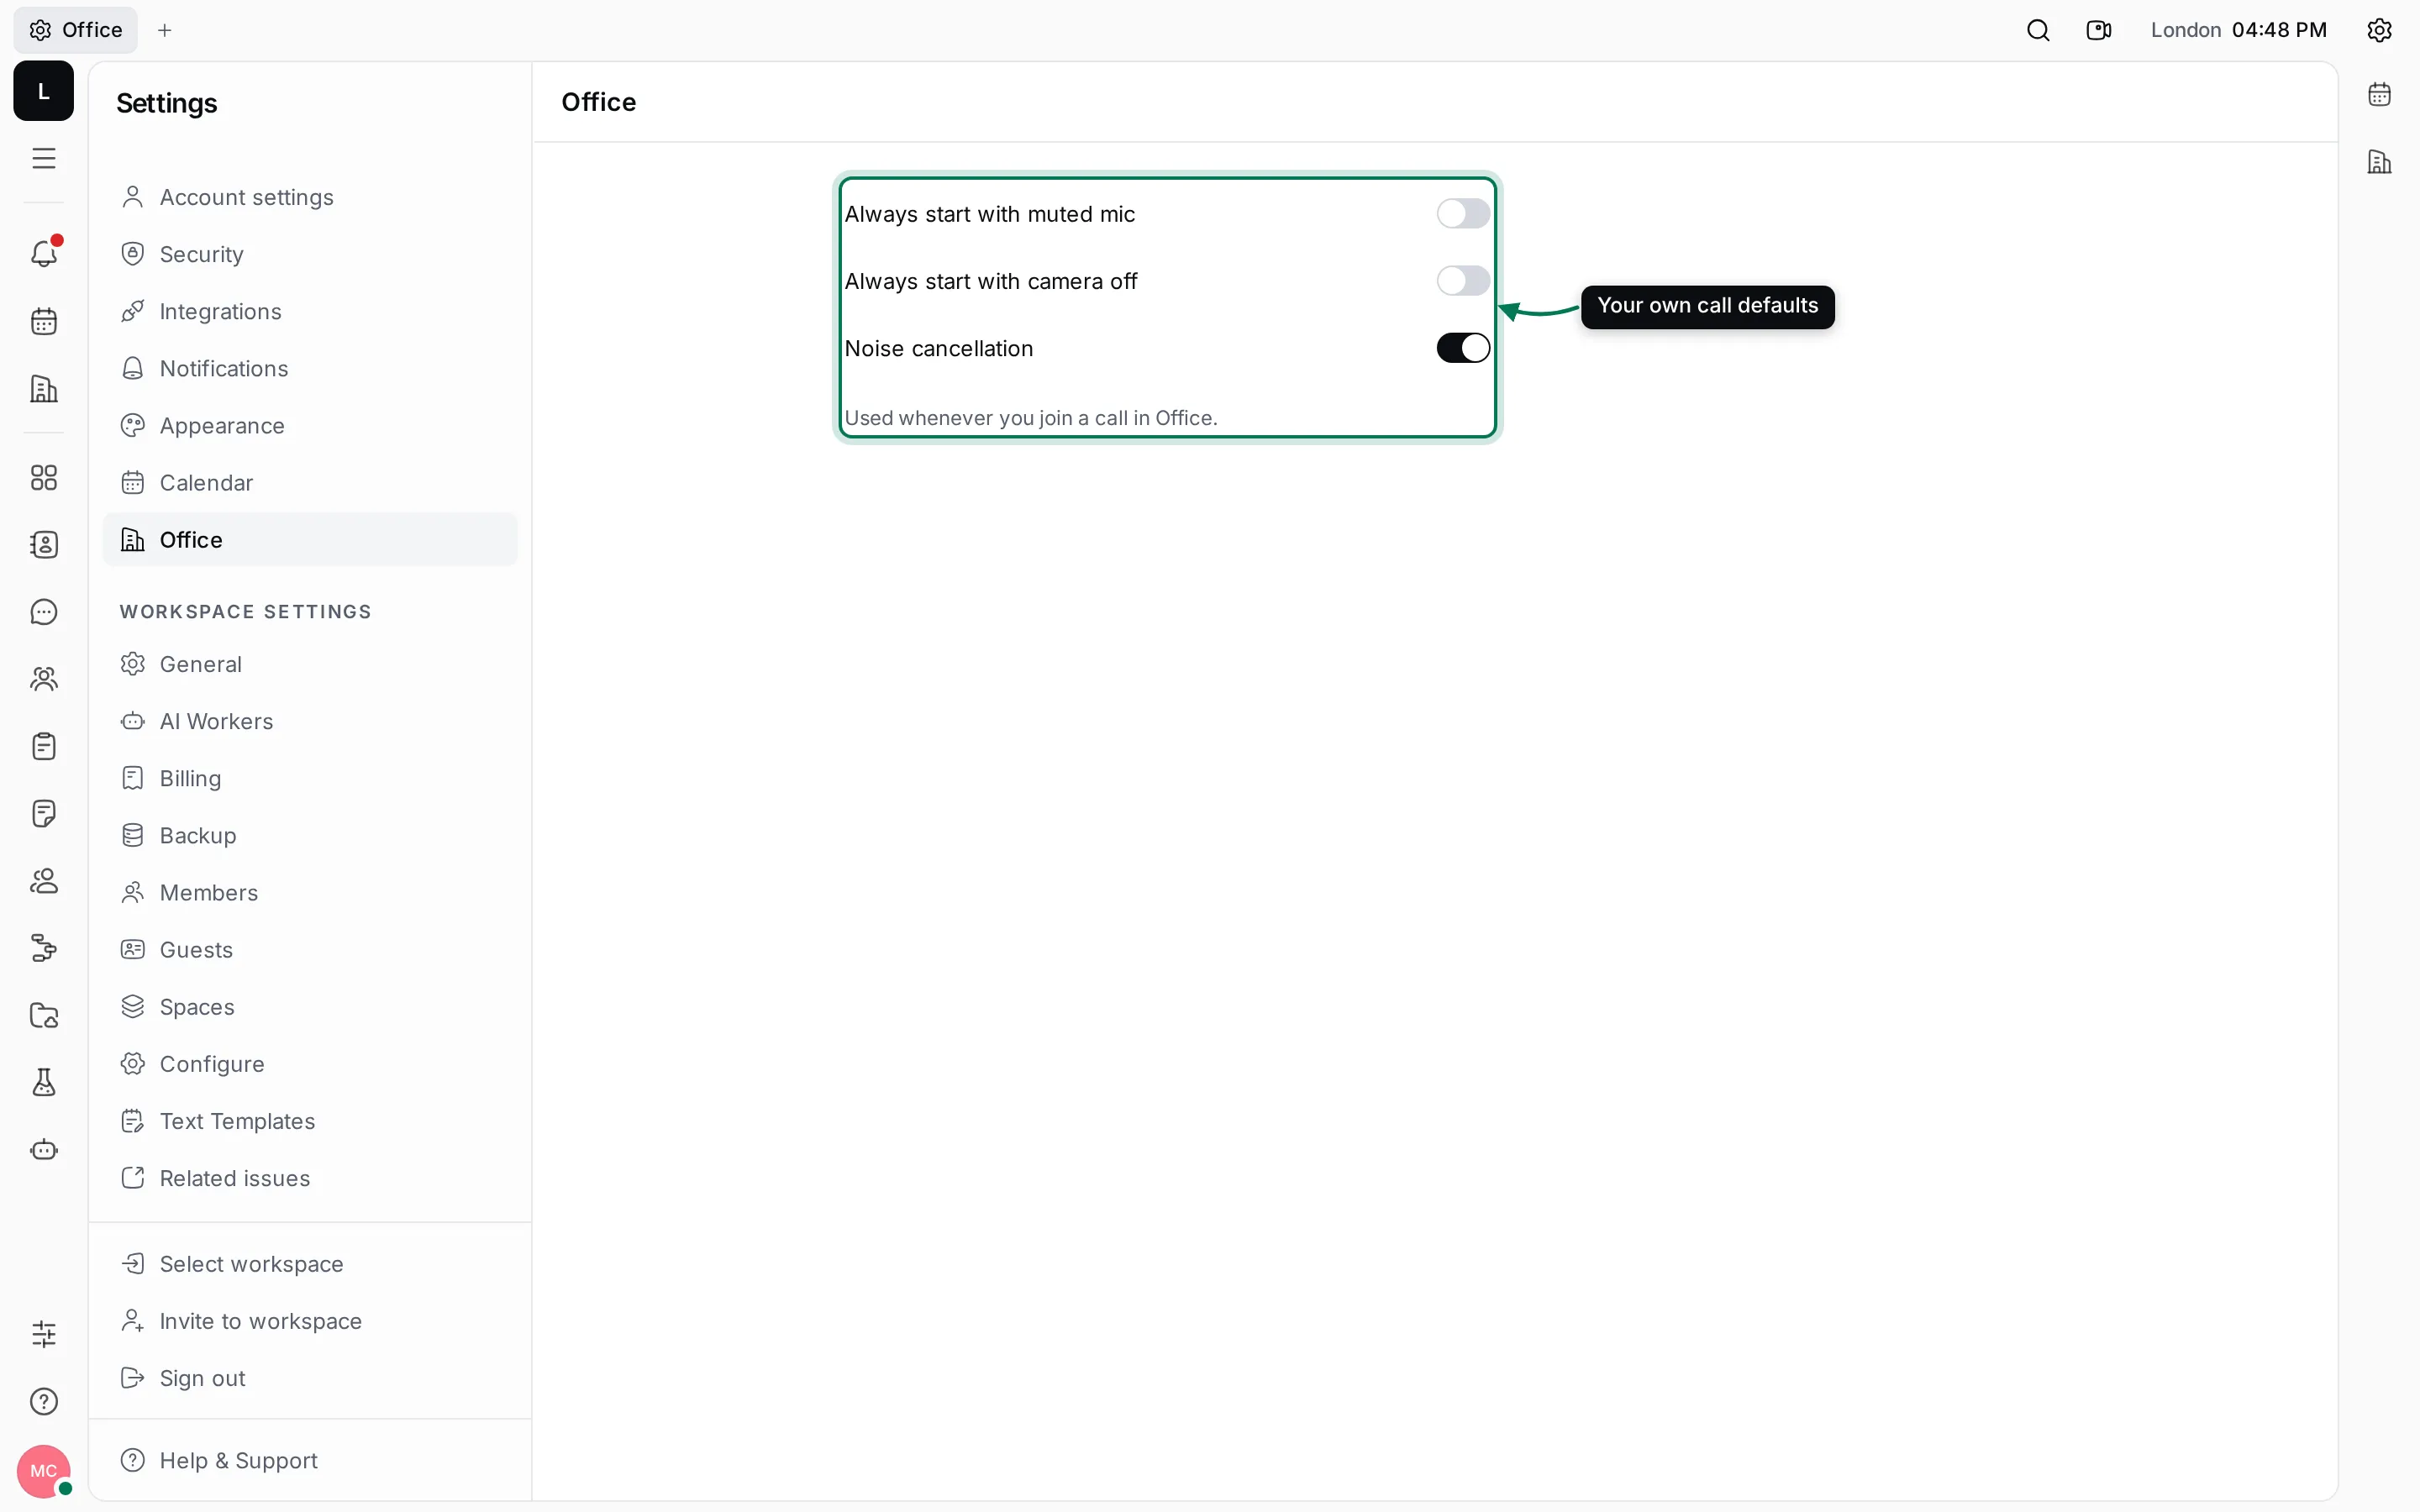
- Always start with muted mic
- Always start with camera off
- Noise cancellation
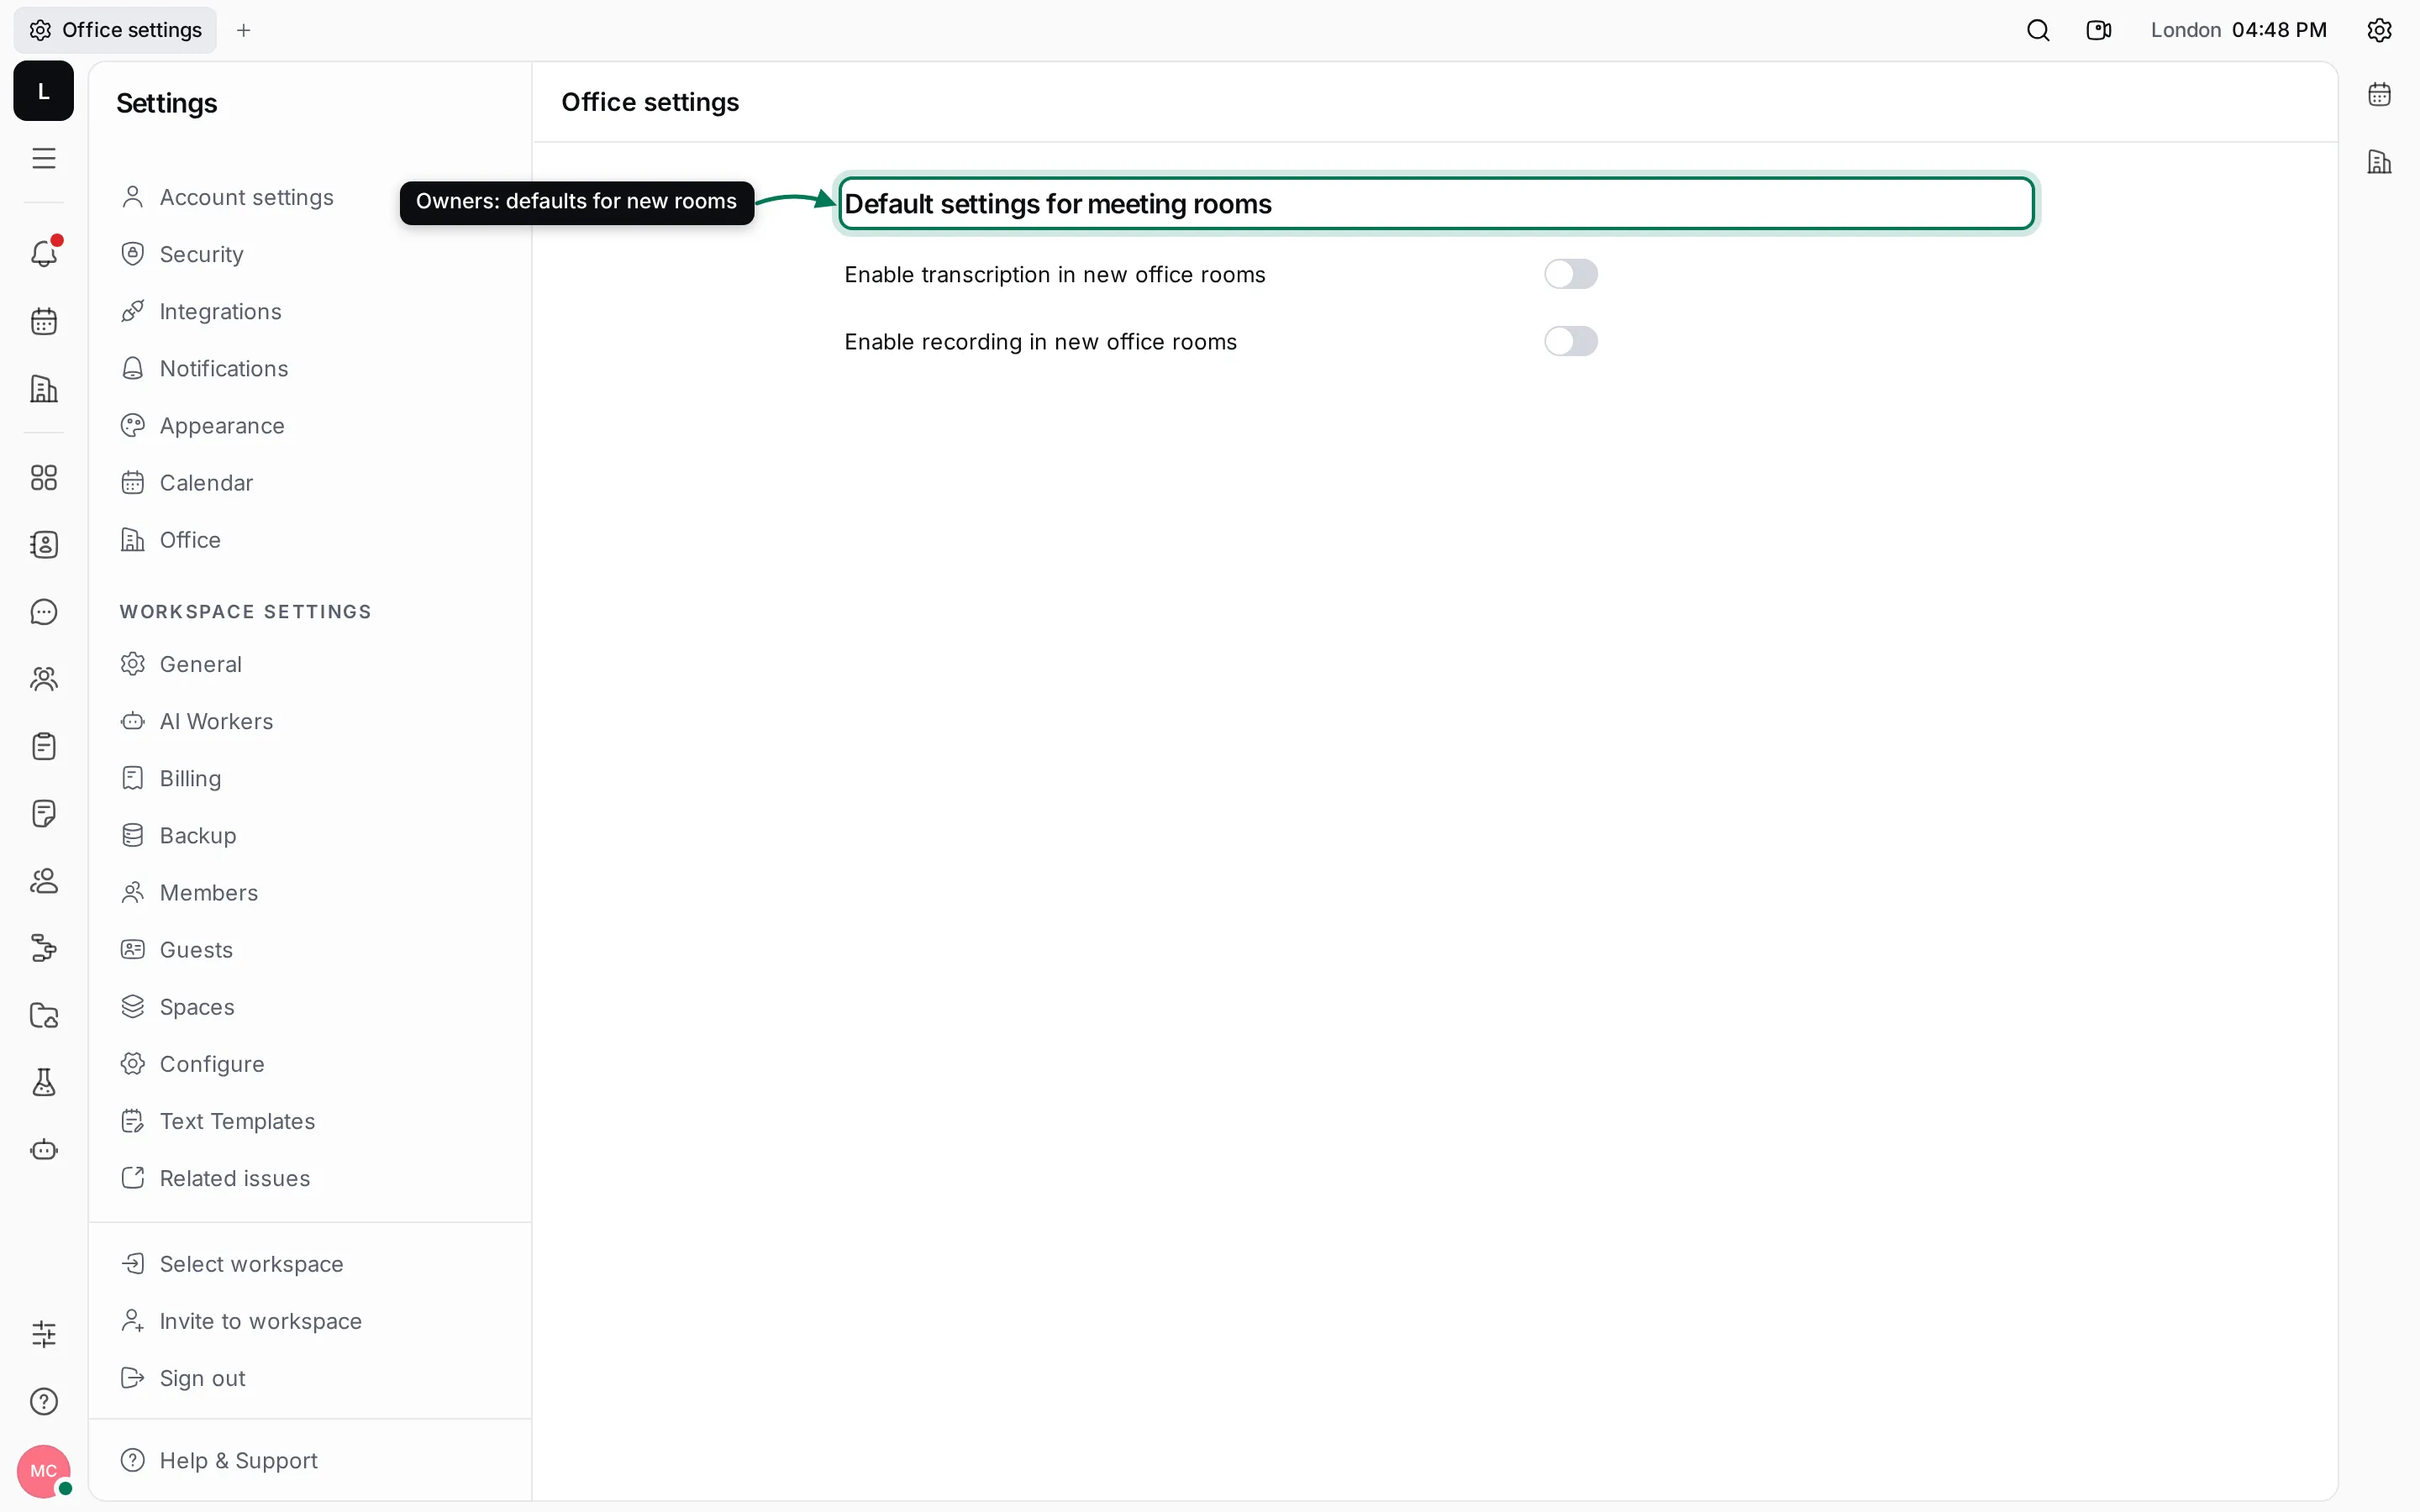
Workspace owners and maintainers set defaults for new rooms in Settings › Office settings: Enable transcription in new office rooms and Enable recording in new office rooms.
When something goes wrong
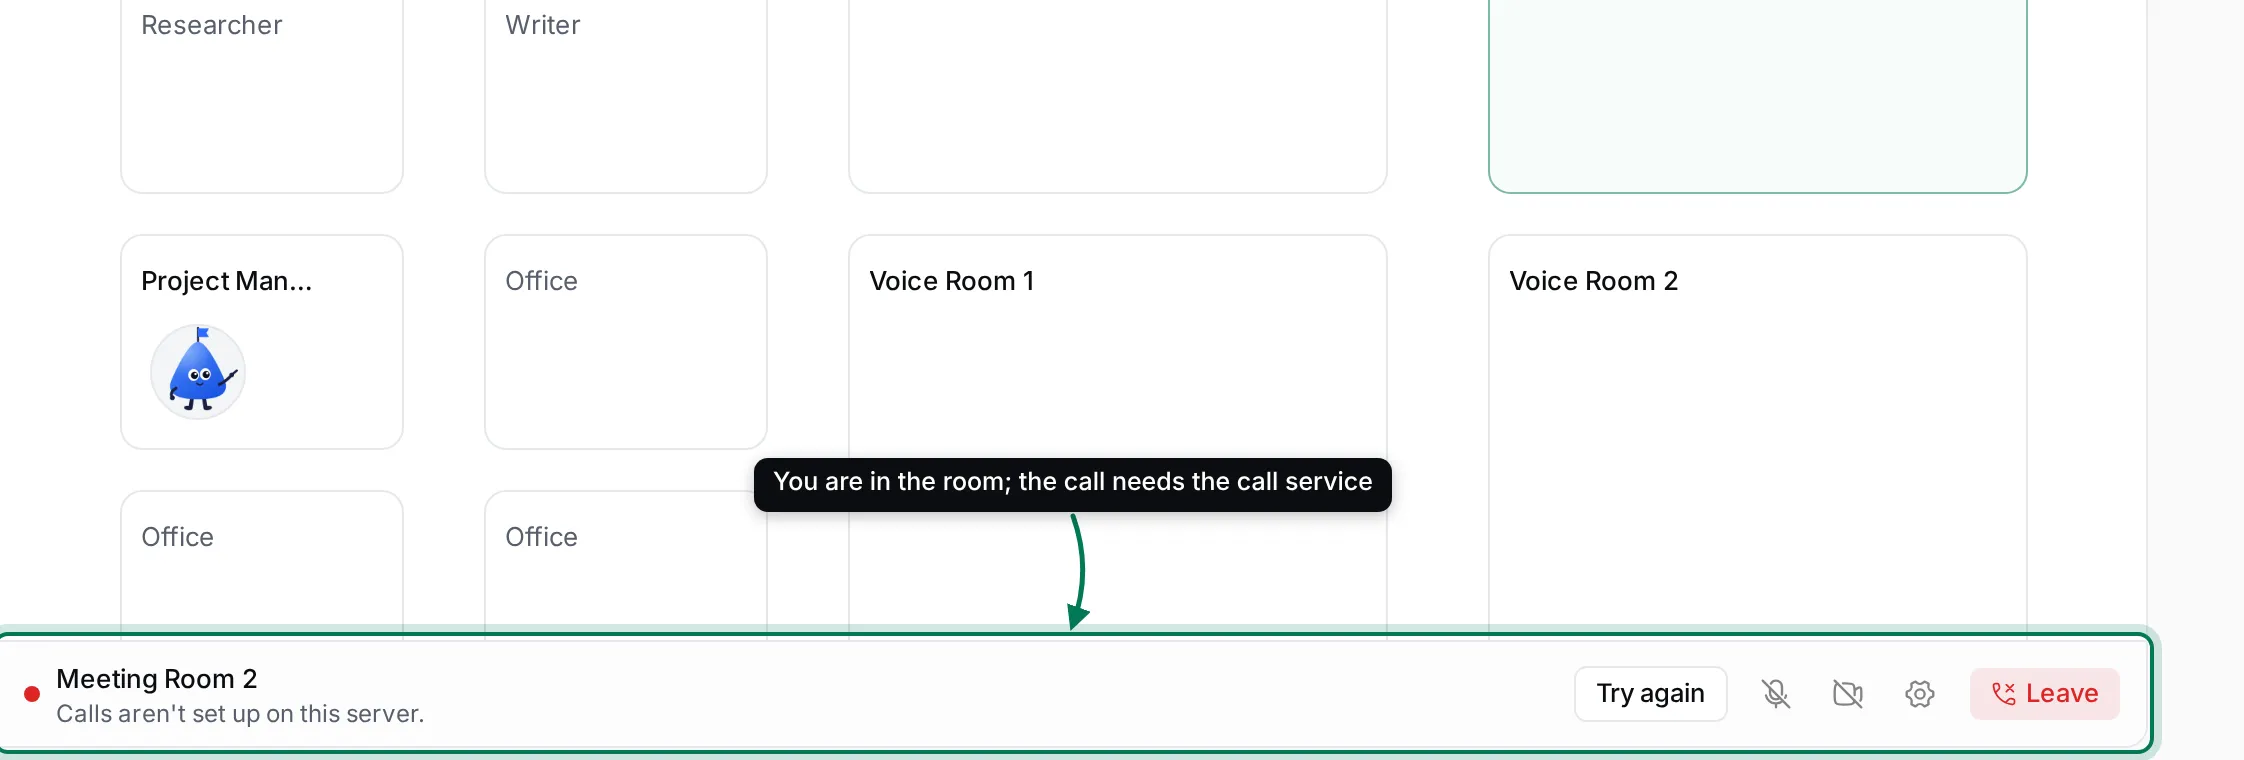
Section titled “When something goes wrong”The call bar says what happened and offers Try again:
- “Calls aren’t set up on this server.” The workspace has no call service yet; ask your workspace owner.
- “Calls need a higher plan for this workspace.” or “This workspace has used up its call minutes.” Ask your workspace owner about the plan.
- “Couldn’t reach the call server.” or “The call was disconnected.” Check your connection and try again.
- “Couldn’t use your microphone.” or “Couldn’t use your camera.” Allow access in your browser’s site settings.
If your browser pauses the sound of the call, click Enable audio.