Create and manage projects
A project groups the issues of one product, team or effort. Its identifier becomes the prefix of every issue ID, so issues in the Website project are numbered WEB-1, WEB-2 and so on.
Create a project
Section titled “Create a project”-
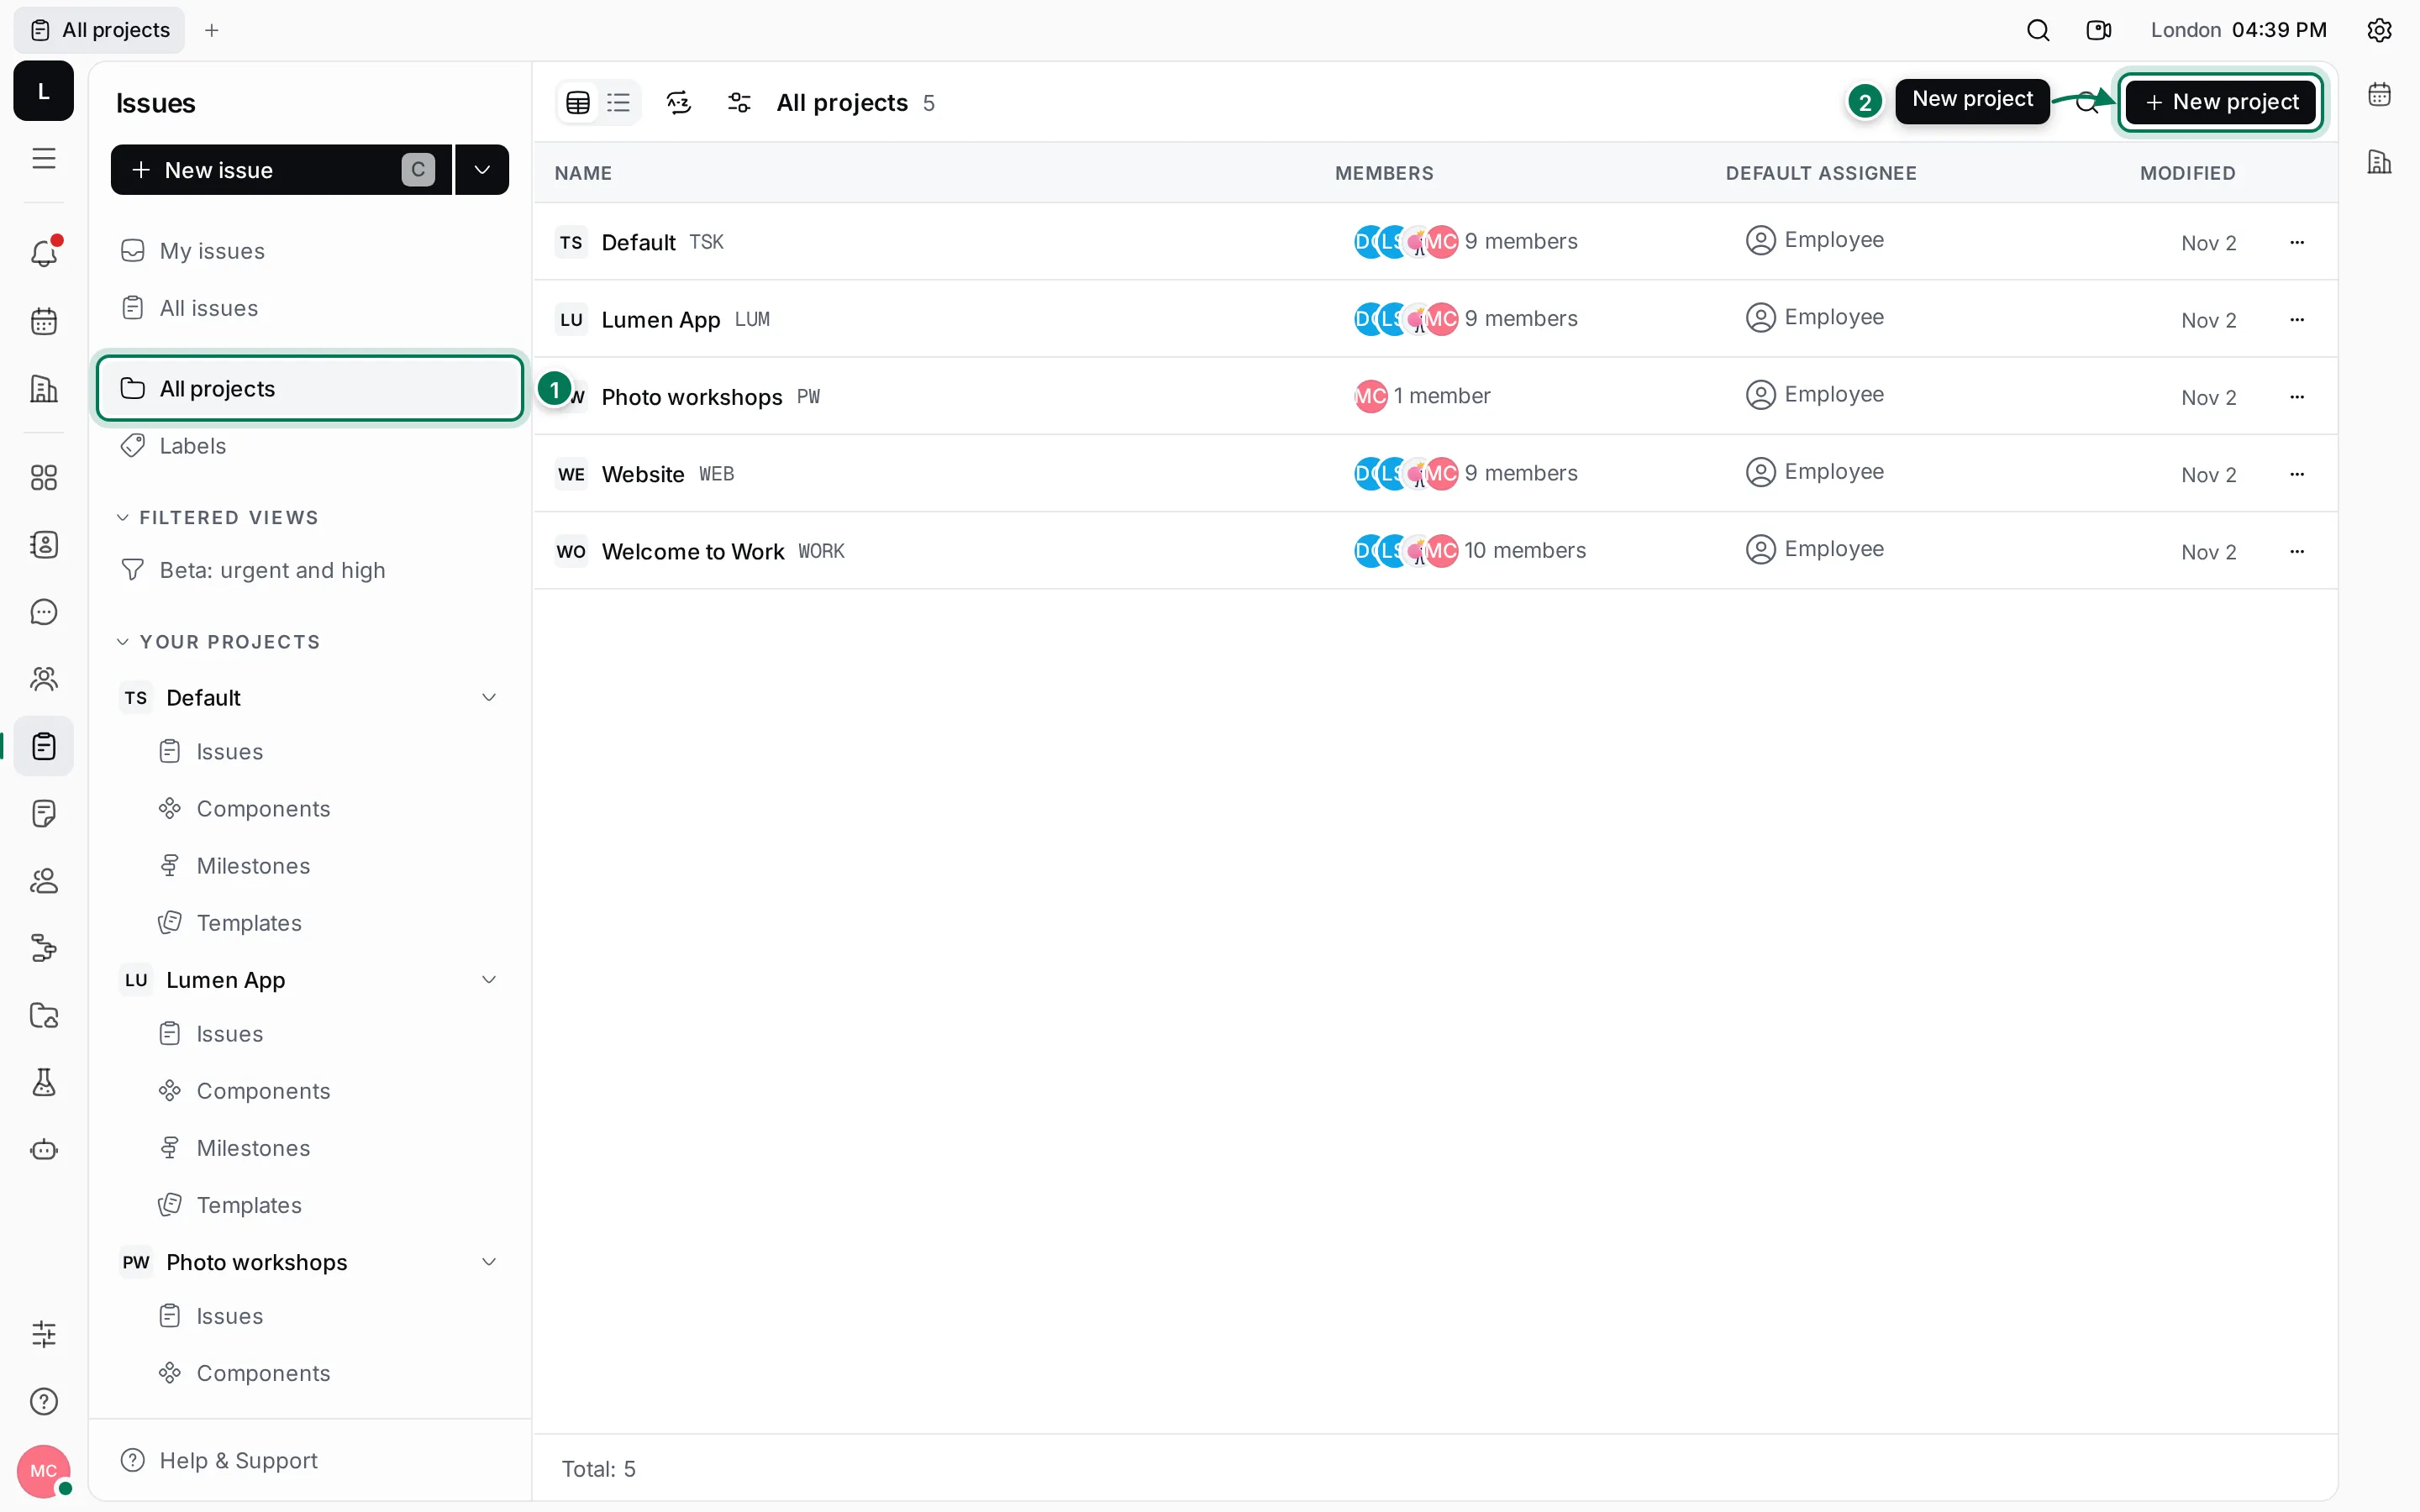
In the Issues navigator, click All projects (1).
-
Click New project (2). You can also click the arrow next to New issue in the navigator and choose New project.
-
Type a Name (3).
-
Check the Identifier (4). It fills in from the name; change it to something short your team will recognise. Use capital letters, digits and underscores, starting with a letter.
-
Optionally, set the Default assignee for issues and the Default issue status for new issues (5).
-
Optionally, turn on Working days (6) and pick the weekdays your team works, plus a Holiday calendar. Without it, the project counts calendar days.
-
Add Owners and Members (7). You’re both an owner and a member to start with.
-
Click Create project (8). The project opens and appears under Your projects.
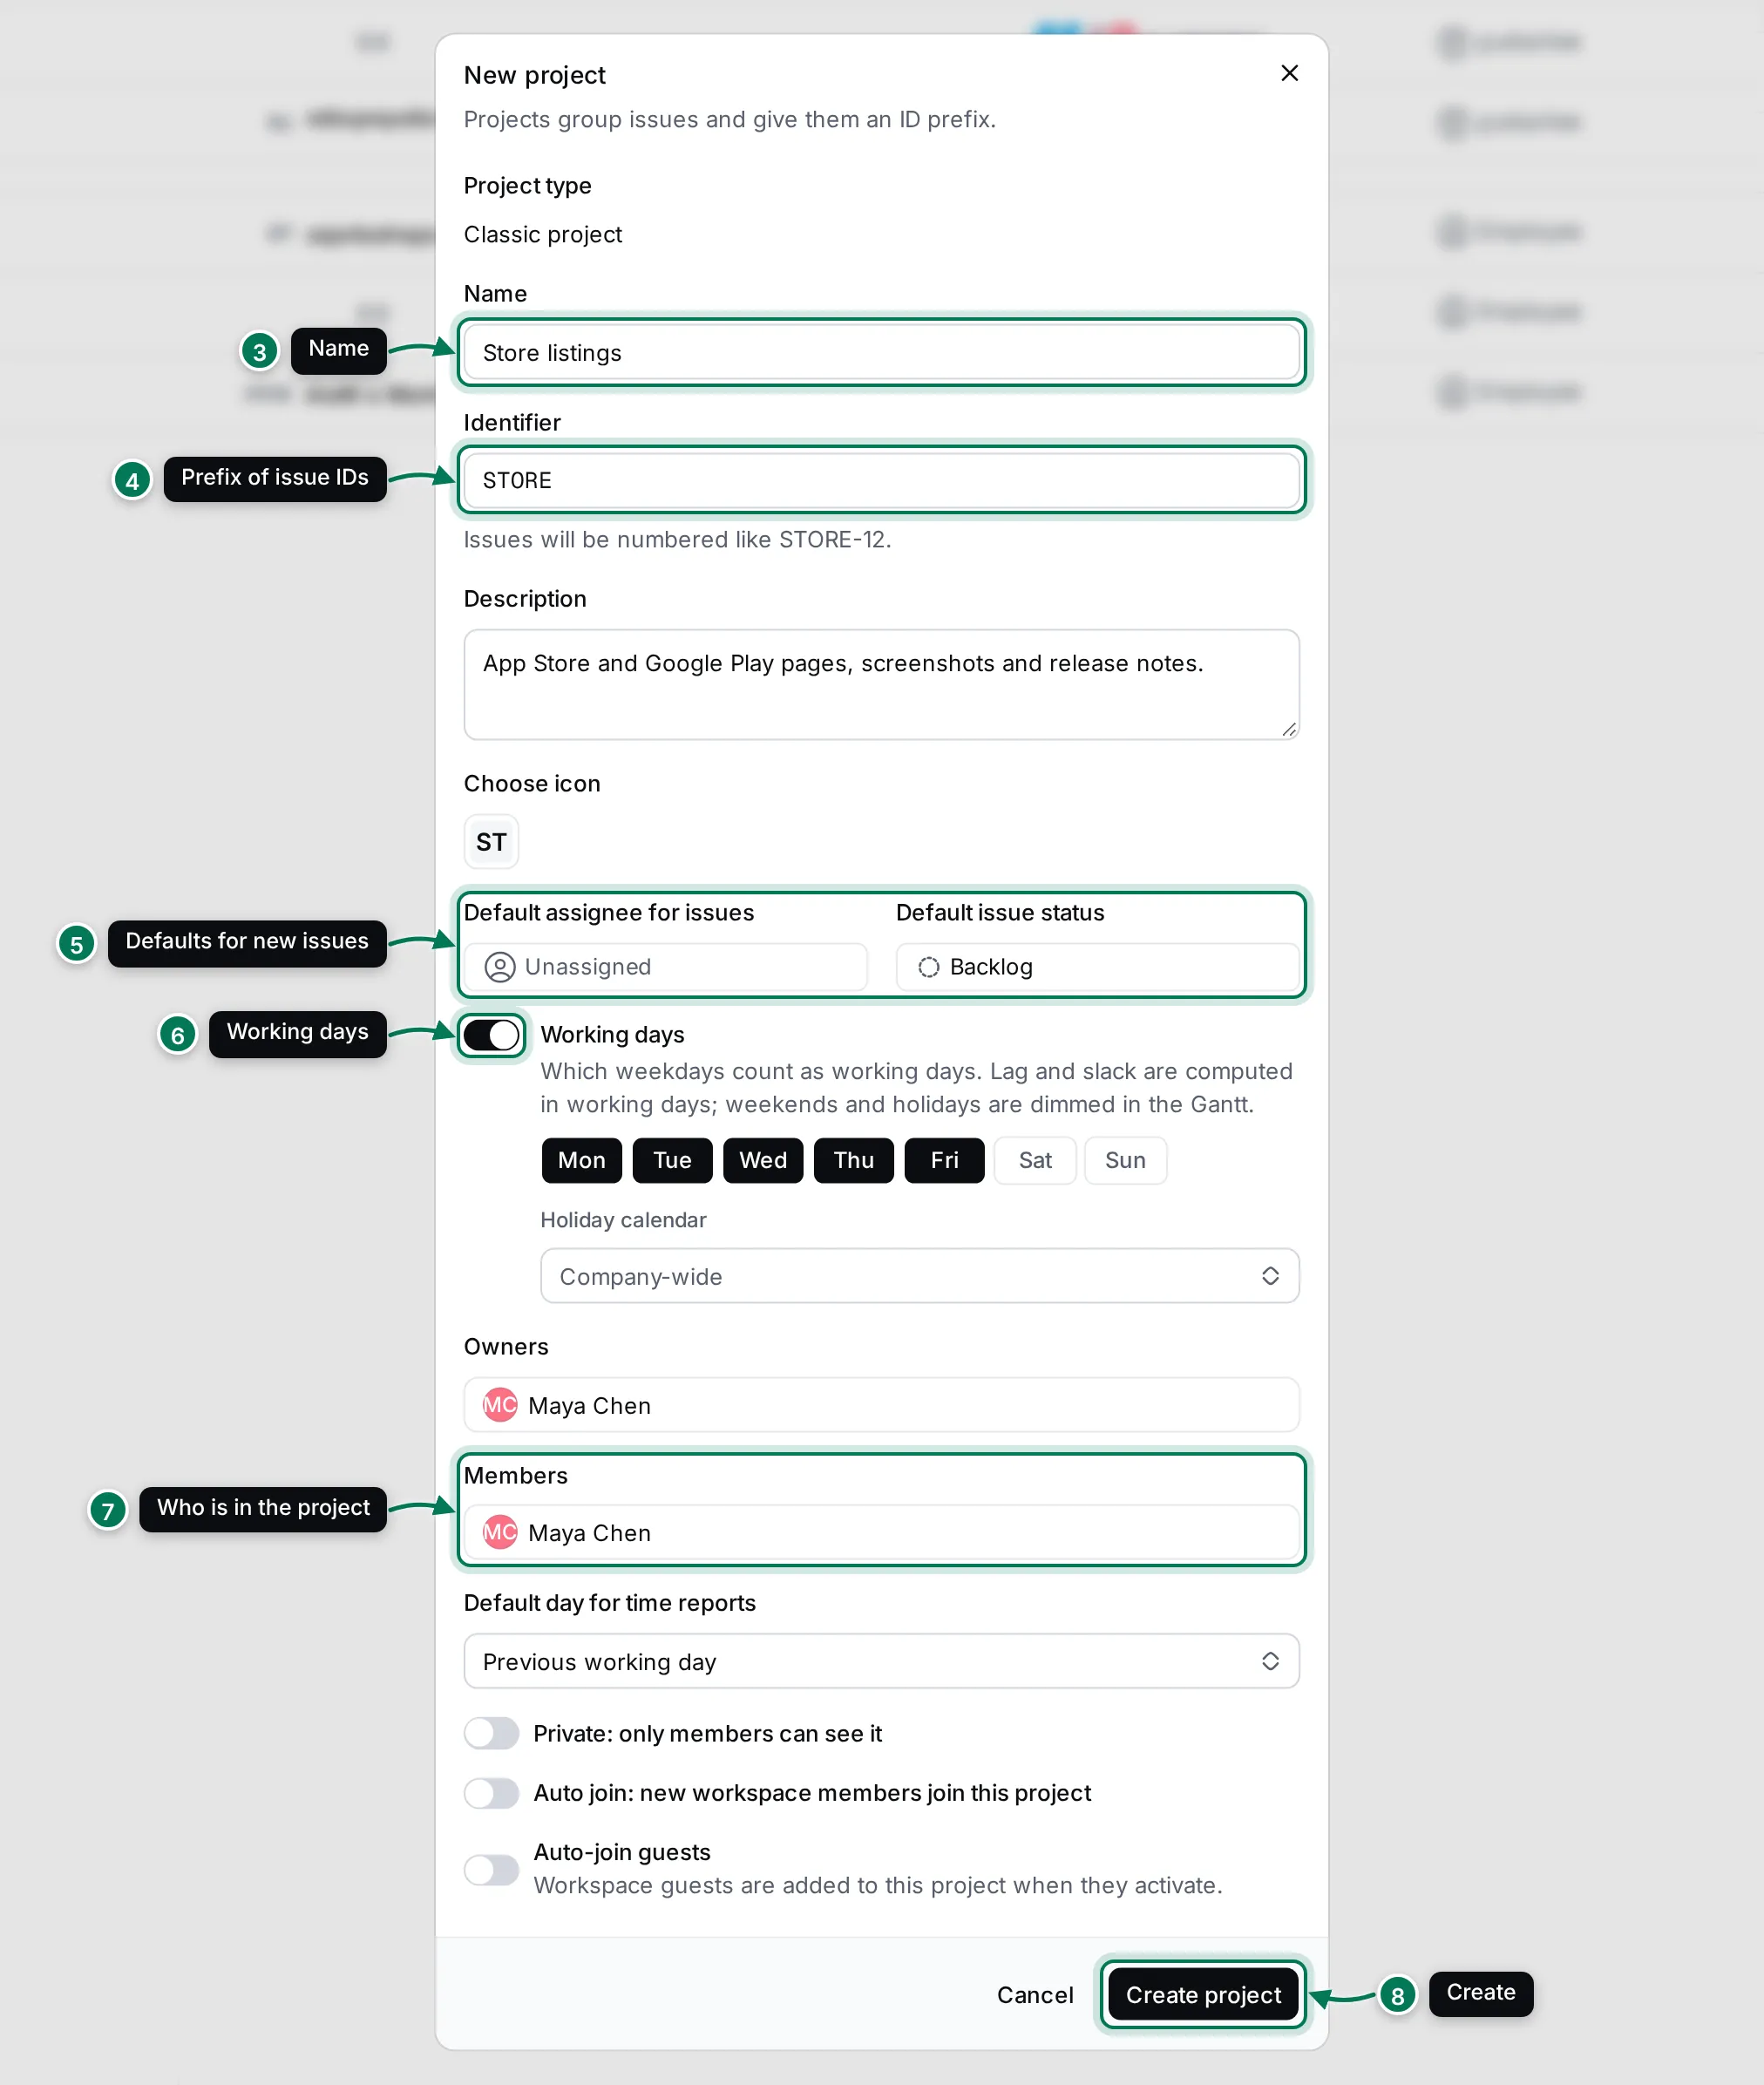
The identifier can’t be changed once the project exists, so pick it with care.
More options
Section titled “More options”- Default day for time reports: whether new time reports start on the Previous working day or the Current working day. See report time.
- Private: only members can see it: hides the project and its issues from everyone who isn’t a member.
- Auto join: new workspace members join this project: useful for projects everyone takes part in.
- Auto-join guests: adds workspace guests to the project when they activate their account.
Manage a project
Section titled “Manage a project”Hover over a project in the navigator and click … to open its menu. The same menu opens when you right-click a row in All projects.
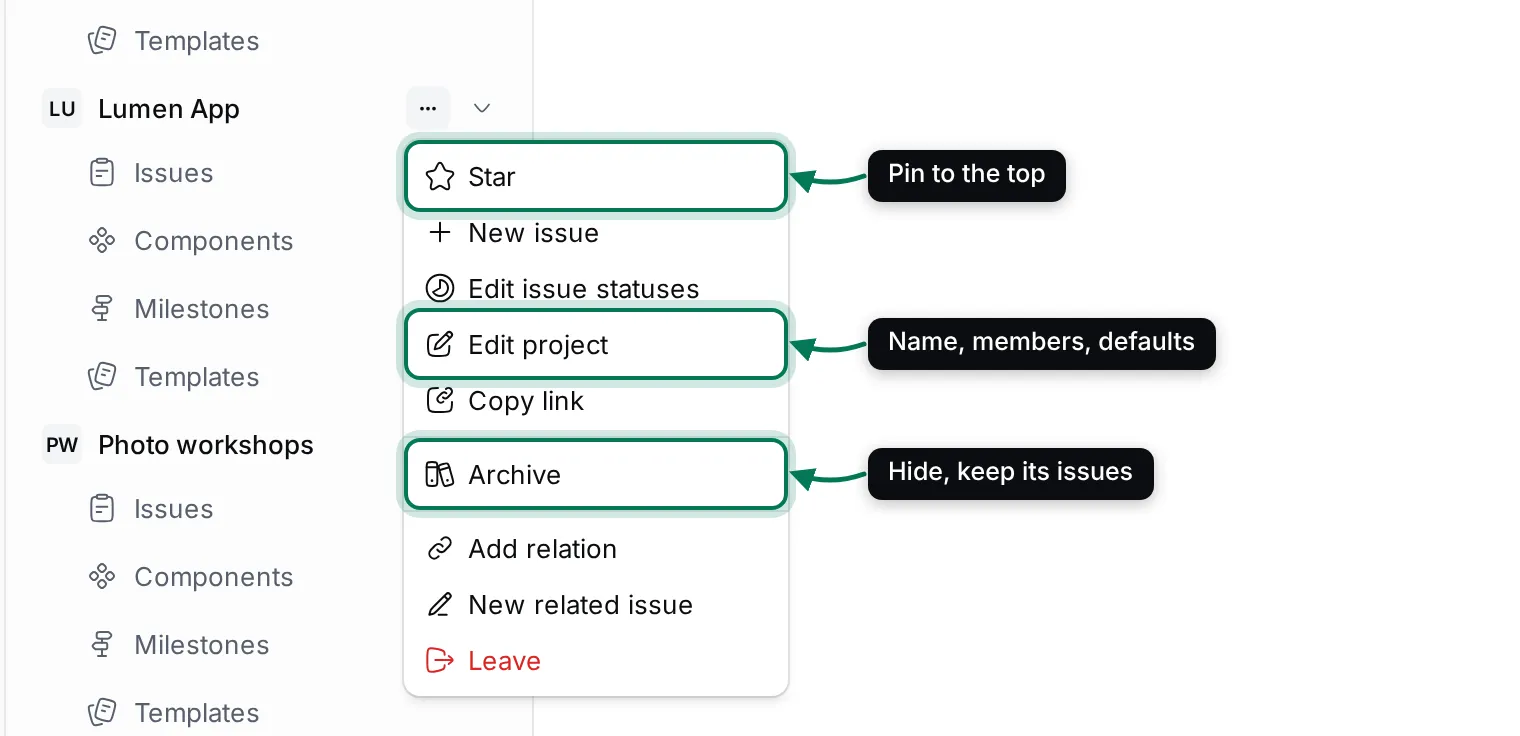
- Star moves the project to a Starred section at the top of the navigator. Only you see your stars.
- New issue opens the New issue dialog in this project.
- Edit issue statuses opens the project type in Settings, where the statuses and their order are set.
- Edit project opens the same form as New project, with Save.
- Copy link copies a link to the project.
- Archive hides the project from the navigator and the issue lists. Its issues are kept. You’re asked to confirm first.
- Add relation and New related issue link the project to an issue or another item, the same way as for issues.
- Leave removes you from the project’s members. If the project is private, it disappears for you. Projects you’re not a member of show Join instead.
The All projects table
Section titled “The All projects table”All projects lists every project you can see, with its members, default assignee and when it was last changed. Click a project’s members or default assignee to change them right in the table.
Use the buttons above the table to switch between Table and List, to show archived projects (turn off Hide archived) and to choose more columns, such as Owners, Private or Default issue status.