Add and manage action items
Action items are the things on your to-do list. Some come from your work: every issue assigned to you appears as an action item with its ID, such as LUM-14. Others you write yourself, like “Book flights for the scouting trip”.
Add an action item
Section titled “Add an action item”- Open Planner from the left rail.
- Click Add Action Item, press Enter to save at the top of the list and type a title (1).
- Press Enter. The action item goes to the top of your list, and the field stays ready for the next one.
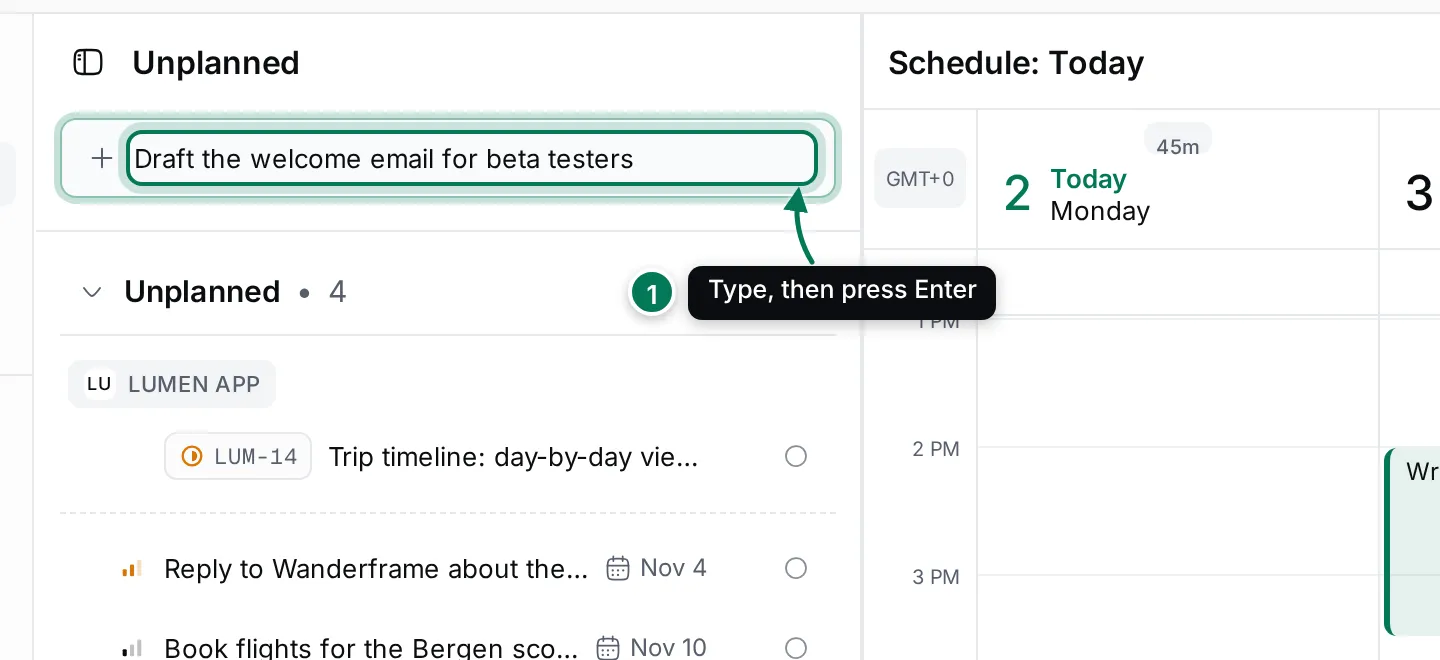
Press Esc to clear the field without saving. You can also press Ctrl K (⌘ K on a Mac) and choose Add Action Item from anywhere in the Planner.
Edit an action item
Section titled “Edit an action item”Click an action item in the list. Its panel opens in place of the schedule. Changes save as you make them.
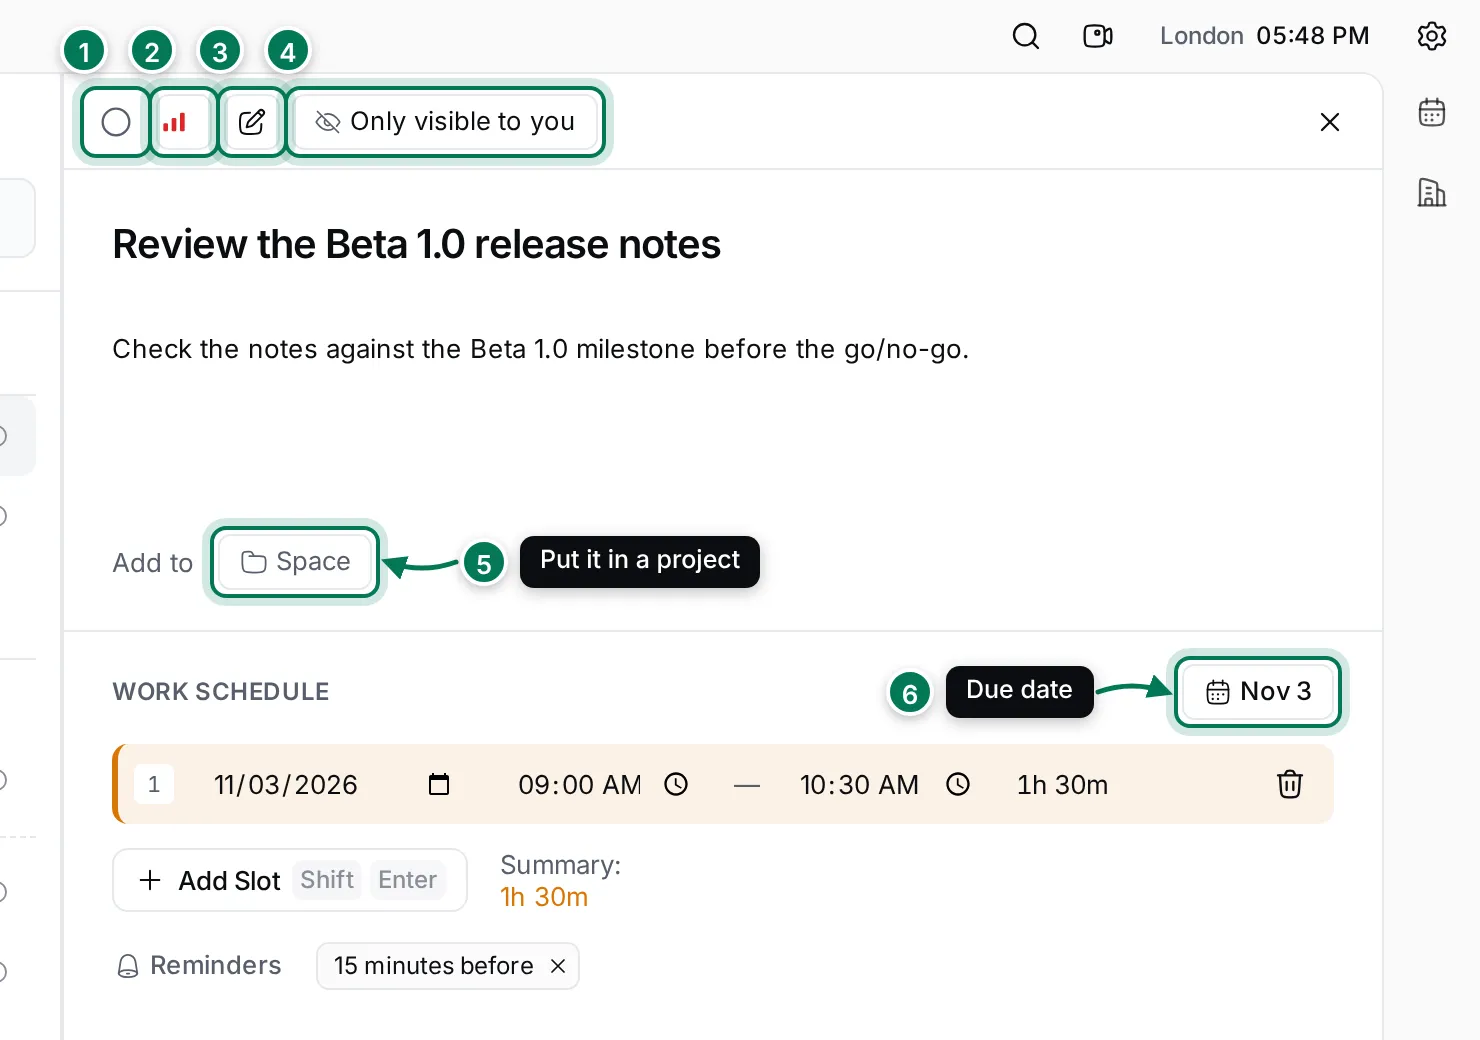
- Done: the circle marks the action item as done.
- Priority: No priority, Low, Medium, High or Urgent. Rows show high and urgent ones with a red icon.
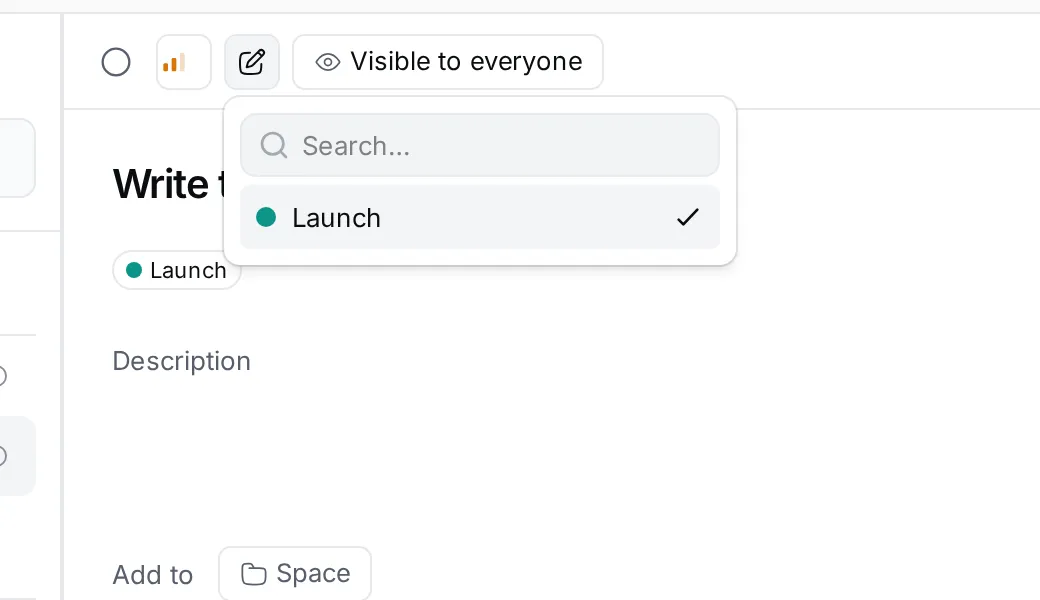
- Labels: type to search, or type a new name and choose Create to make a label. Labels show as chips in the list.
- Visibility: who can see the action item and its time slots (see below).
- Add to › Space: put a personal action item in one of your projects. Action items of issues always belong to the issue’s project.
- Due date: click it to pick a date, or Clear due date to remove it. Overdue dates show in red in the list.
Click the title to rename the action item, and click under it to write a Description. Close the panel with × or Esc. The Work schedule part of the panel is explained in Schedule time for your work.
Who can see an action item
Section titled “Who can see an action item”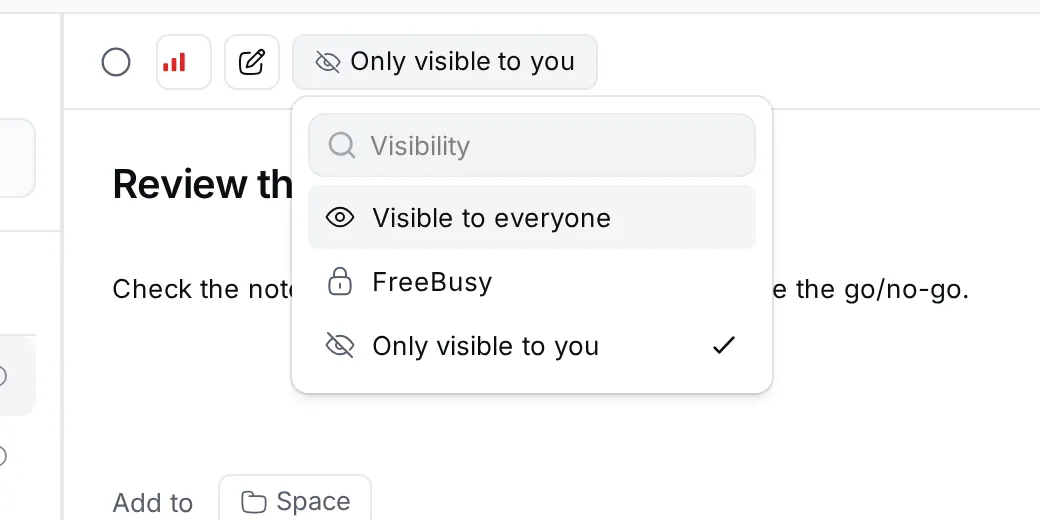
- Visible to everyone: your teammates see the title of the action item and its time slots.
- FreeBusy: teammates see that you’re busy at that time, but not what you’re doing.
- Only visible to you: nobody else sees it. New action items you write start like this.
Action items of issues are always visible to everyone, so the menu is disabled for them.
Mark an action item done
Section titled “Mark an action item done”Click the circle at the end of its row, or in its panel. The action item moves to the Done group of the All view, struck through. Click the circle again to bring it back.
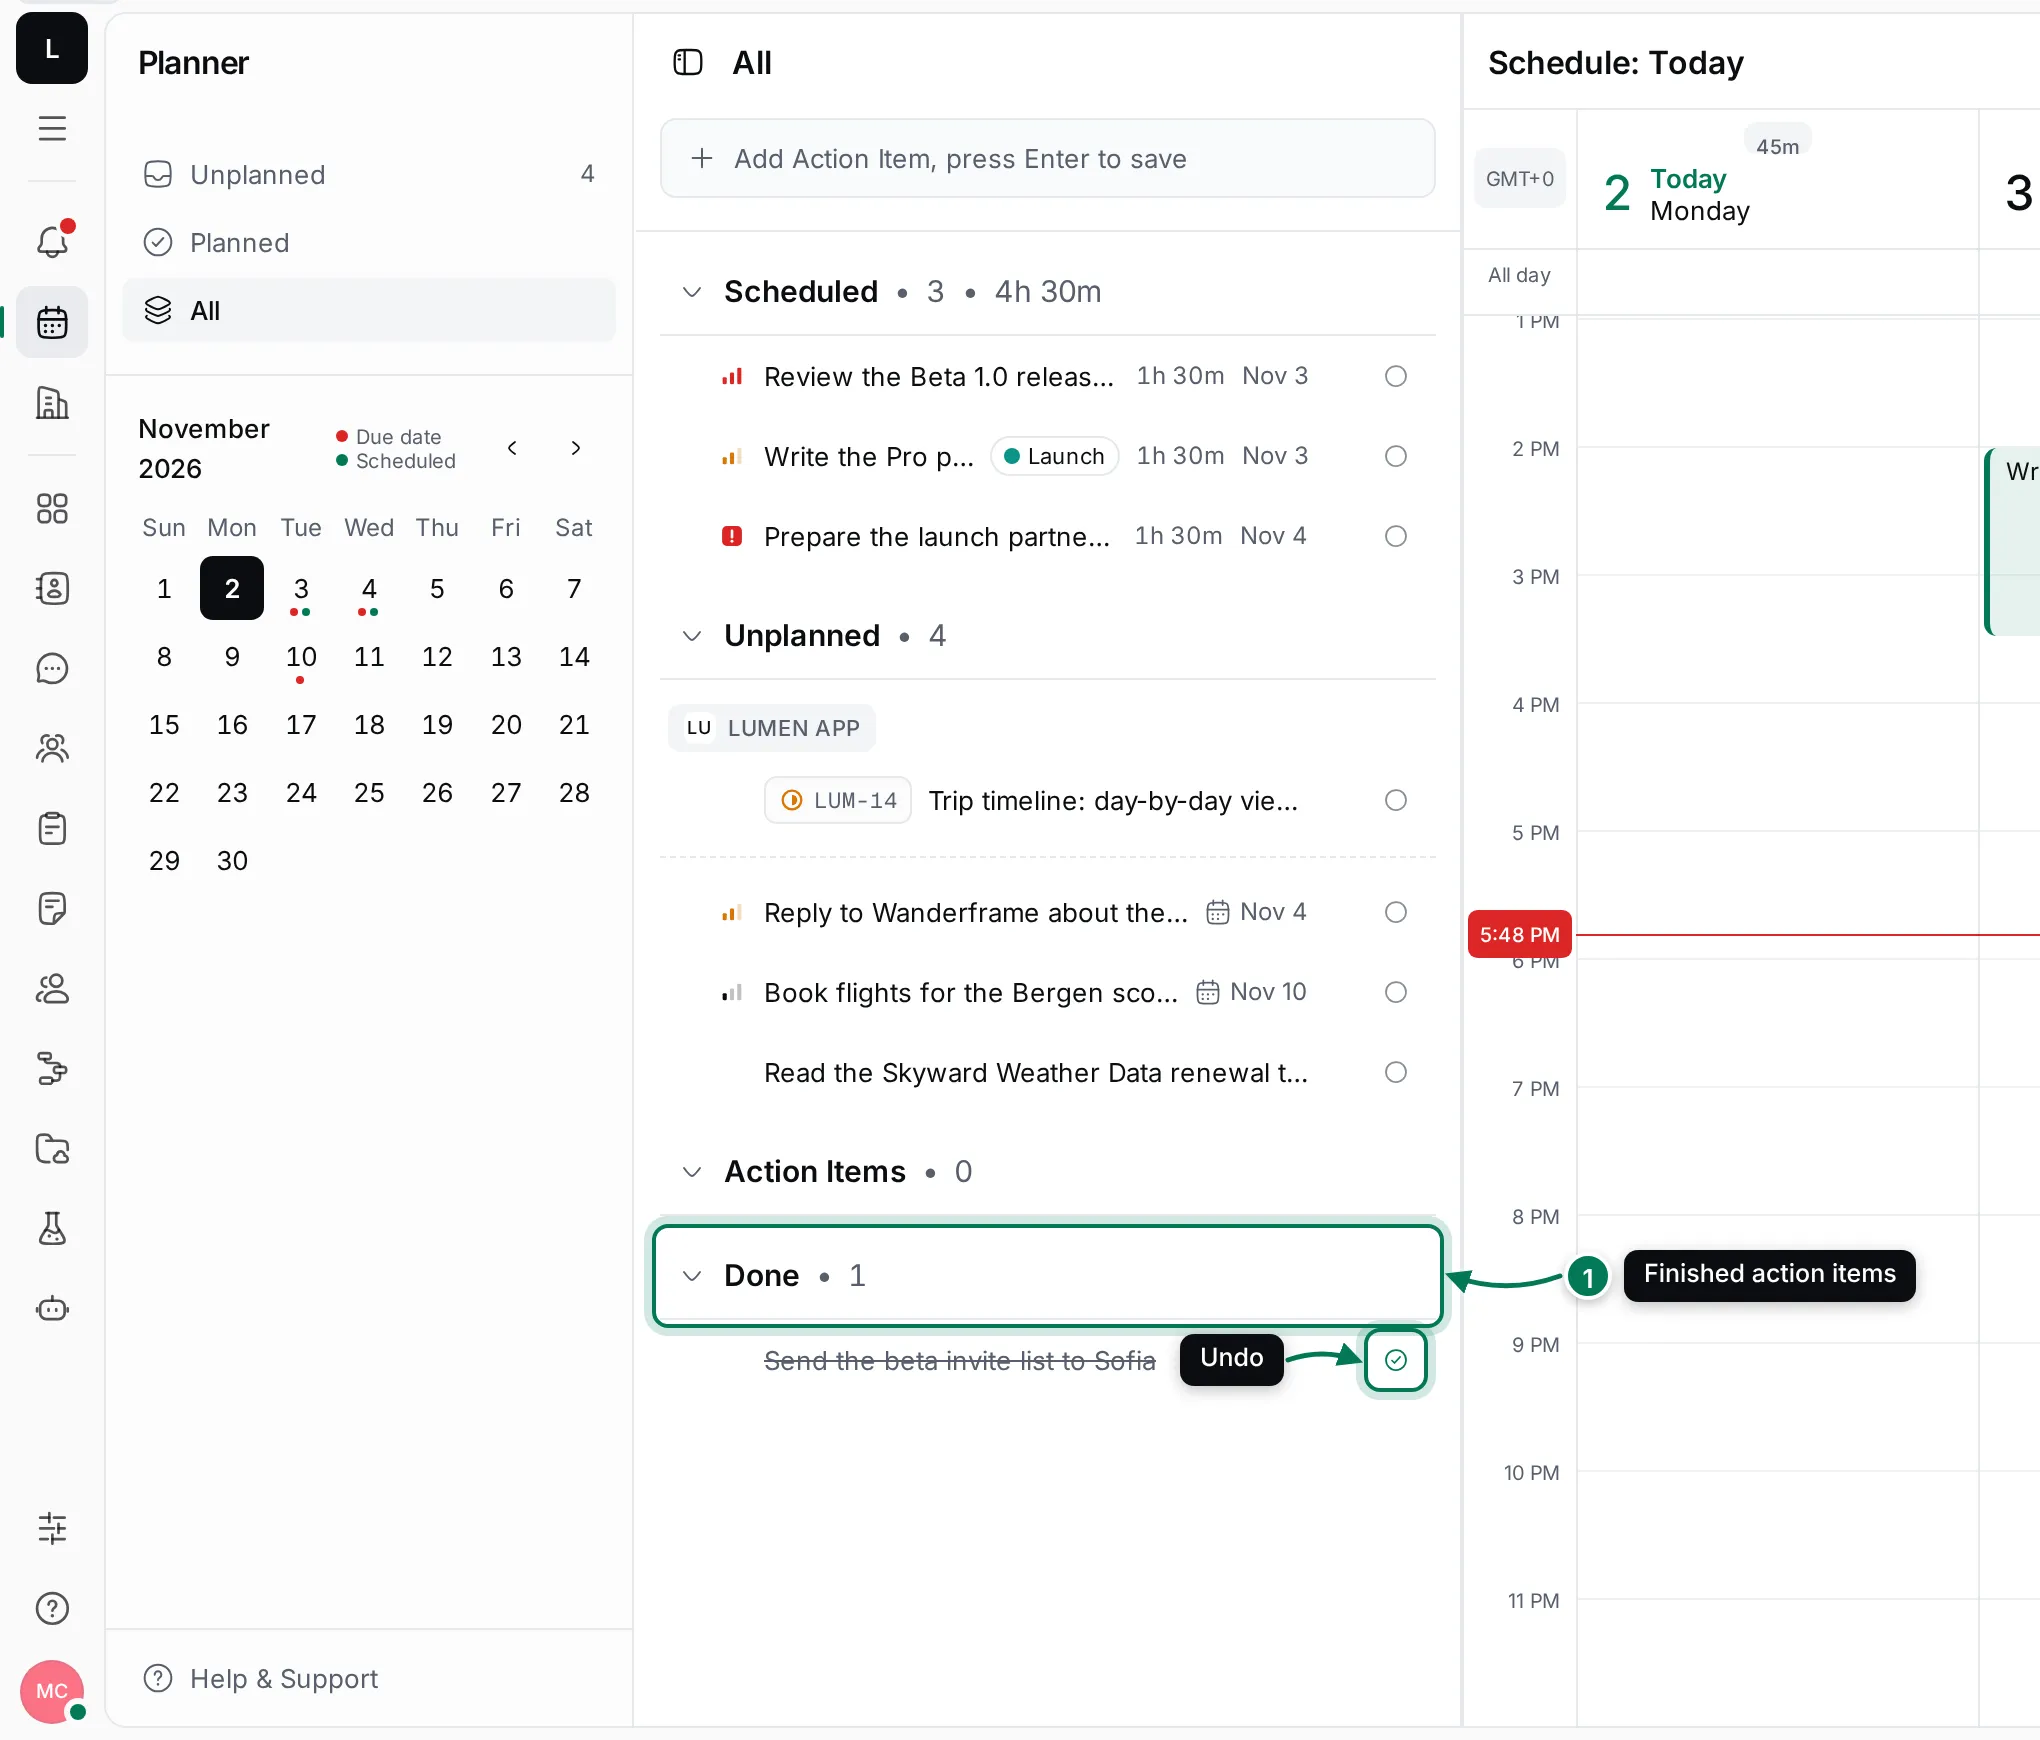
Marking an issue’s action item done doesn’t close the issue. Change the issue’s status in the Tracker for that.
More actions
Section titled “More actions”Right-click an action item, or hover over it and click ⋯, for its menu.
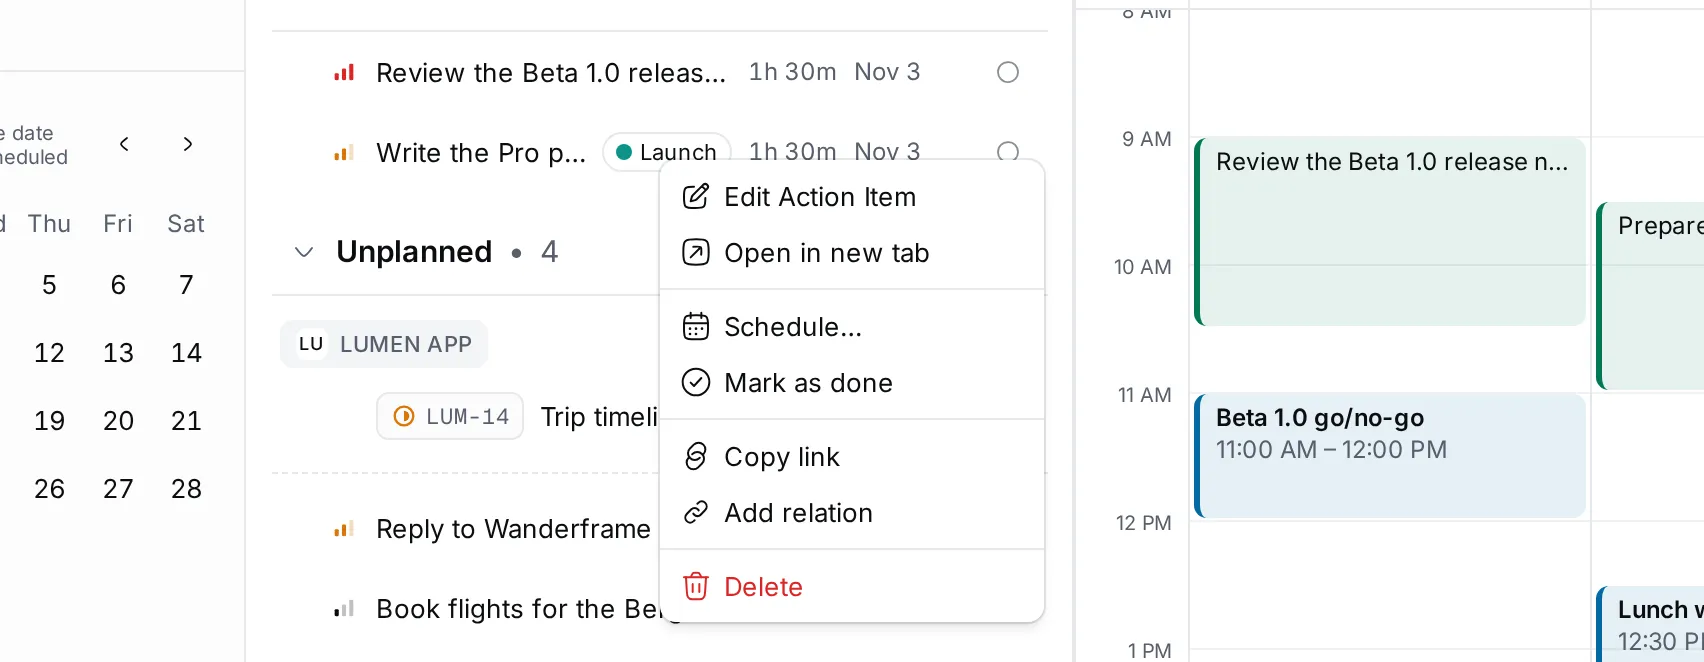
- Edit Action Item opens its panel; Open in new tab opens it in a new browser tab.
- Open issue (for an issue’s action item) goes to the issue.
- Schedule… gives it a time slot. See Schedule time for your work.
- Copy link copies a link to the action item.
- Add relation links it to another item in the workspace.
- Delete removes the action item and its time slots, after you confirm.
To change the order of your list, drag an action item by the handle (⋮⋮) that appears at its start when you hover, and drop it on another row.