Work on an issue
Click an issue in any list or board to open its page. Everything about the issue is here: what it is, who works on it, what changed and what people said about it.
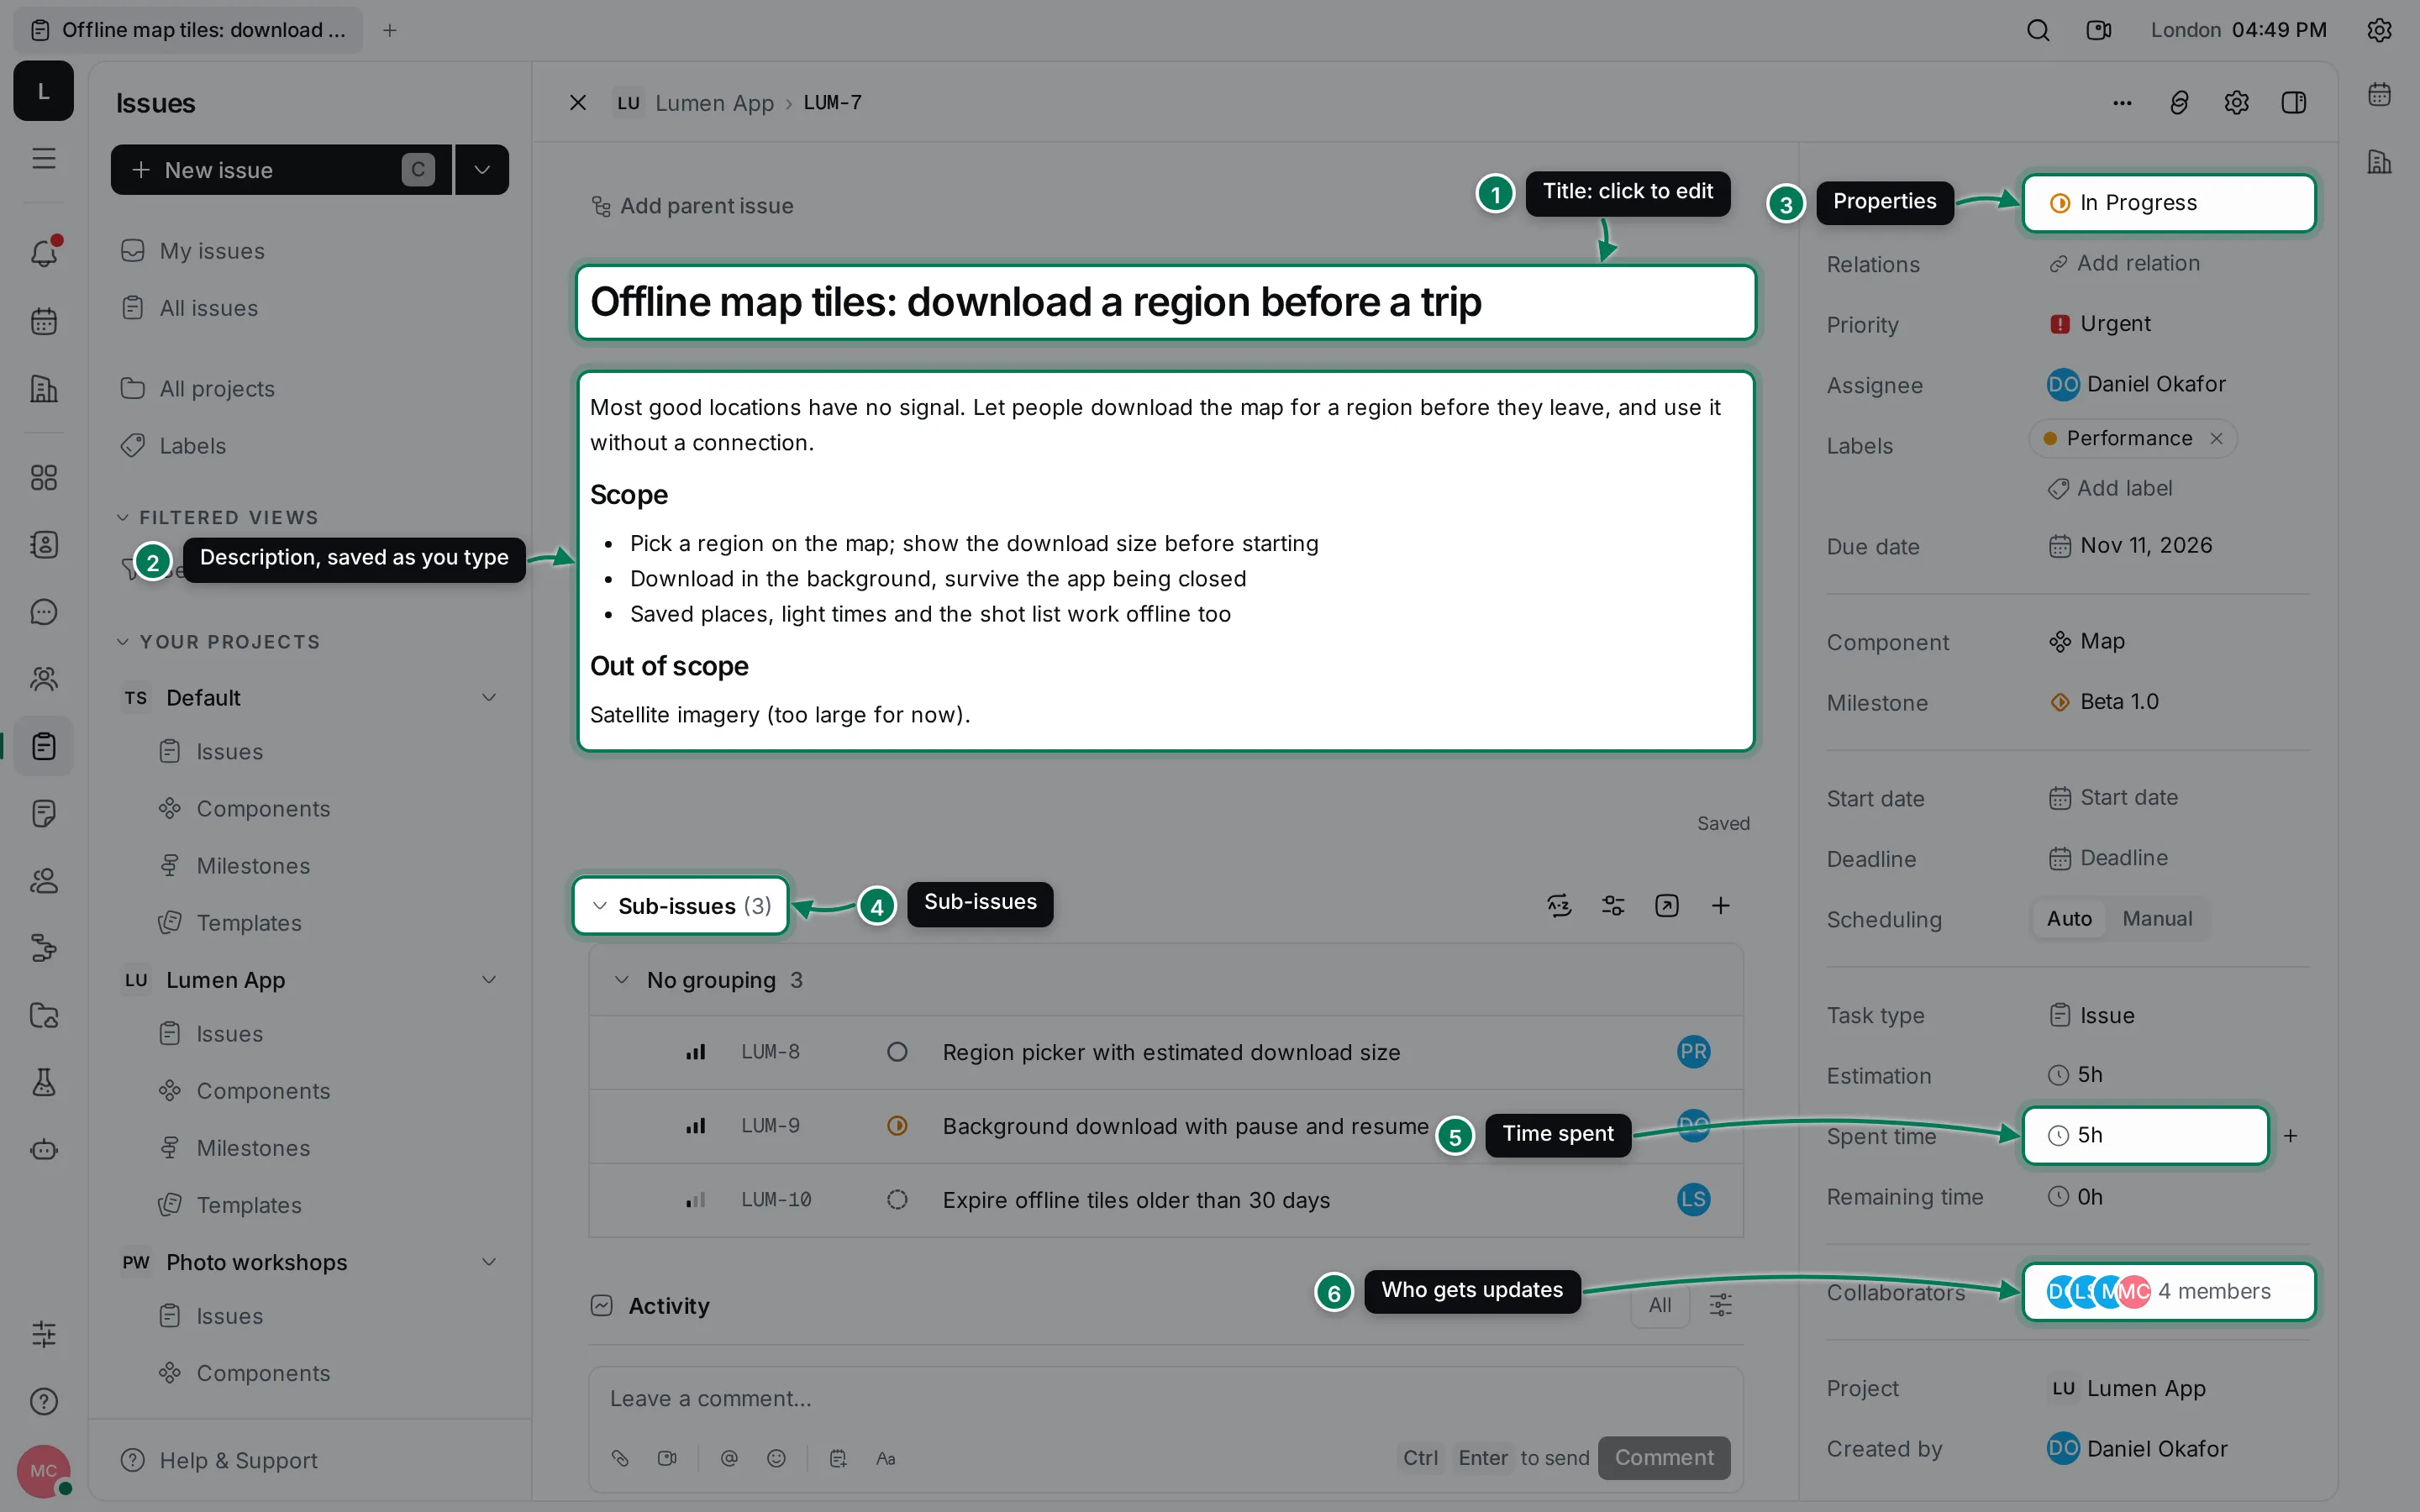
- Title: click it to edit.
- Description: a full editor, saved as you type.
- Properties: status, relations, priority, assignee, labels, dates, component and milestone.
- Sub-issues: the smaller issues this one is split into. See sub-issues and relations.
- Estimation, spent and remaining time.
- Collaborators: the people who get updates about the issue.
Below the sub-issues is the Activity feed with comments and every change. Close the issue with × at the top left or Esc.
The buttons at the top right open the issue’s … menu (see the issue menu), Copy link, Class setting (where workspace owners add custom properties to issues) and a button that hides or shows the properties on the right.
Change properties
Section titled “Change properties”On the issue page, click any value on the right, such as Status or Assignee, and pick a new one. The change saves at once and shows in the activity feed.
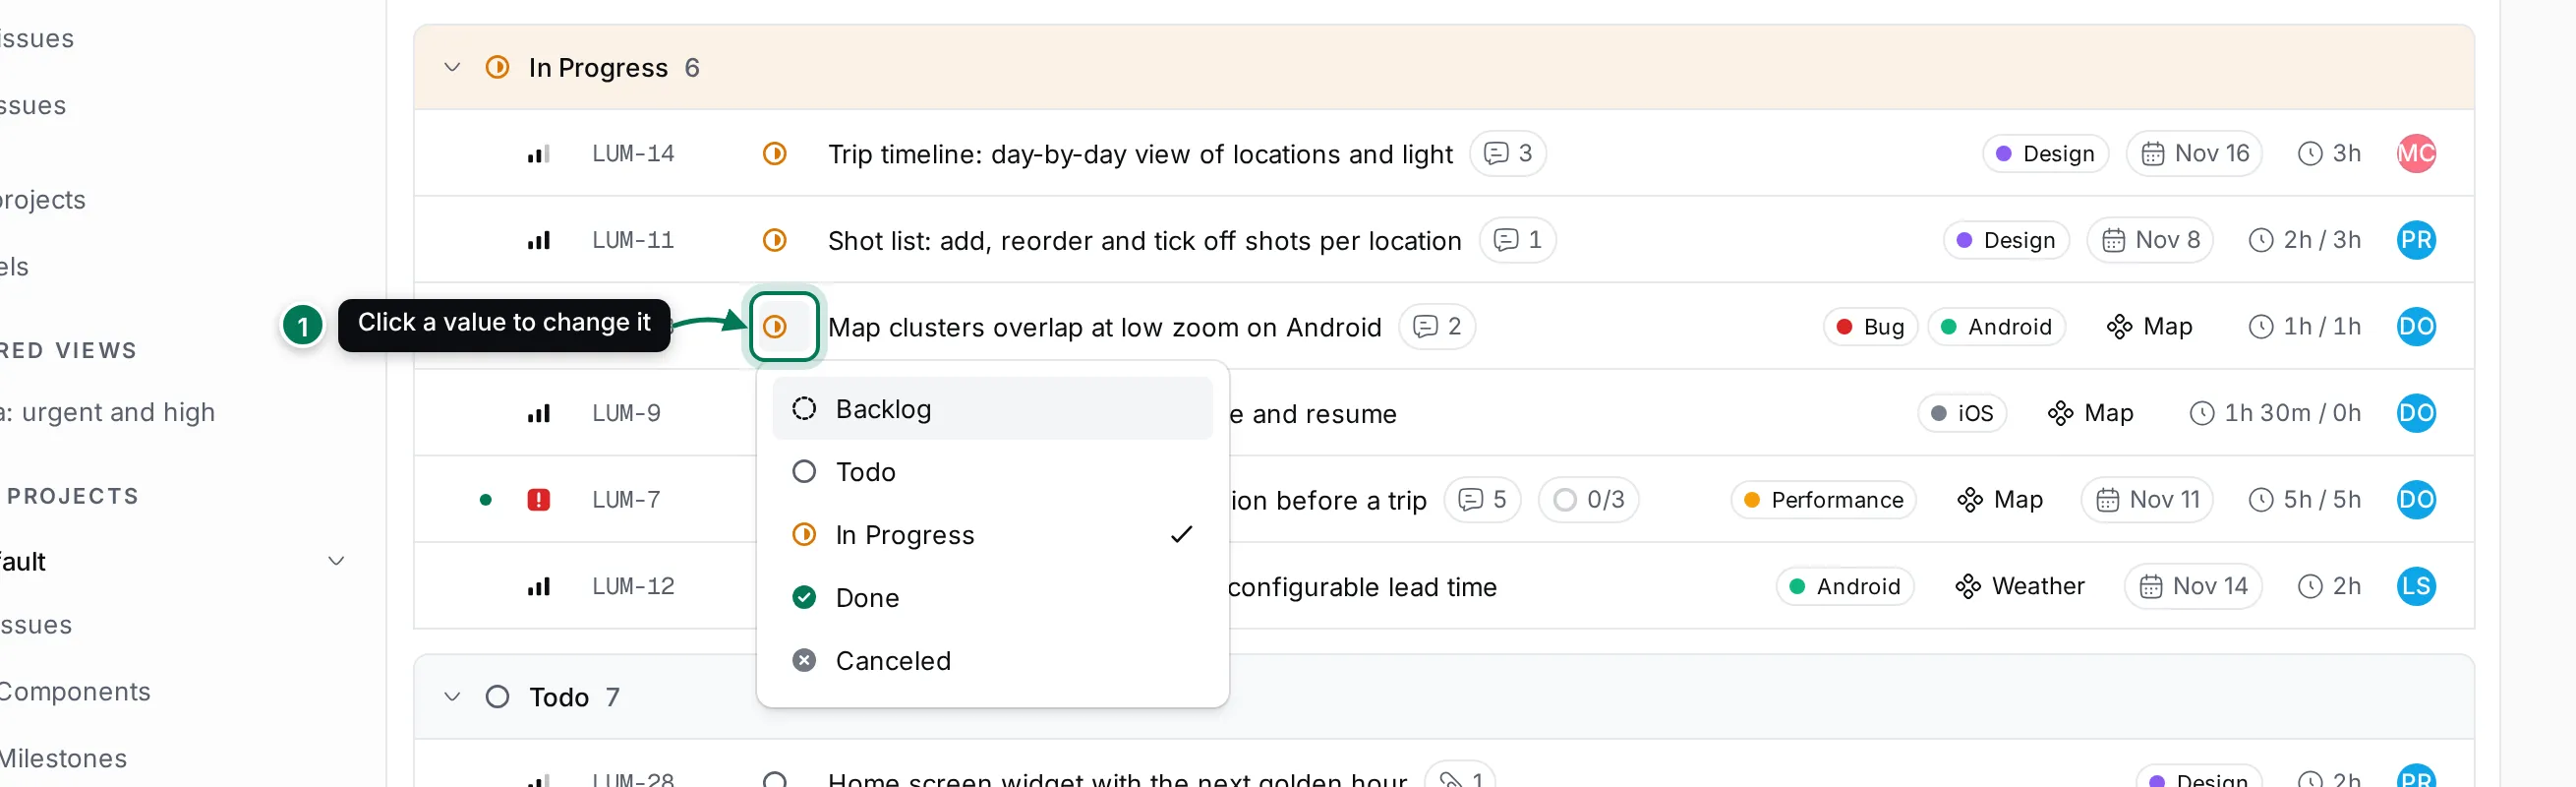
You don’t have to open an issue to change it. In a list, each value in a row is a button too:
- Click the value you want to change, such as the status icon (1).
- Pick the new value. The row updates straight away and moves to its new group.
A few properties need more explanation:
- Due date opens a calendar with quick picks such as in 7 days. Overdue dates turn red in lists.
- Start date and Deadline are for planning around the due date. Scheduling is Auto or Manual: a manual issue keeps its dates when the dates of the issues it depends on change.
- Labels shows a chip per label. Click × on a chip to remove it, or Add label to pick or create one.
- Component and Milestone list the ones of the issue’s project. See labels, components and milestones.
- State history lists each status the issue has been in and for how long.
- Project, Created by, Created and Updated are for reference and can’t be changed here.
Write in the description
Section titled “Write in the description”Click the description to edit it. Changes save as you type, and Saved appears under it. Several people can edit at once.
- Type / for headings, lists, to-dos, tables, images, code blocks, dividers and diagrams.
- Type @ to mention a person, document or issue. A mentioned issue shows as a chip with its ID and title.
- Select text for formatting: bold, links, colors, quotes and more.
- Paste or drop images and files on the description to attach them.
Comment
Section titled “Comment”Type in Leave a comment… under Activity and click Comment, or press Ctrl + Enter. Use @ to mention someone; they get a notification.
Hover over a comment to react with an emoji, reply in a thread, pin it, save it for later, or edit and delete your own. Use the filter at the top of Activity to show only comments, changes, attachments, mentions or pinned items.
Attach files
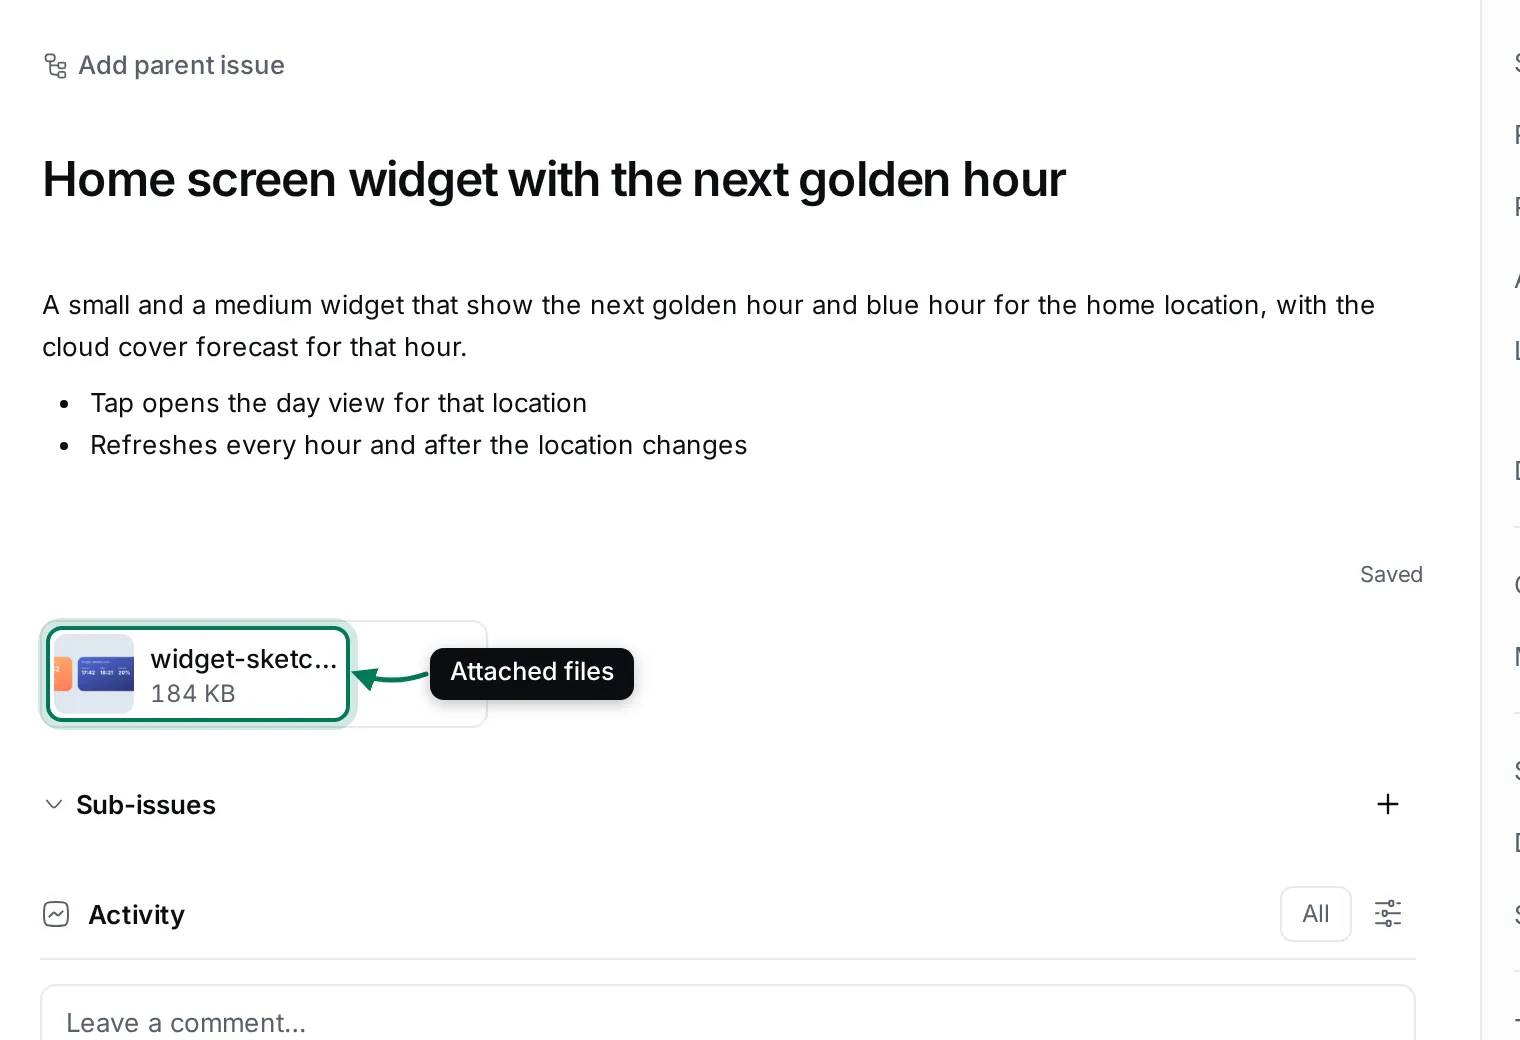
Section titled “Attach files”While you edit the description, click the paperclip (Attach files) in its toolbar and pick the files. They appear under the description. Click a file to preview it, or hover over it to download or delete it.
Follow an issue
Section titled “Follow an issue”The Collaborators row lists the people who get notifications about the issue. People are usually added when they create the issue, are assigned to it or comment on it. Click the row to add or remove people, including yourself.
Issues you collaborate on appear in the Subscribed tab of My issues. See search, filters and saved views.
Estimate and report time
Section titled “Estimate and report time”Each issue has an Estimation in hours. Time you spend is added as time reports; Spent time is their total and Remaining time is what’s left of the estimate. Lists show the time as spent / estimate, for example 2h / 3h.
-
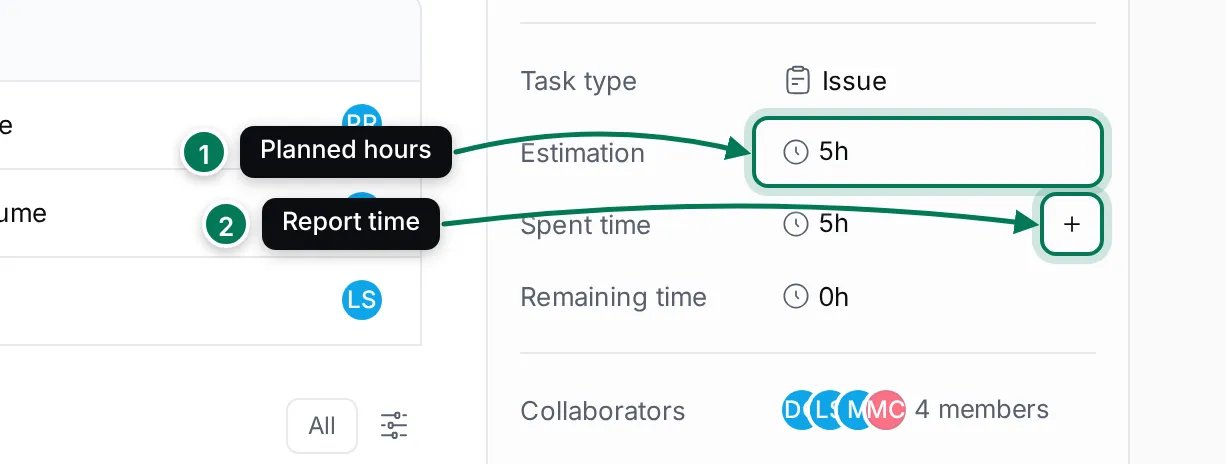
To set the estimate, click Estimation (1), type the hours and confirm. You can type
1.5,1h 30mor90m. -
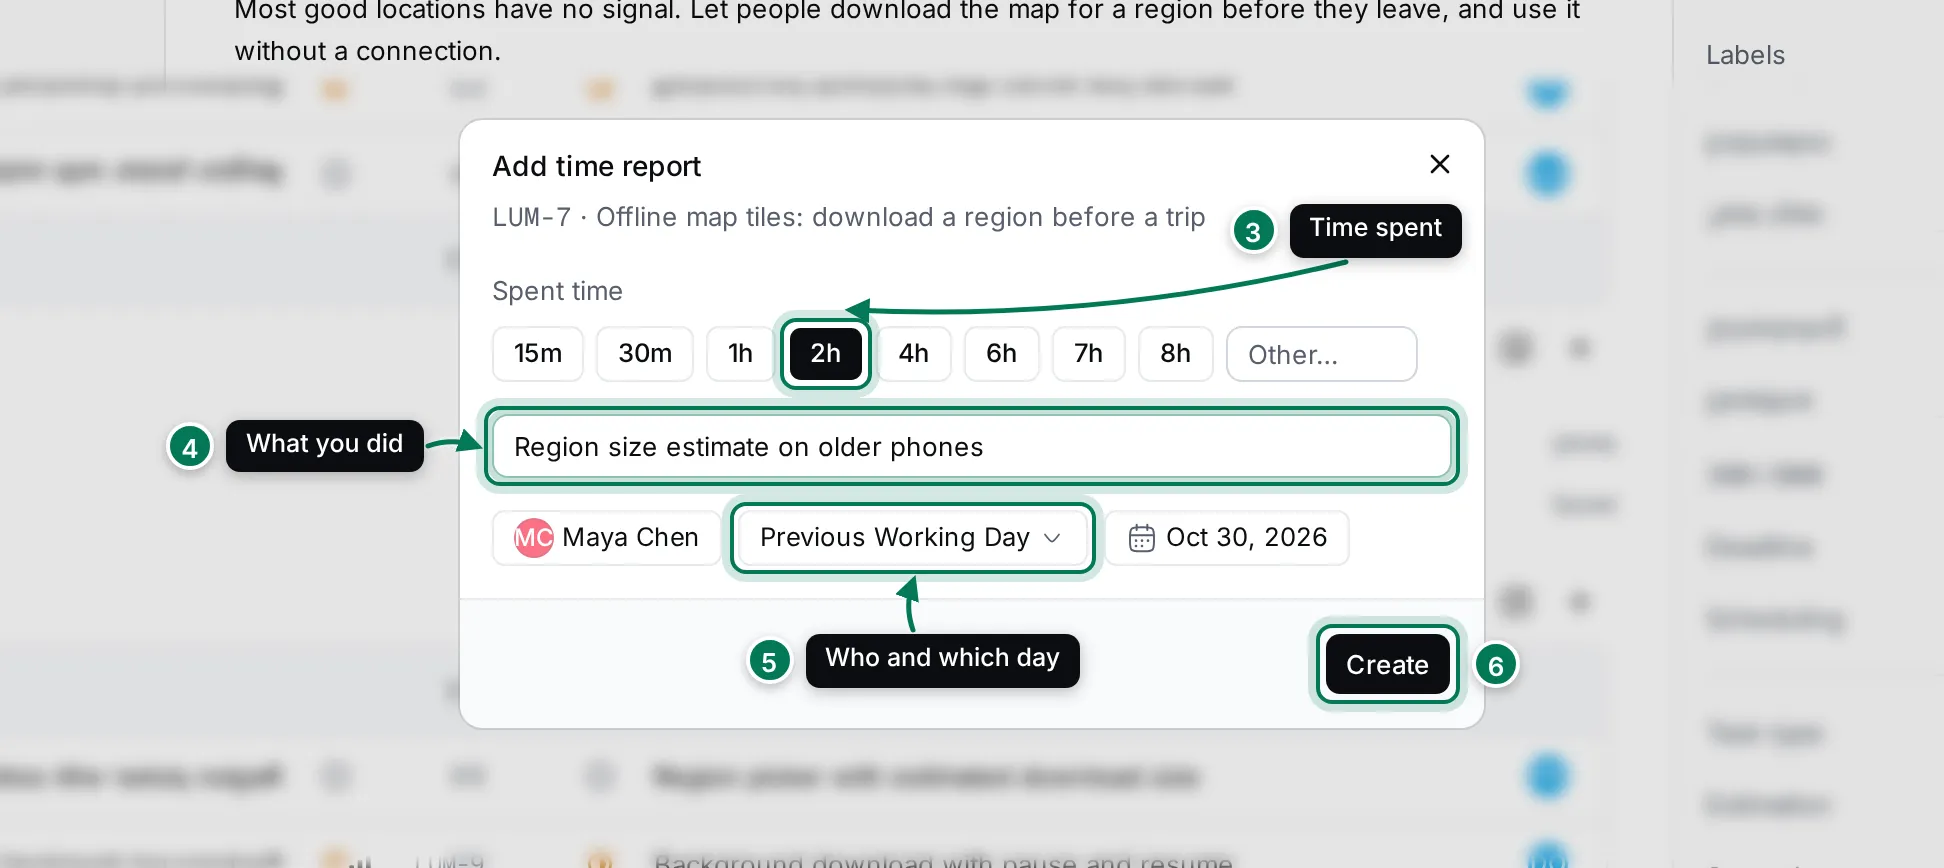
To report time, click + next to Spent time (2). It’s also in the issue’s menu as Add time report, and the T key opens it for the focused issue in a list.
-
Pick a duration such as 2h, or type one in Other… (3).
-
Optionally, describe what you did (4).
-
Check the person and the day (5). The day starts on the project’s default, Previous Working Day or Current Working Day; pick a date to change it.
-
Click Create (6).
Click Spent time to see every report on the issue and remove one if it was wrong.