Create issues
An issue needs only a title. Everything else (status, priority, assignee, labels, dates) can be set when you create it or later on the issue page.
Create an issue
Section titled “Create an issue”-
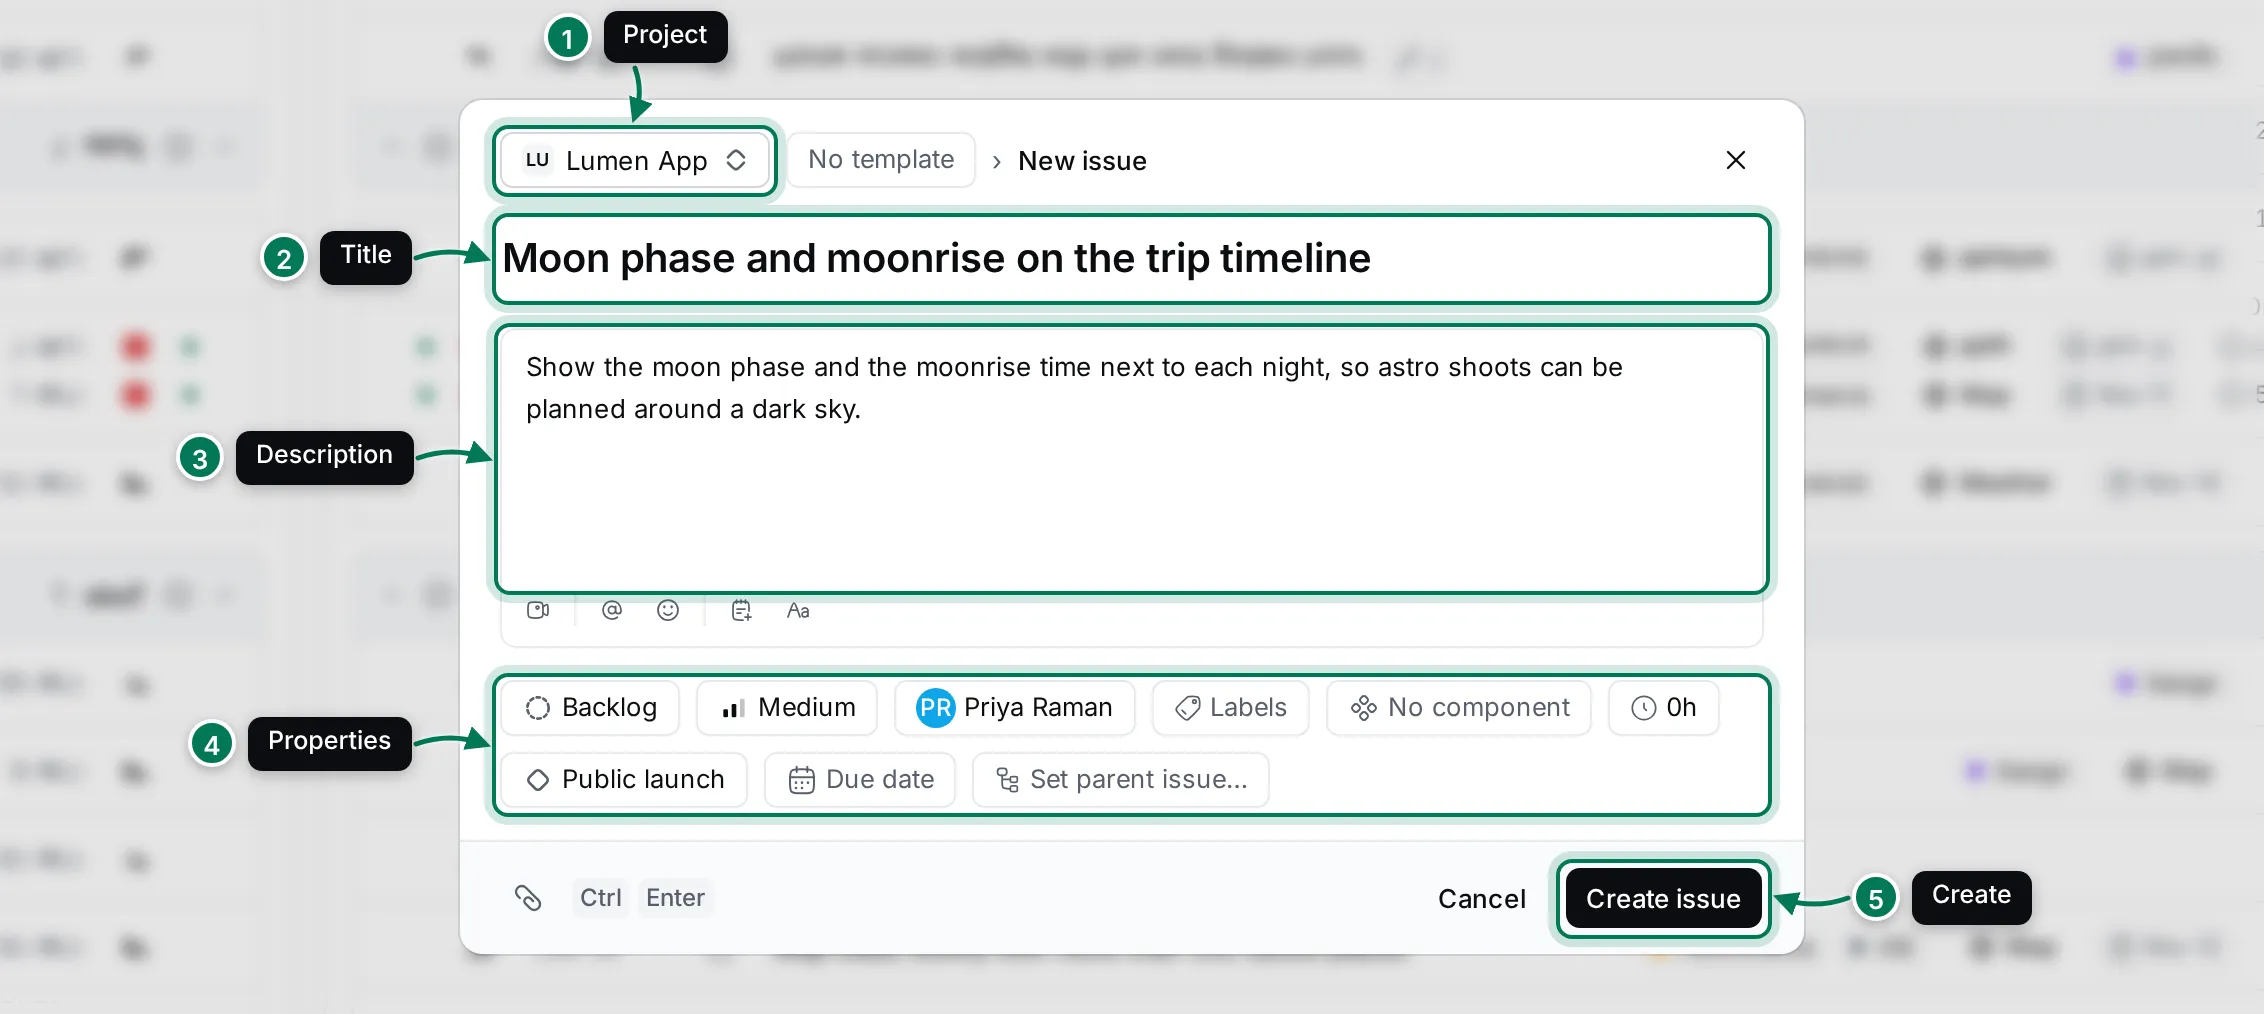
Click New issue in the navigator or at the top of the list, or press C. The dialog opens in the project you’re looking at. To file the issue somewhere else, click the project chip (1) and pick another project.
-
Type the Issue title (2).
-
Optionally, add a description (3). It’s a full editor: type / for headings, lists, tables, images and code, and @ to mention people, documents or other issues.
-
Set the properties with the chips under the description (4): status, priority, assignee, labels, component, estimate, milestone, due date and parent issue. Each chip opens a picker you can search.
-
Click Create issue (5), or press Ctrl + Enter. A message shows the new issue’s ID, with a link to open it.
To attach files, click the paperclip at the bottom left of the dialog. Files upload straight away and are attached when the issue is created.
Create an issue in a group
Section titled “Create an issue in a group”Hover over a group header in the list, such as Todo or a person’s name, and click +. The new issue starts with that group’s value, so an issue added to the Todo group starts in Todo.
Drafts
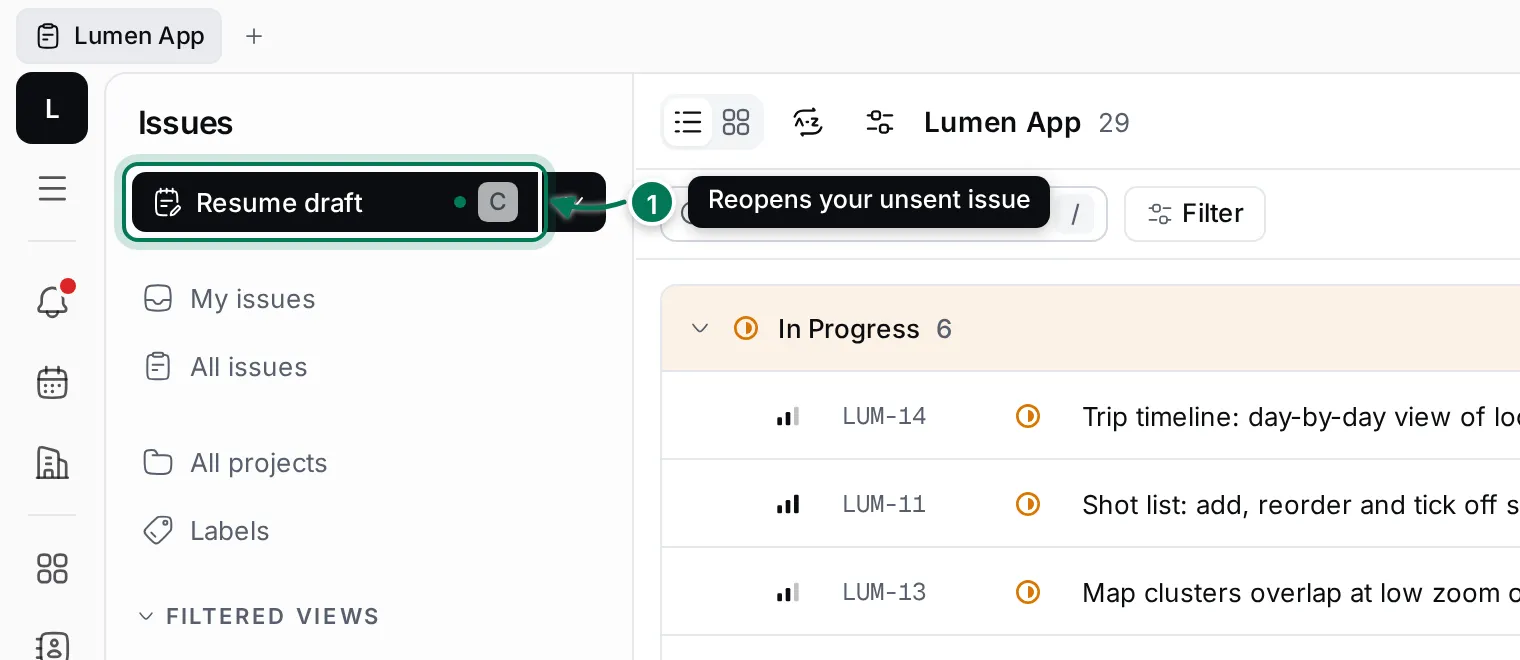
Section titled “Drafts”If you close the dialog with Esc or by clicking outside it, nothing is lost. The button in the navigator changes to Resume draft with a small dot, and clicking it (or pressing C) brings the issue back as you left it.
To throw a draft away, open it and click Cancel or ×, then confirm with Ok. Drafts are kept in your browser, so they don’t follow you to another device.
Start from a template
Section titled “Start from a template”Templates fill in a new issue for you: its title, description, properties and sub-issues. They’re useful for work you file often, such as bug reports.
-
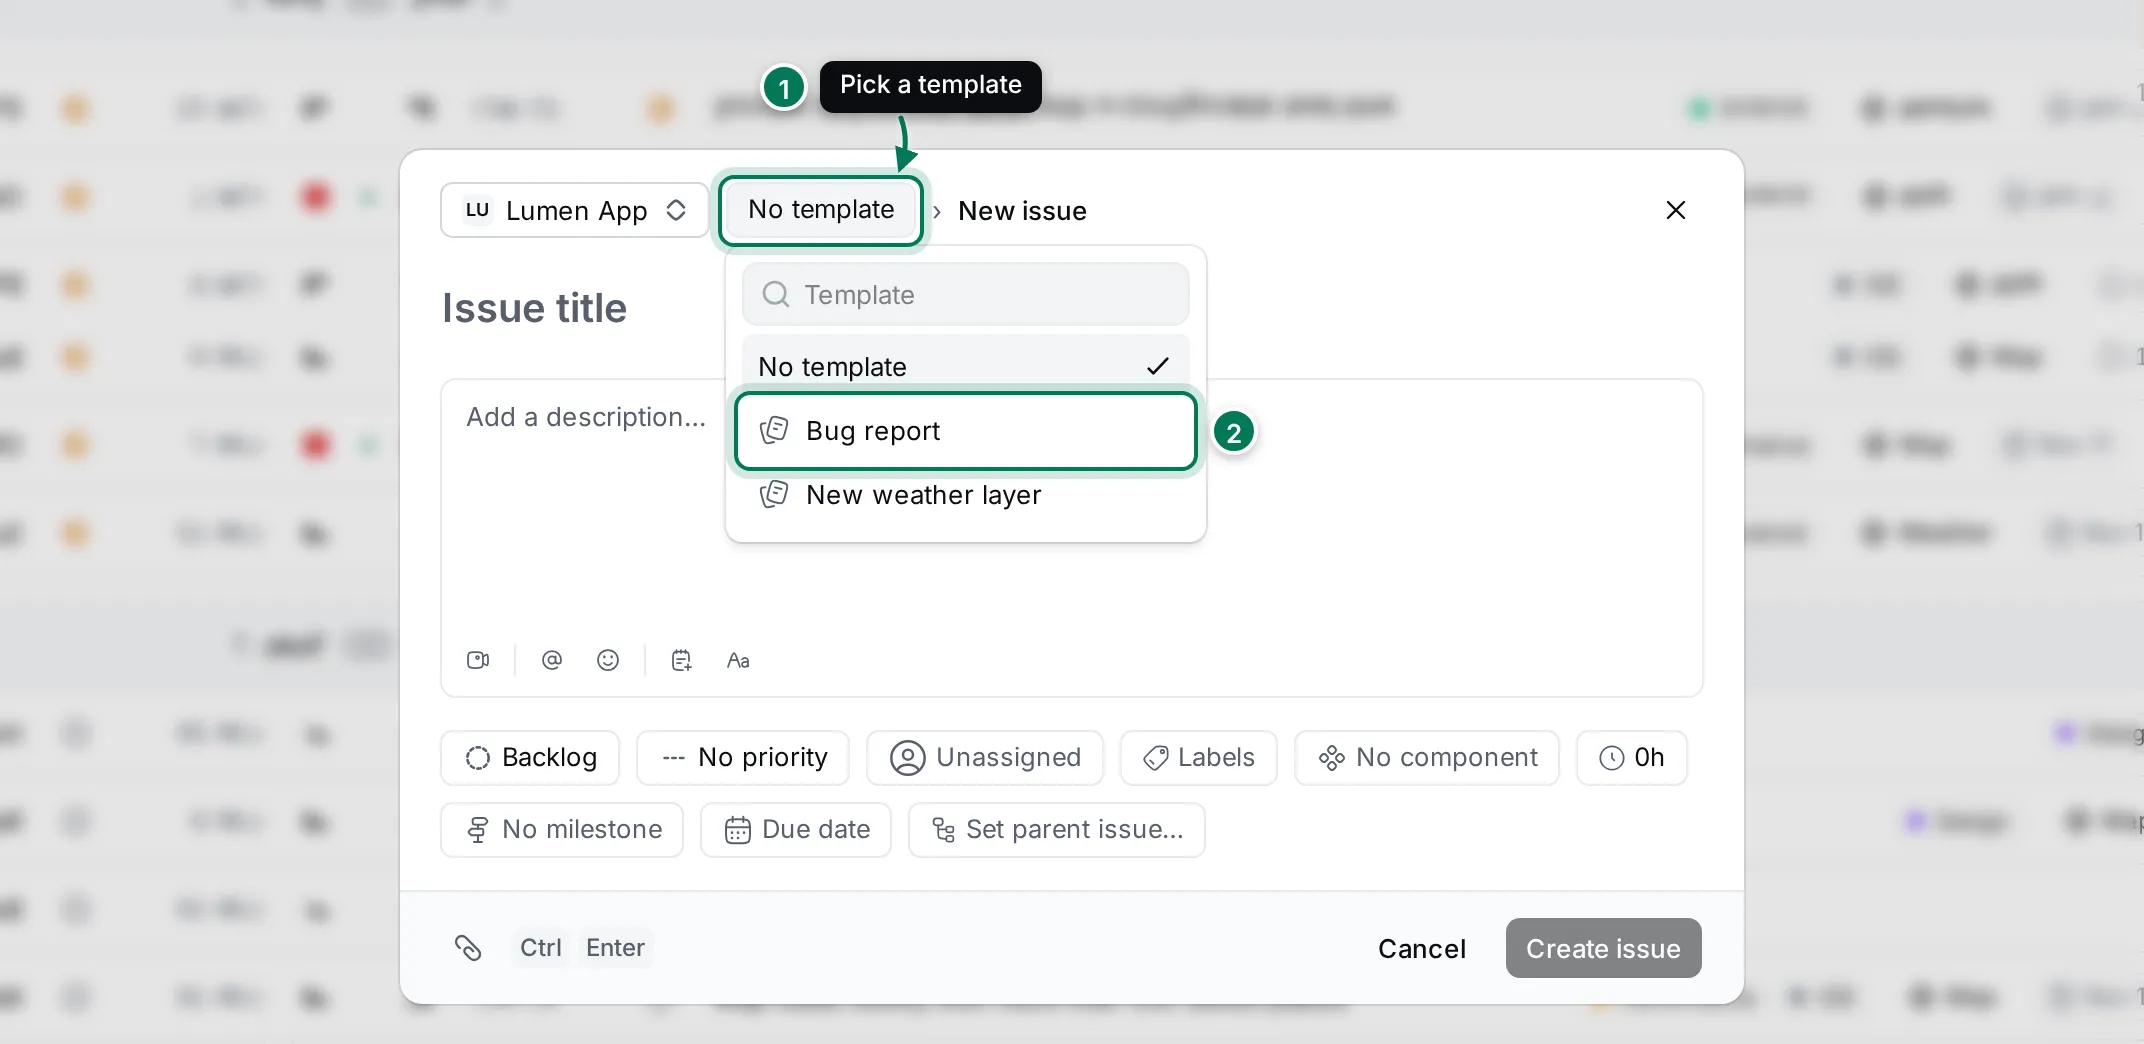
In the New issue dialog, click No template (1).
-
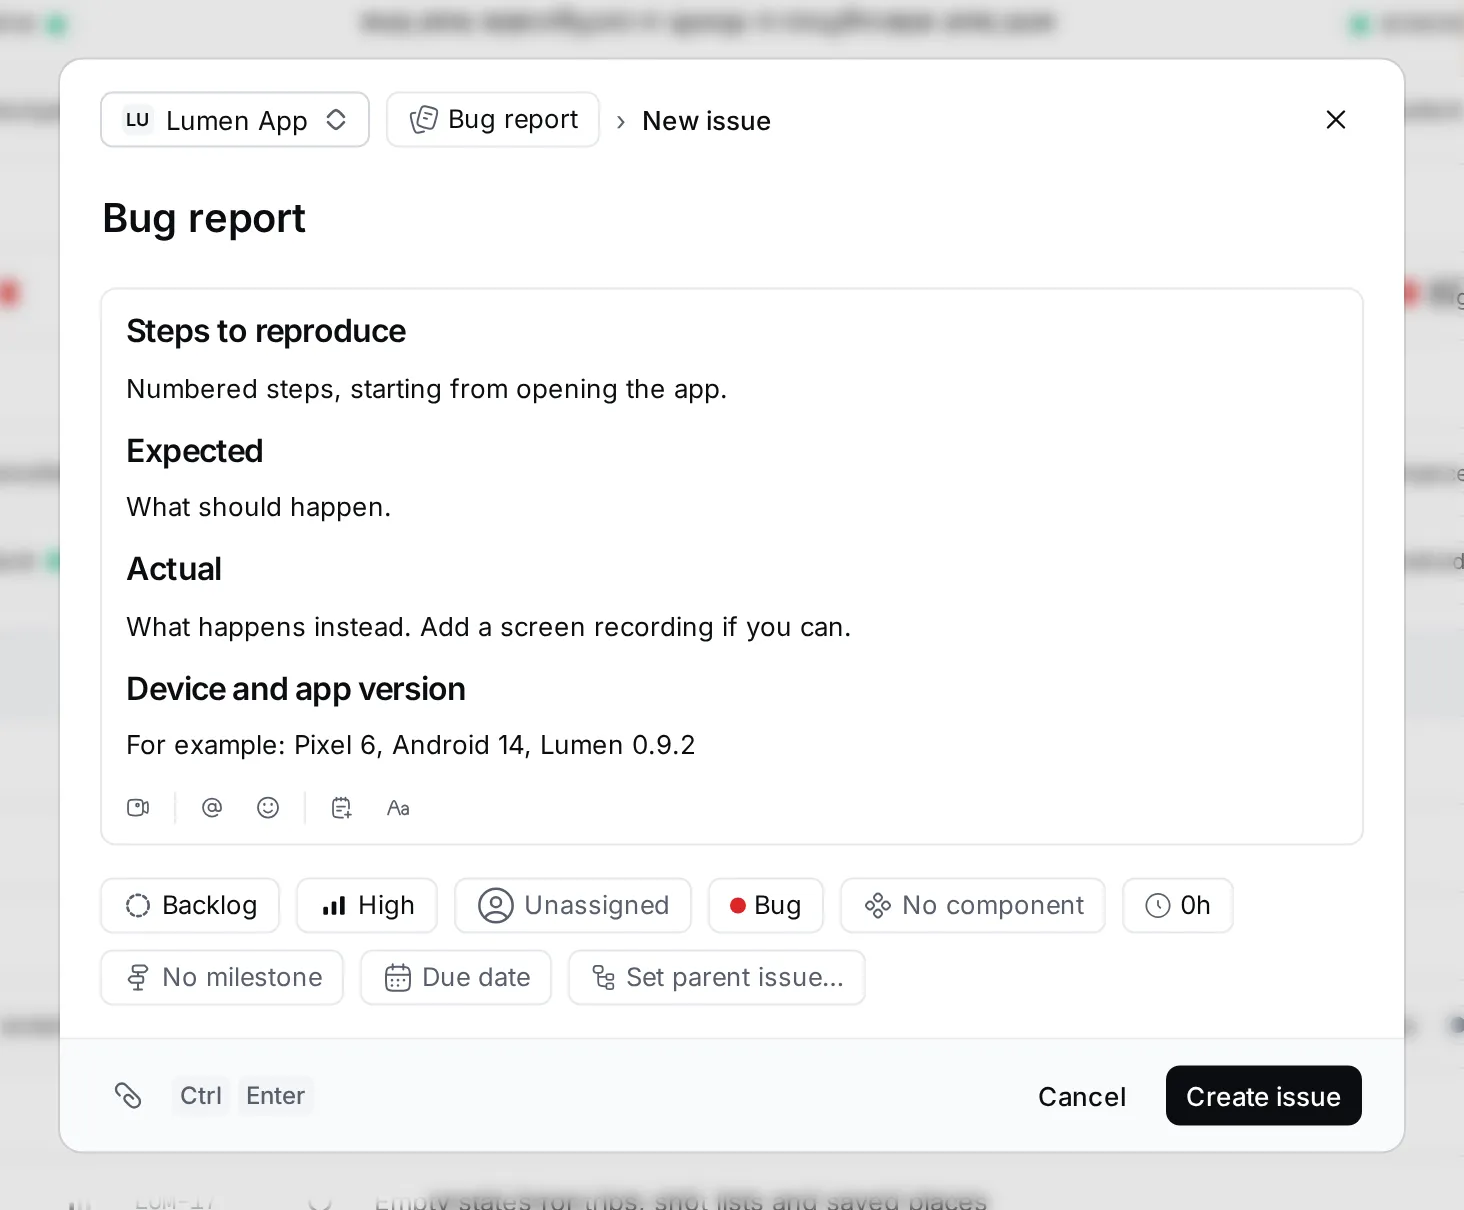
Pick a template (2). The title, description and properties fill in.
-
Change what you need and click Create issue. If the template has sub-issues, they’re created too.
Create a template
Section titled “Create a template”Each project has its own templates.
-
In the navigator, open Templates under the project (1).
-
Click New template (2).
-
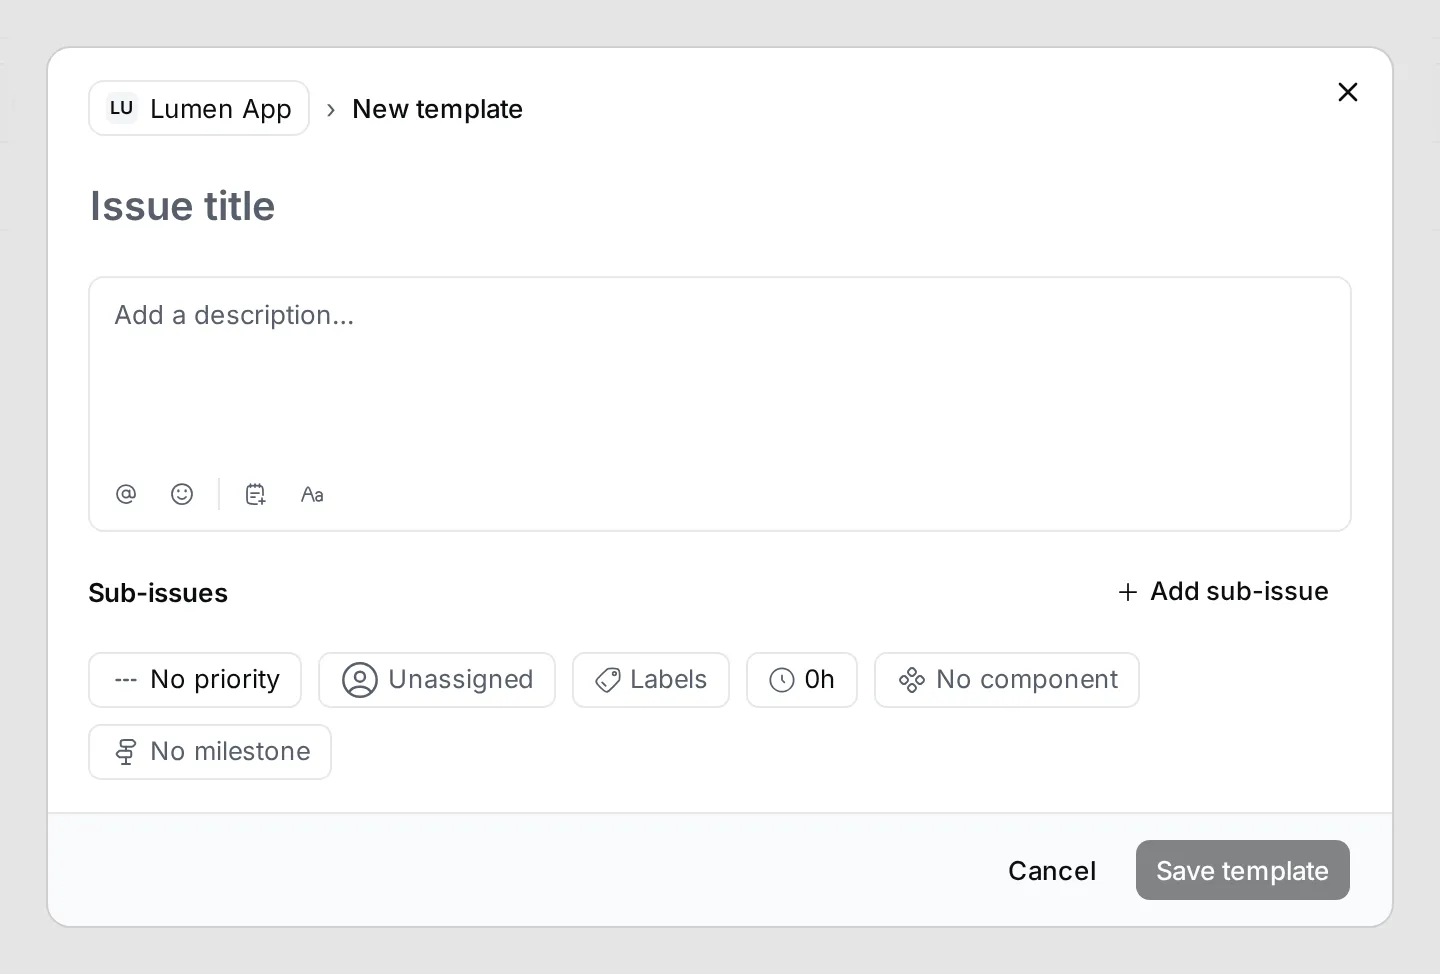
Type the Issue title and description that new issues should start with.
-
Set the priority, assignee, labels, estimate, component and milestone. To add sub-issues, click Add sub-issue and give each one a title, priority and assignee.
-
Click Save template.
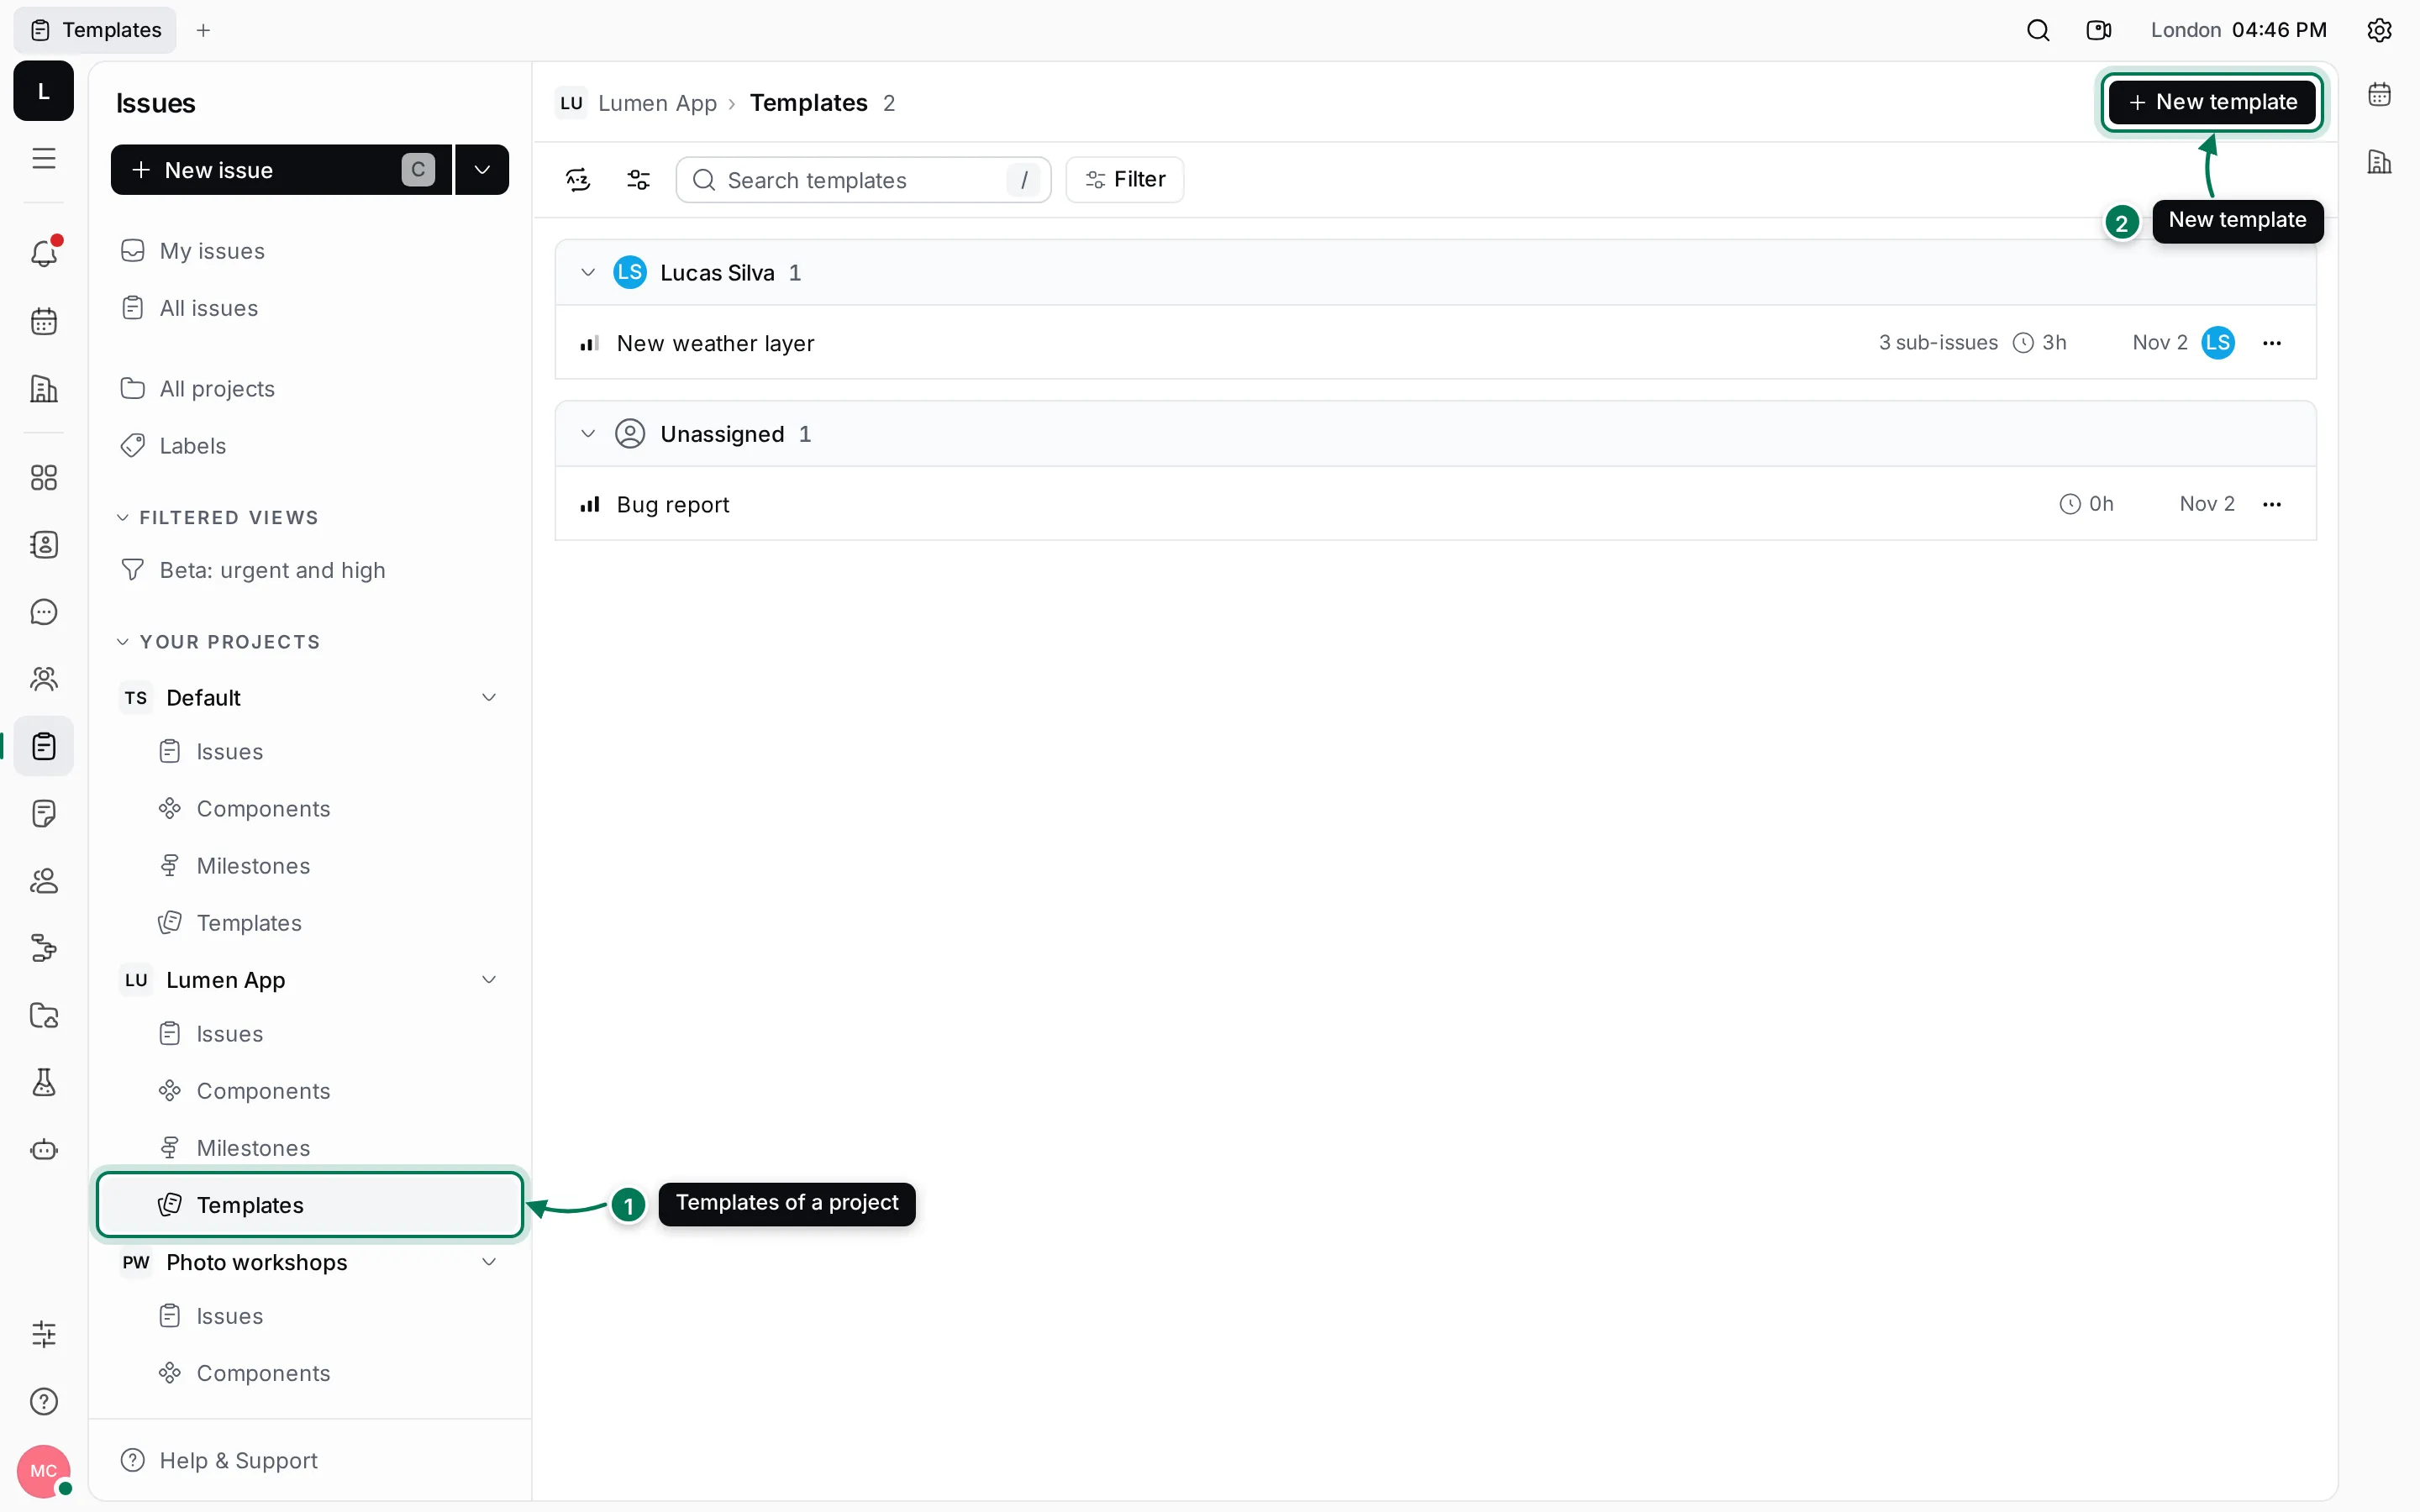
Click a template in the list to edit it. To delete it, click … on its row. Issues created from a template stay as they are when the template changes or is deleted.