Work // Test management
Projects and suites
A test project holds a team’s test library, plans and runs. Suites inside it group the test cases, much like folders. Lumen Labs has one project, Lumen QA, with a suite for each area of the app.
Create a test project
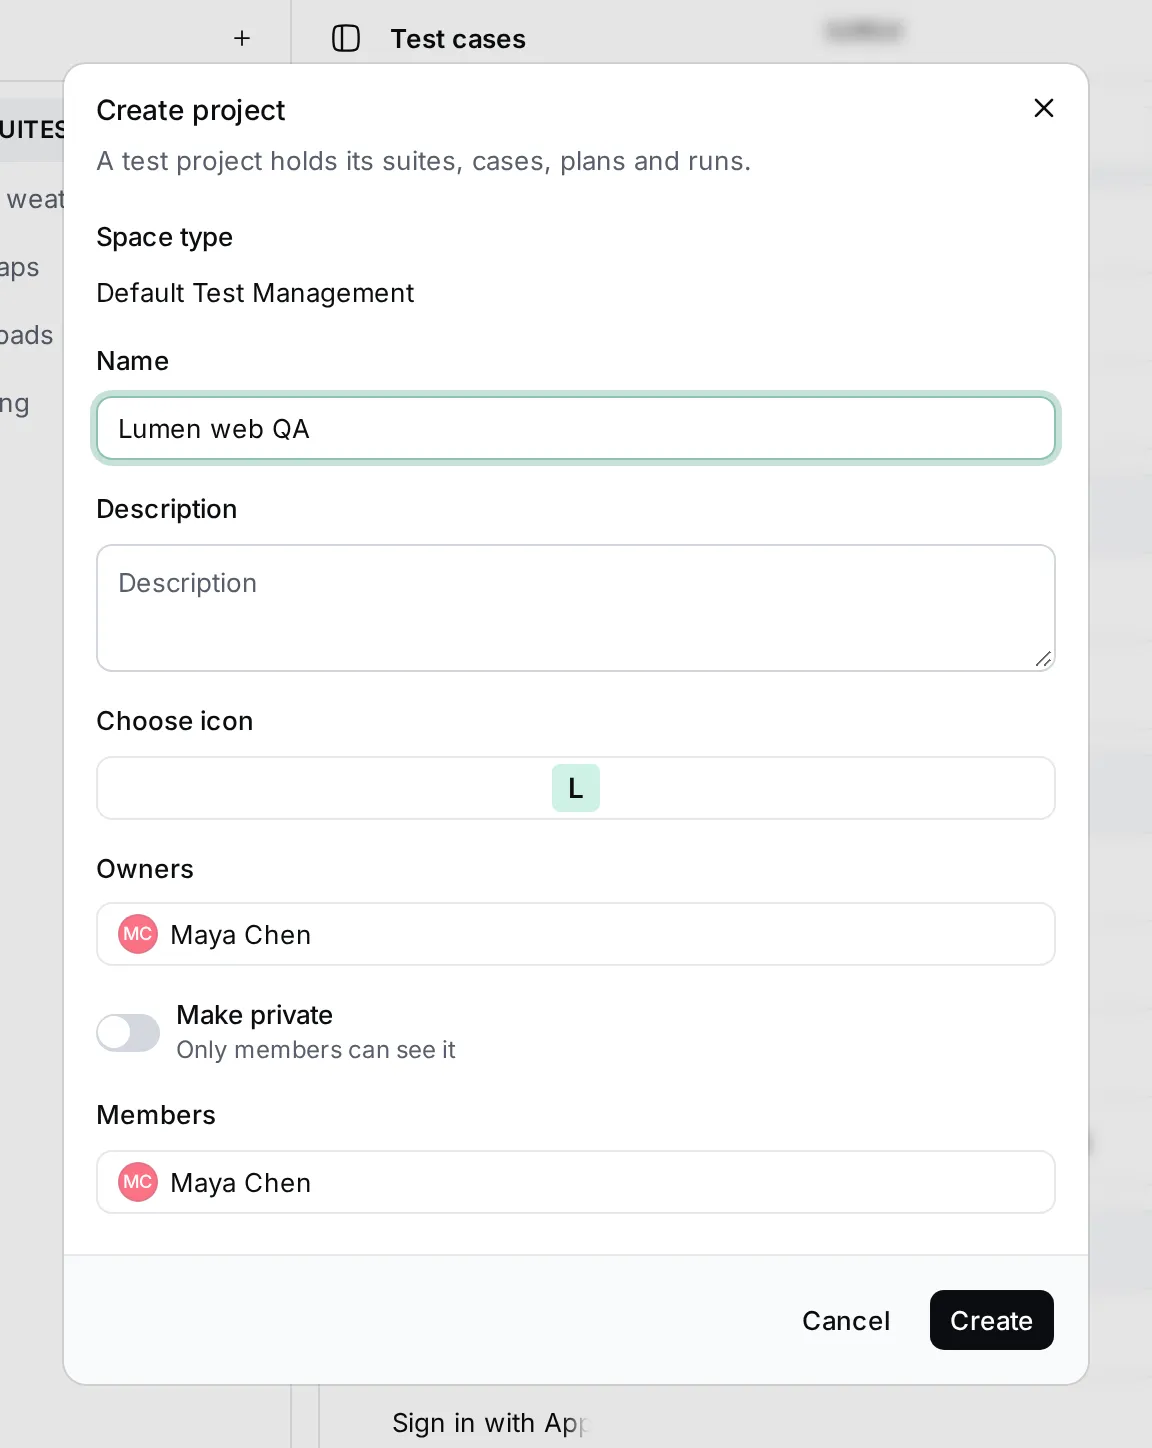
Section titled “Create a test project”- Open Test management. If there is no project yet, click Create project. Otherwise, open the menu next to New test case and choose Create project.
- Enter the project’s Name and, if you like, a Description. Click the tile under Choose icon to pick an emoji for the project.
- Choose the Owners and Members. Turn on Make private if only members should see the project.
- Click Create.
The project appears under Projects in the navigator, with its Test library, Test plans and Test runs.
Change a project
Section titled “Change a project”Hover the project in the navigator and click ⋯, or right-click it.
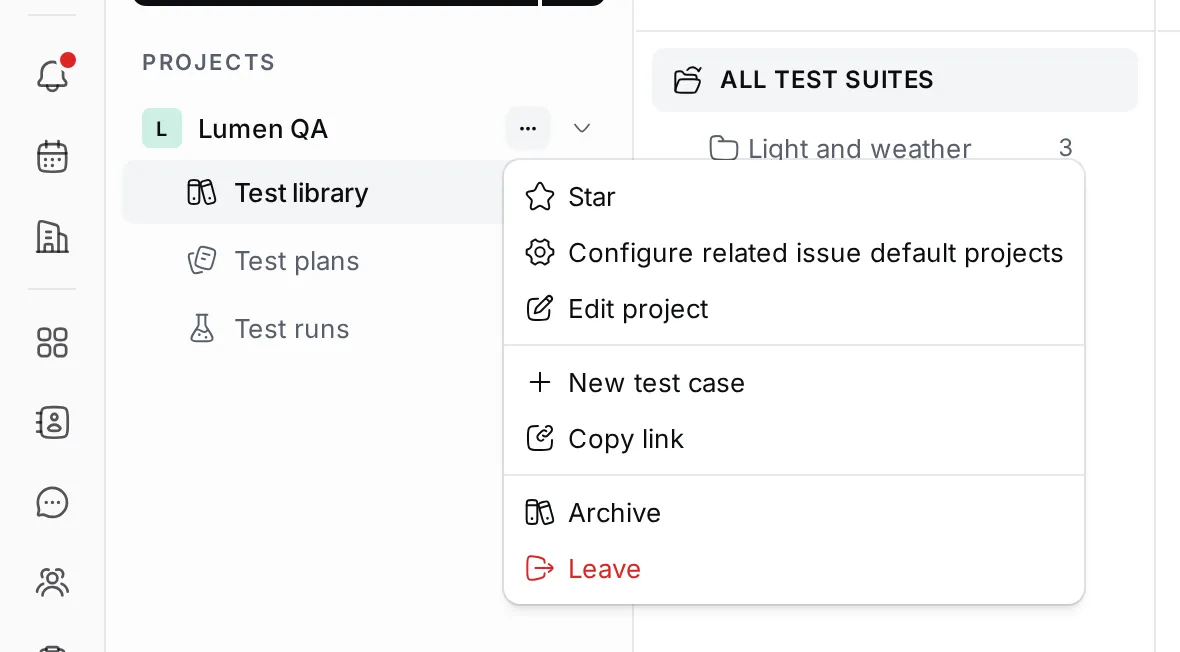
- Star moves the project to a Starred section at the top of the navigator.
- Edit project changes the name, icon, owners and members. If the project type has roles, each role has its own people field here.
- Configure related issue default projects picks the Tracker project for issues created from this project’s tests. See Link tests to issues.
- Archive hides the project from the navigator, after you confirm.
- Leave takes you out of the project, after you confirm. People who aren’t members see Join.
Create a test suite
Section titled “Create a test suite”- Open the project’s Test library.
- Click + in the Test suites pane, or open the menu next to New test case and choose Create test suite.
- Enter the Suite name and, if you like, a description.
- To put the suite inside another one, pick it in the parent chip at the top. Leave No test suite for a top-level suite.
- Click Create test suite.
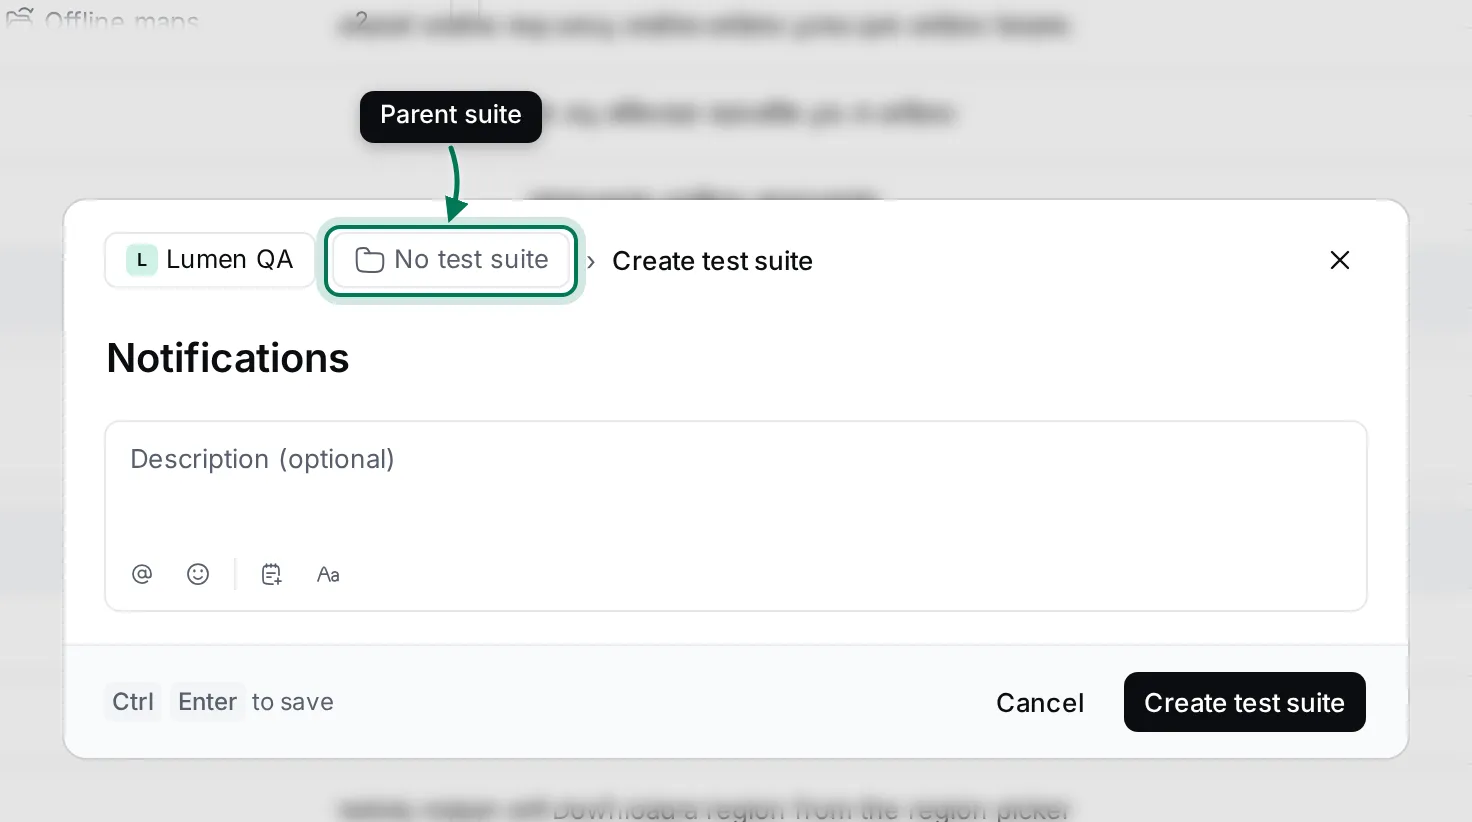
To add a suite inside an existing one, hover the suite, click ⋯ and choose Create test suite; the parent is filled in for you.
Work with suites
Section titled “Work with suites”- Click a suite to show only its cases. Click All test suites to see every case again.
- Click the arrow next to a suite to fold its sub-suites.
- Hover a suite and click ⋯ for Open, Open in new tab, Run (all its cases), Add relation, Copy link and Delete. Deleting a suite asks you to confirm.
- Open a suite to edit its name and description and see its sub-suites, its cases and its history.
- Click the pane button next to Test cases to hide or show the suites pane.
Next, write the test cases.