Workspace settings
These pages change the workspace for everyone. Each one is visible only to the roles that may use it (see which pages each role sees).
Name, week start and access
Section titled “Name, week start and access”Settings › General is the workspace’s main page.
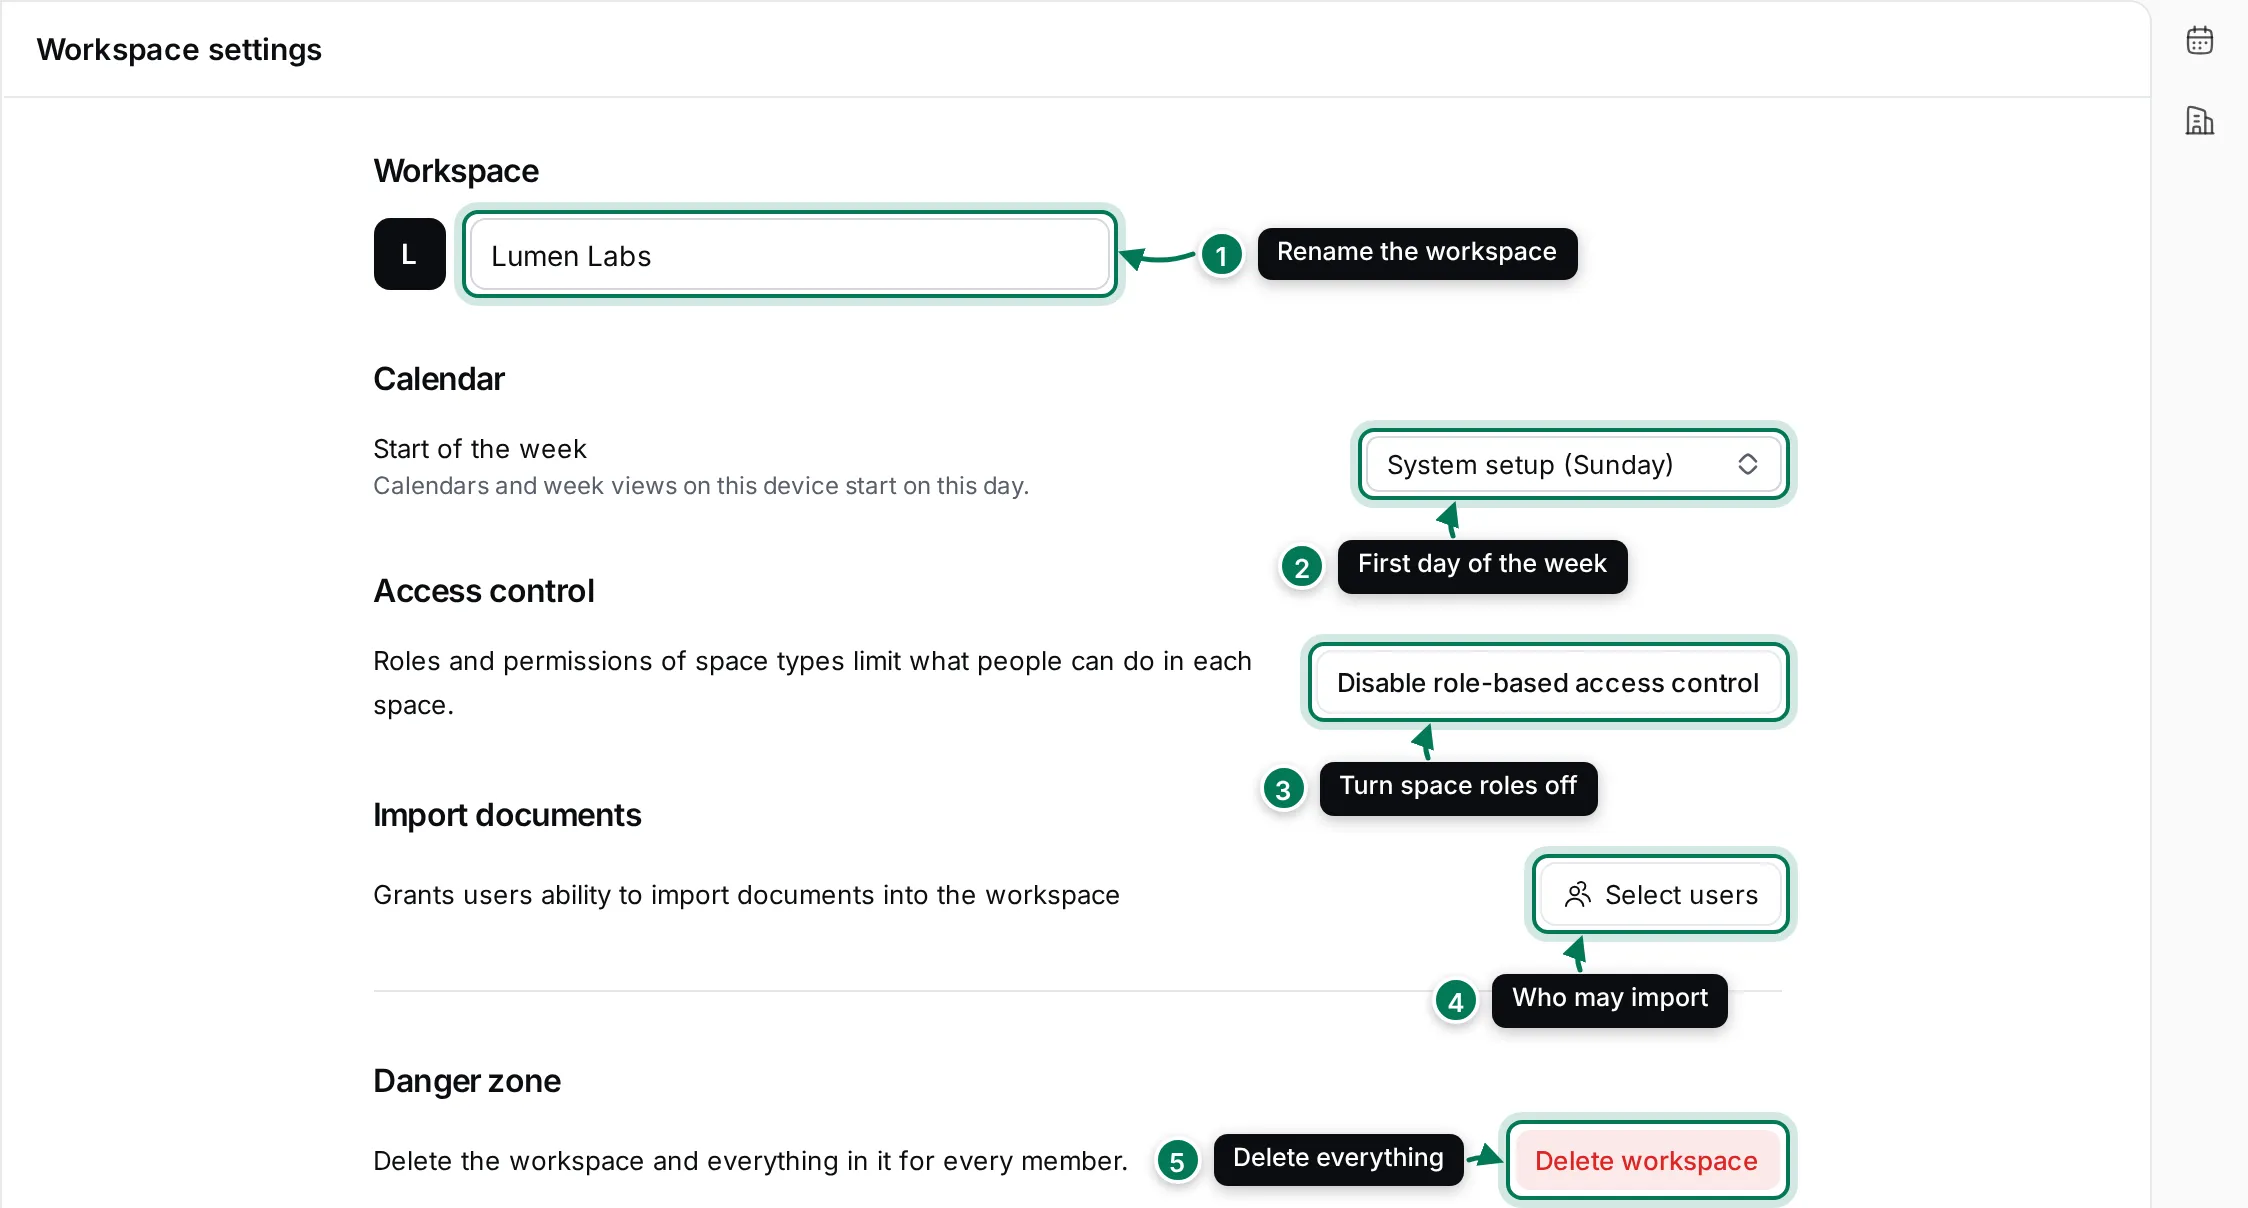
- Workspace: type a new name and click Save (or press Enter). Maintainers and owners can rename the workspace; everyone sees the new name in the workspace switcher.
- Start of the week: the first day of the week in calendars and week views. It applies to this device only.
- Access control: Disable role-based access control turns off the roles and permissions of space types, so everyone can do everything in every space they belong to. Owners only. Turn it back on with Enable role-based access control.
- Import documents: Select users chooses who may import documents into the workspace.
- Delete workspace deletes the workspace and everything in it for every member. You type the workspace’s name to confirm. Owners only; it can’t be undone.
Turn modules on or off
Section titled “Turn modules on or off”Settings › Configure (owners) lists every module with a switch, for example Calendar, Cards, Chat, Documents, GitHub, Email, Human resources, Office, Process configuration, Recruiting, Test Management, Tracker and Trainings.
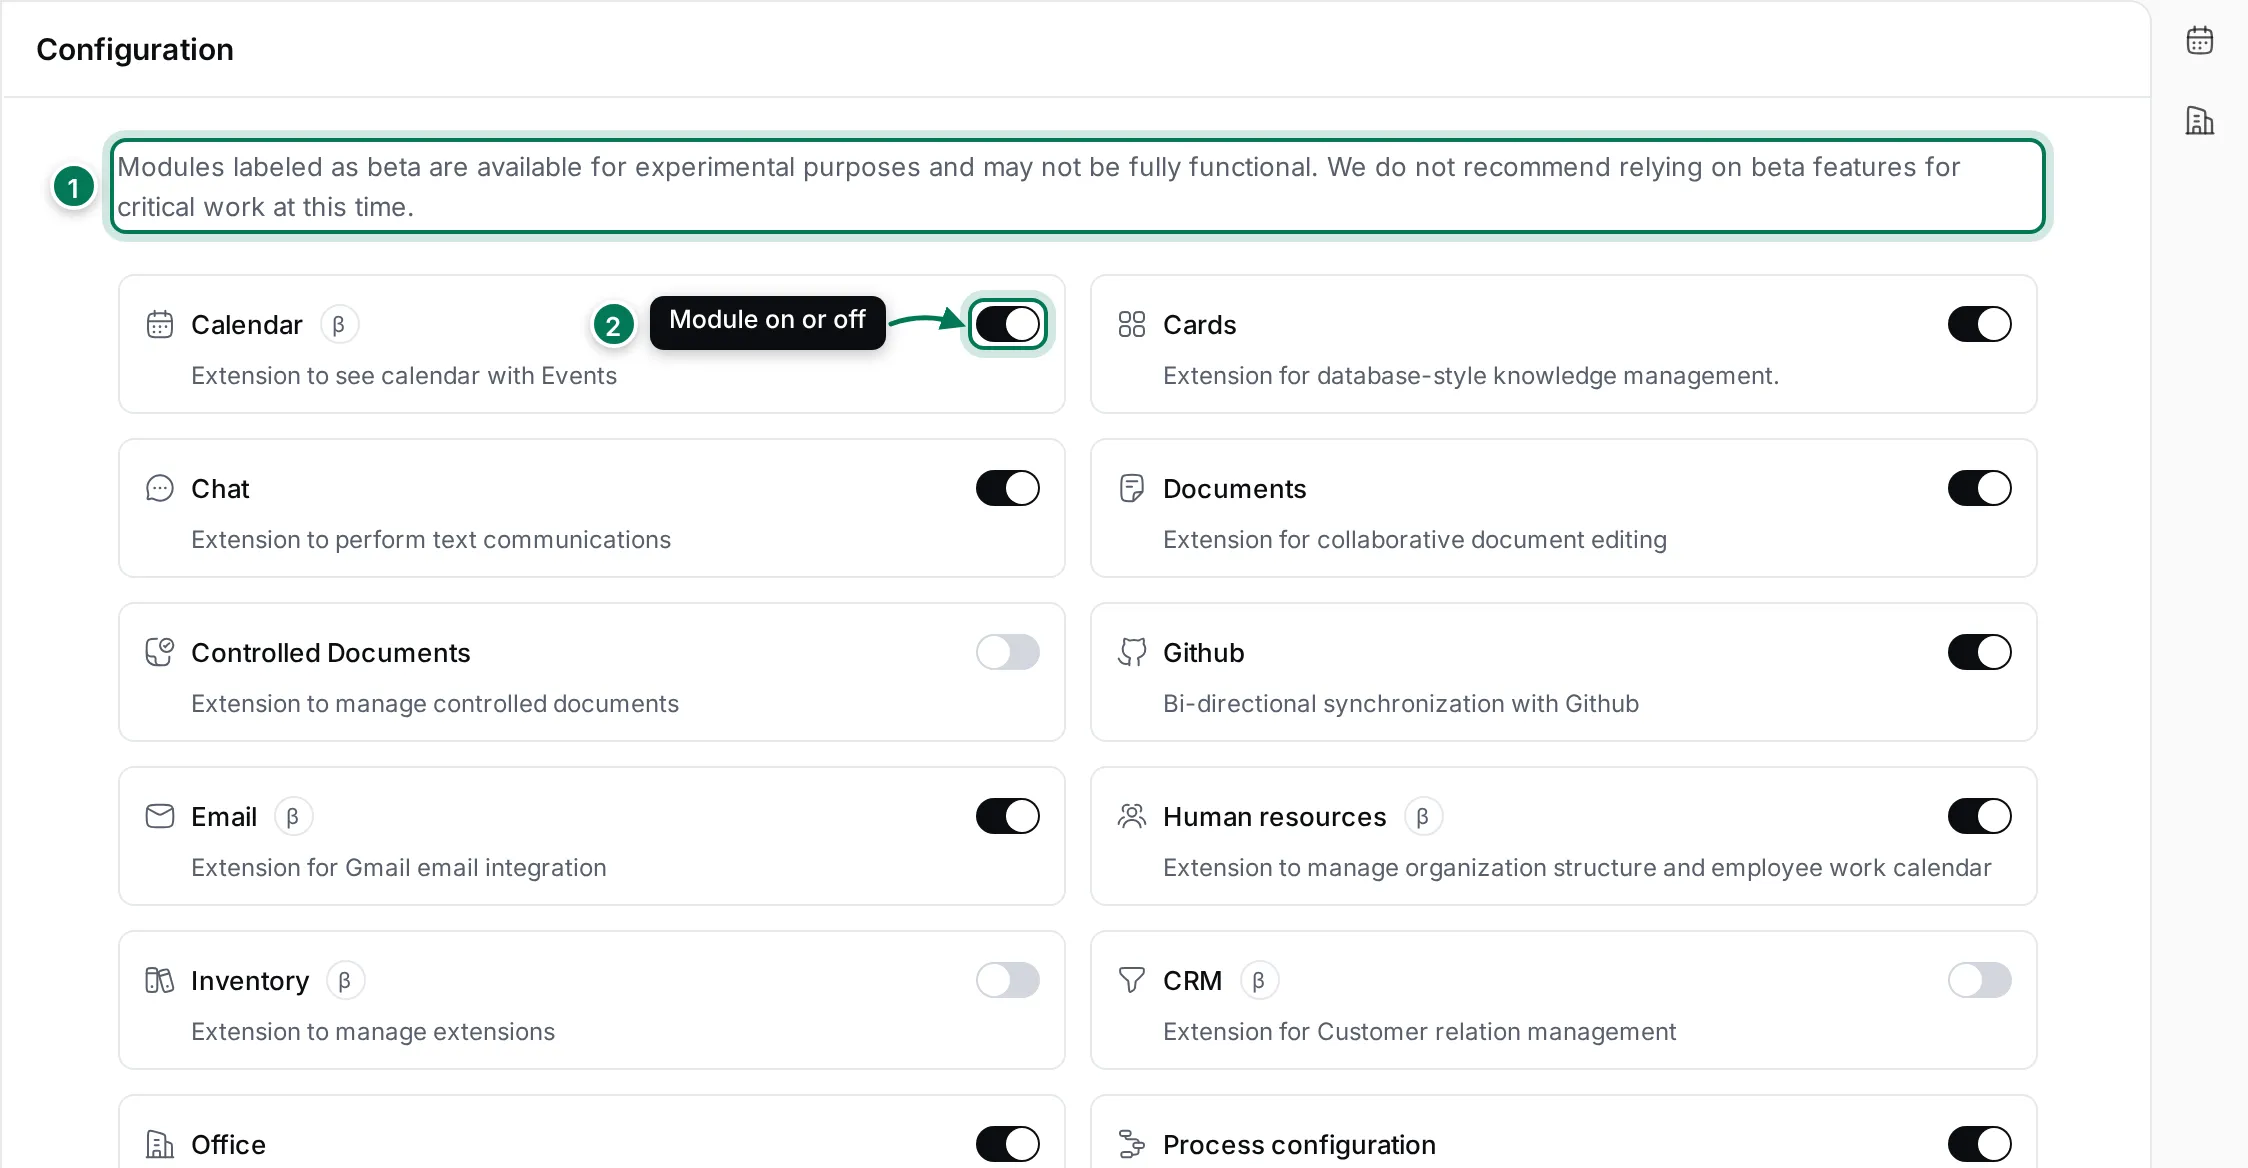
- Modules marked β are in beta: they are experimental and may not be complete, so don’t rely on them for critical work.
- The switch turns a module on or off for everyone. It saves at once.
A module that is off disappears from the apps and from settings such as Integrations and Notifications.
Space admins
Section titled “Space admins”Settings › Spaces (Maintainers and Owners) gives people the Admin role in every space at once: every project, teamspace and drive.
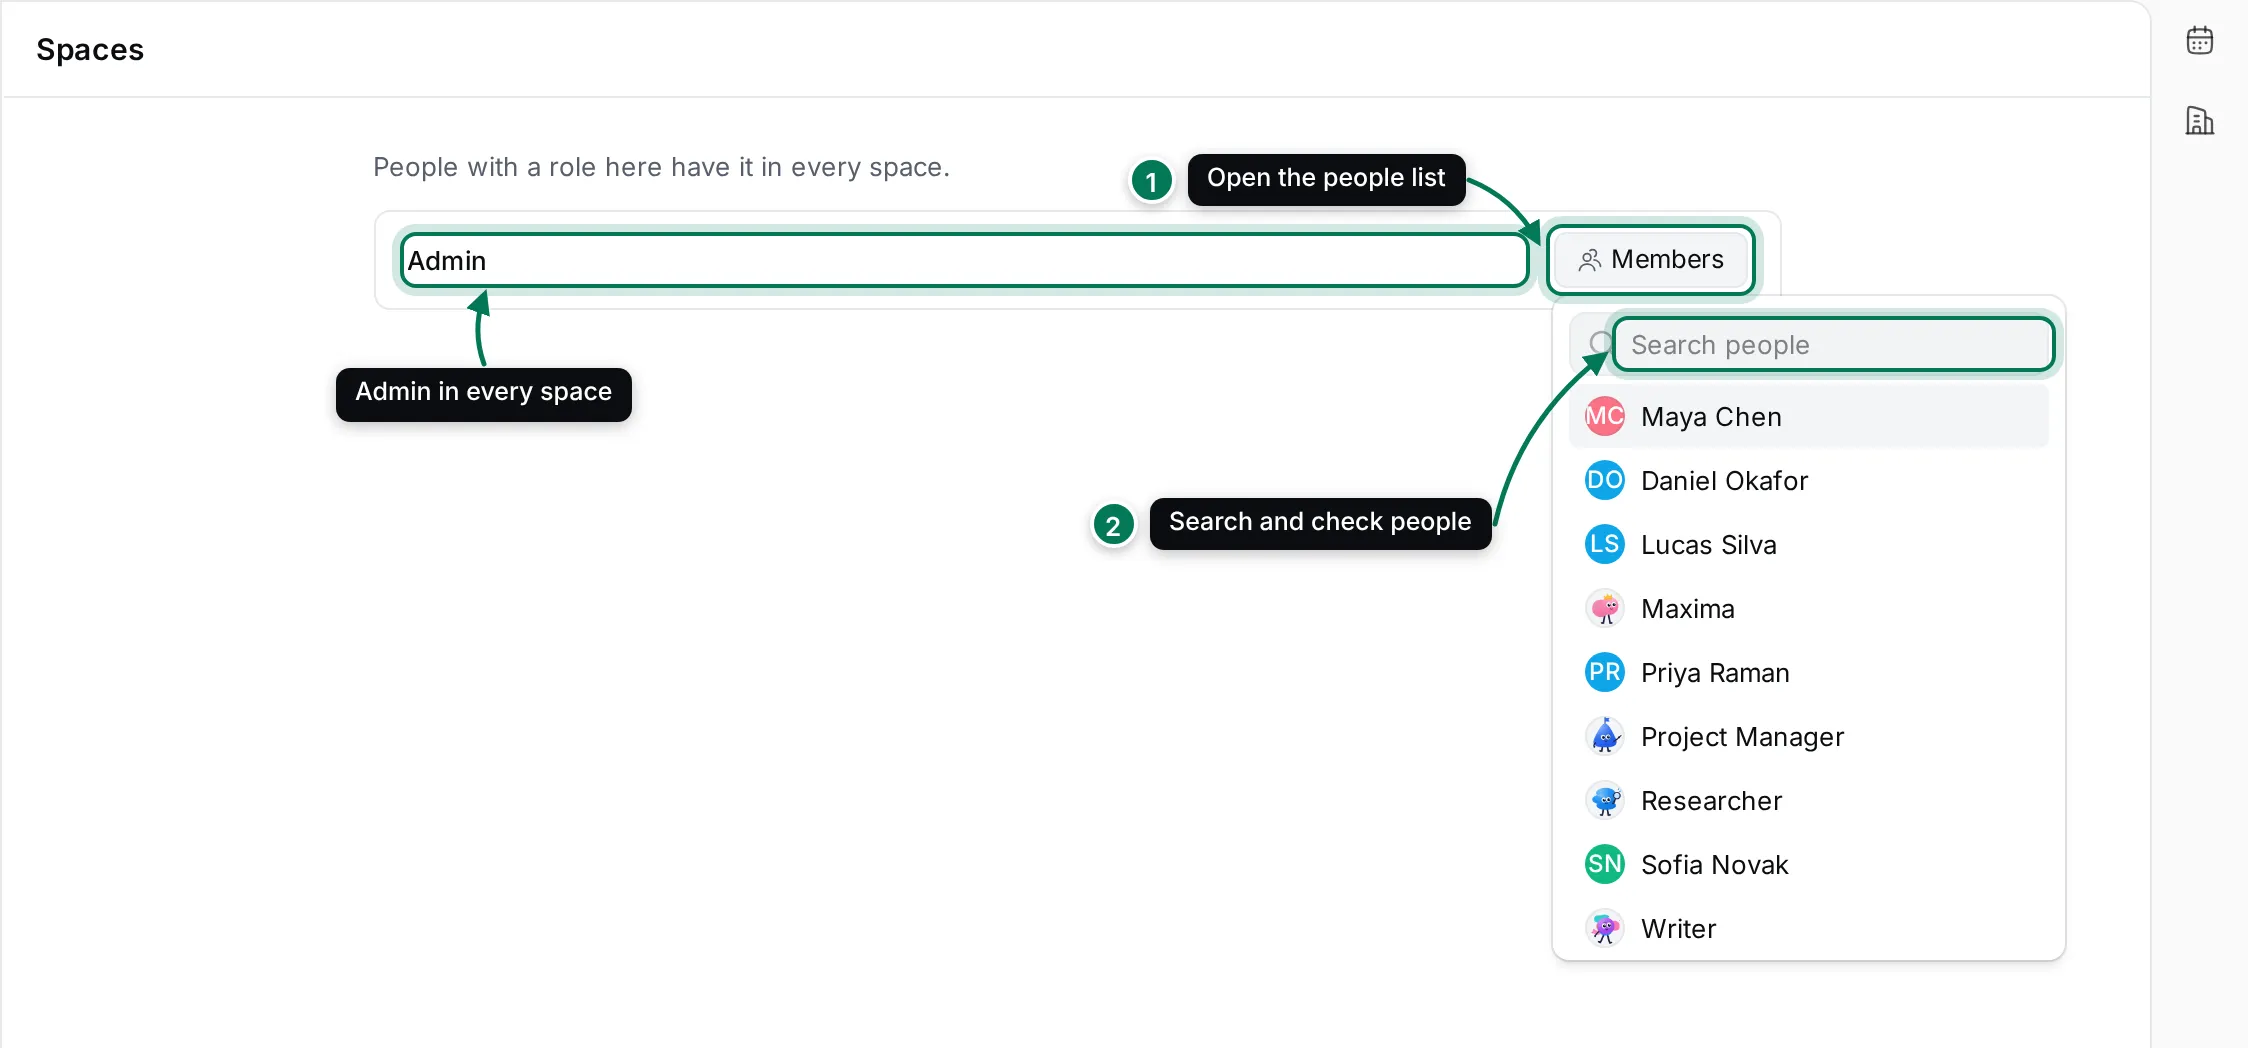
- Click Members next to Admin.
- Search for people and check them. Each click saves.
Office defaults
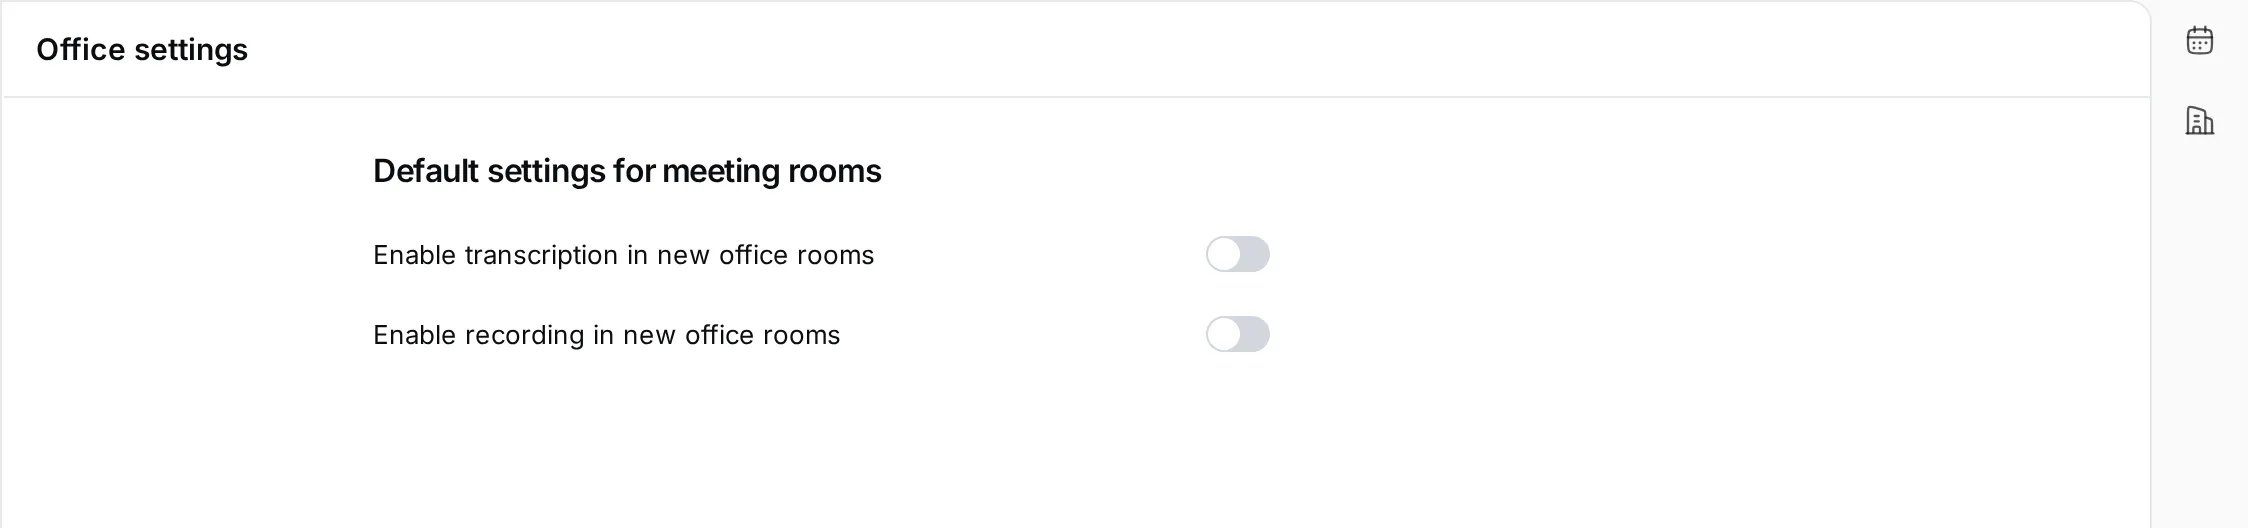
Section titled “Office defaults”Settings › Office settings (Maintainers and Owners) sets Enable transcription in new office rooms and Enable recording in new office rooms, the defaults for new rooms in Office.
Backups
Section titled “Backups”Settings › Backup (owners) shows the workspace’s backups: when the last one ran, how many there are, and how much data and files they hold. Until the first backup has run it says No backups are currently available.

Backups are made by your deployment’s backup service. To restore one into a workspace, use the Maxint Work CLI with an owner’s API token (below). To bring your data over from your old workspace, see Migrate from your old workspace.
API tokens
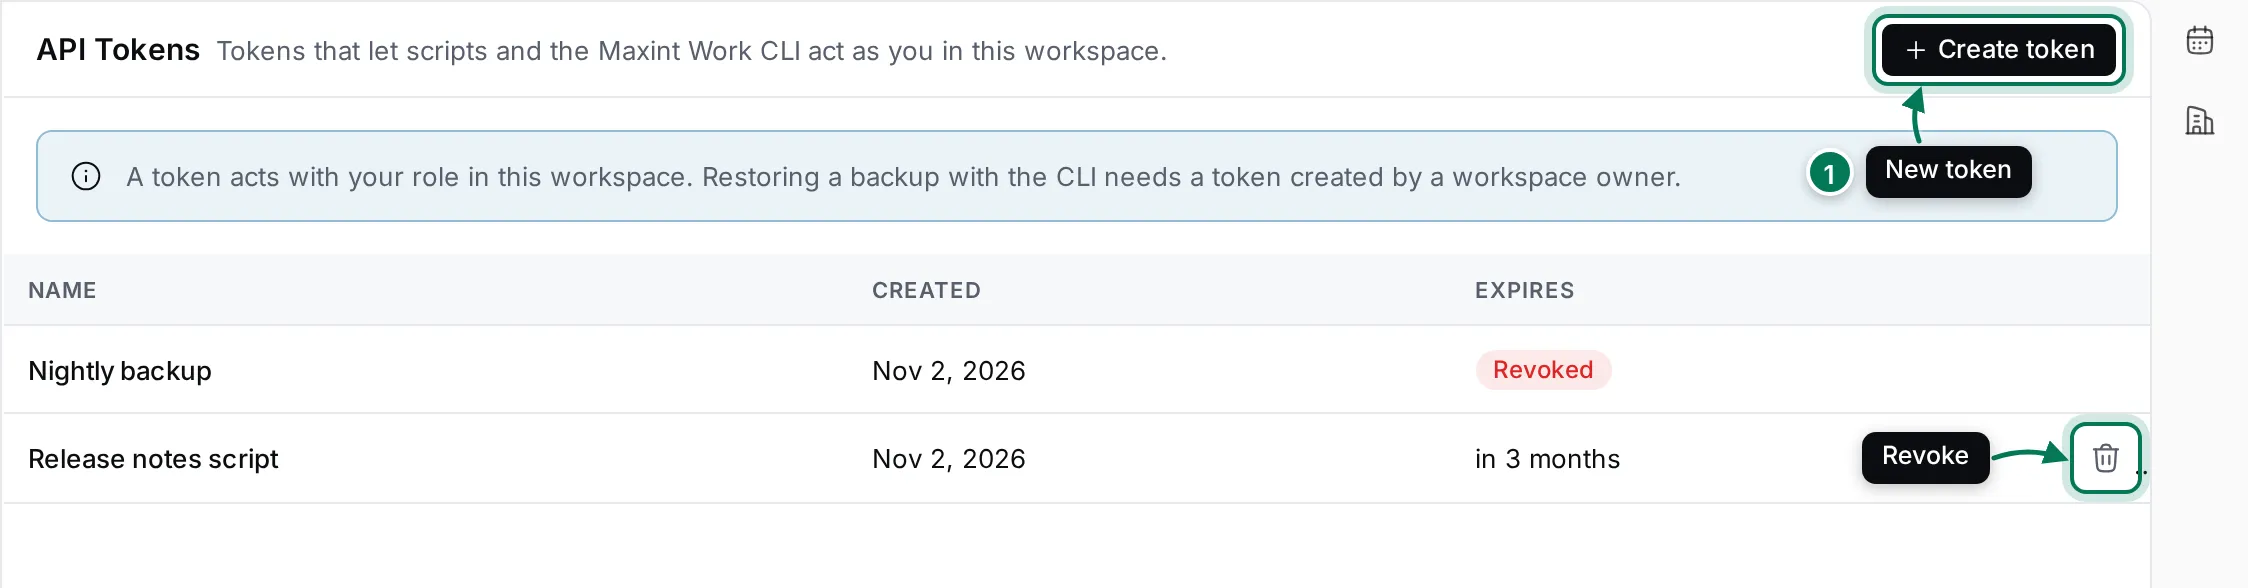
Section titled “API tokens”An API token lets a script or the Maxint Work CLI act as you in this workspace, with your role. Any member (User and up) can create tokens in Settings › API Tokens.
-
Click Create token.
-
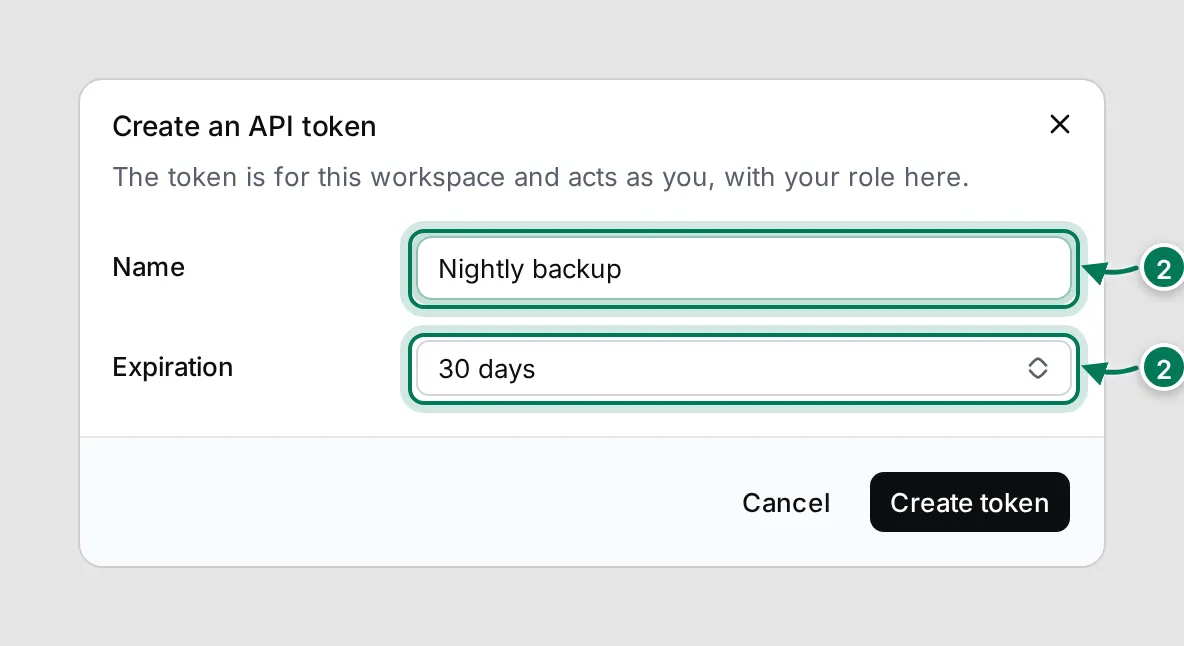
Name the token after what will use it, for example “Nightly backup”, and choose when it expires: 7, 30, 90 or 365 days.
-
Click Create token, then Copy. The token is shown only once.
The dialog also shows how to restore a backup with the CLI: set WORK_API_TOKEN to the token and run
npx @maxint/work-cli upload <backup>. Restoring needs a token created by a workspace owner.
To stop using a token, click its trash button (Revoke) and confirm. Revoked and expired tokens stay in the list, marked Revoked or Expired. To call the API with a token, see API tokens and the REST API.