Templates, emojis and related issues
Three small workspace settings that save time every day: text templates for replies you write again and again, custom emojis, and the project that related issues go to.
Text templates
Section titled “Text templates”A text template is a piece of text you insert into any message, comment or description. Settings › Text Templates (User and up) keeps them, in groups.
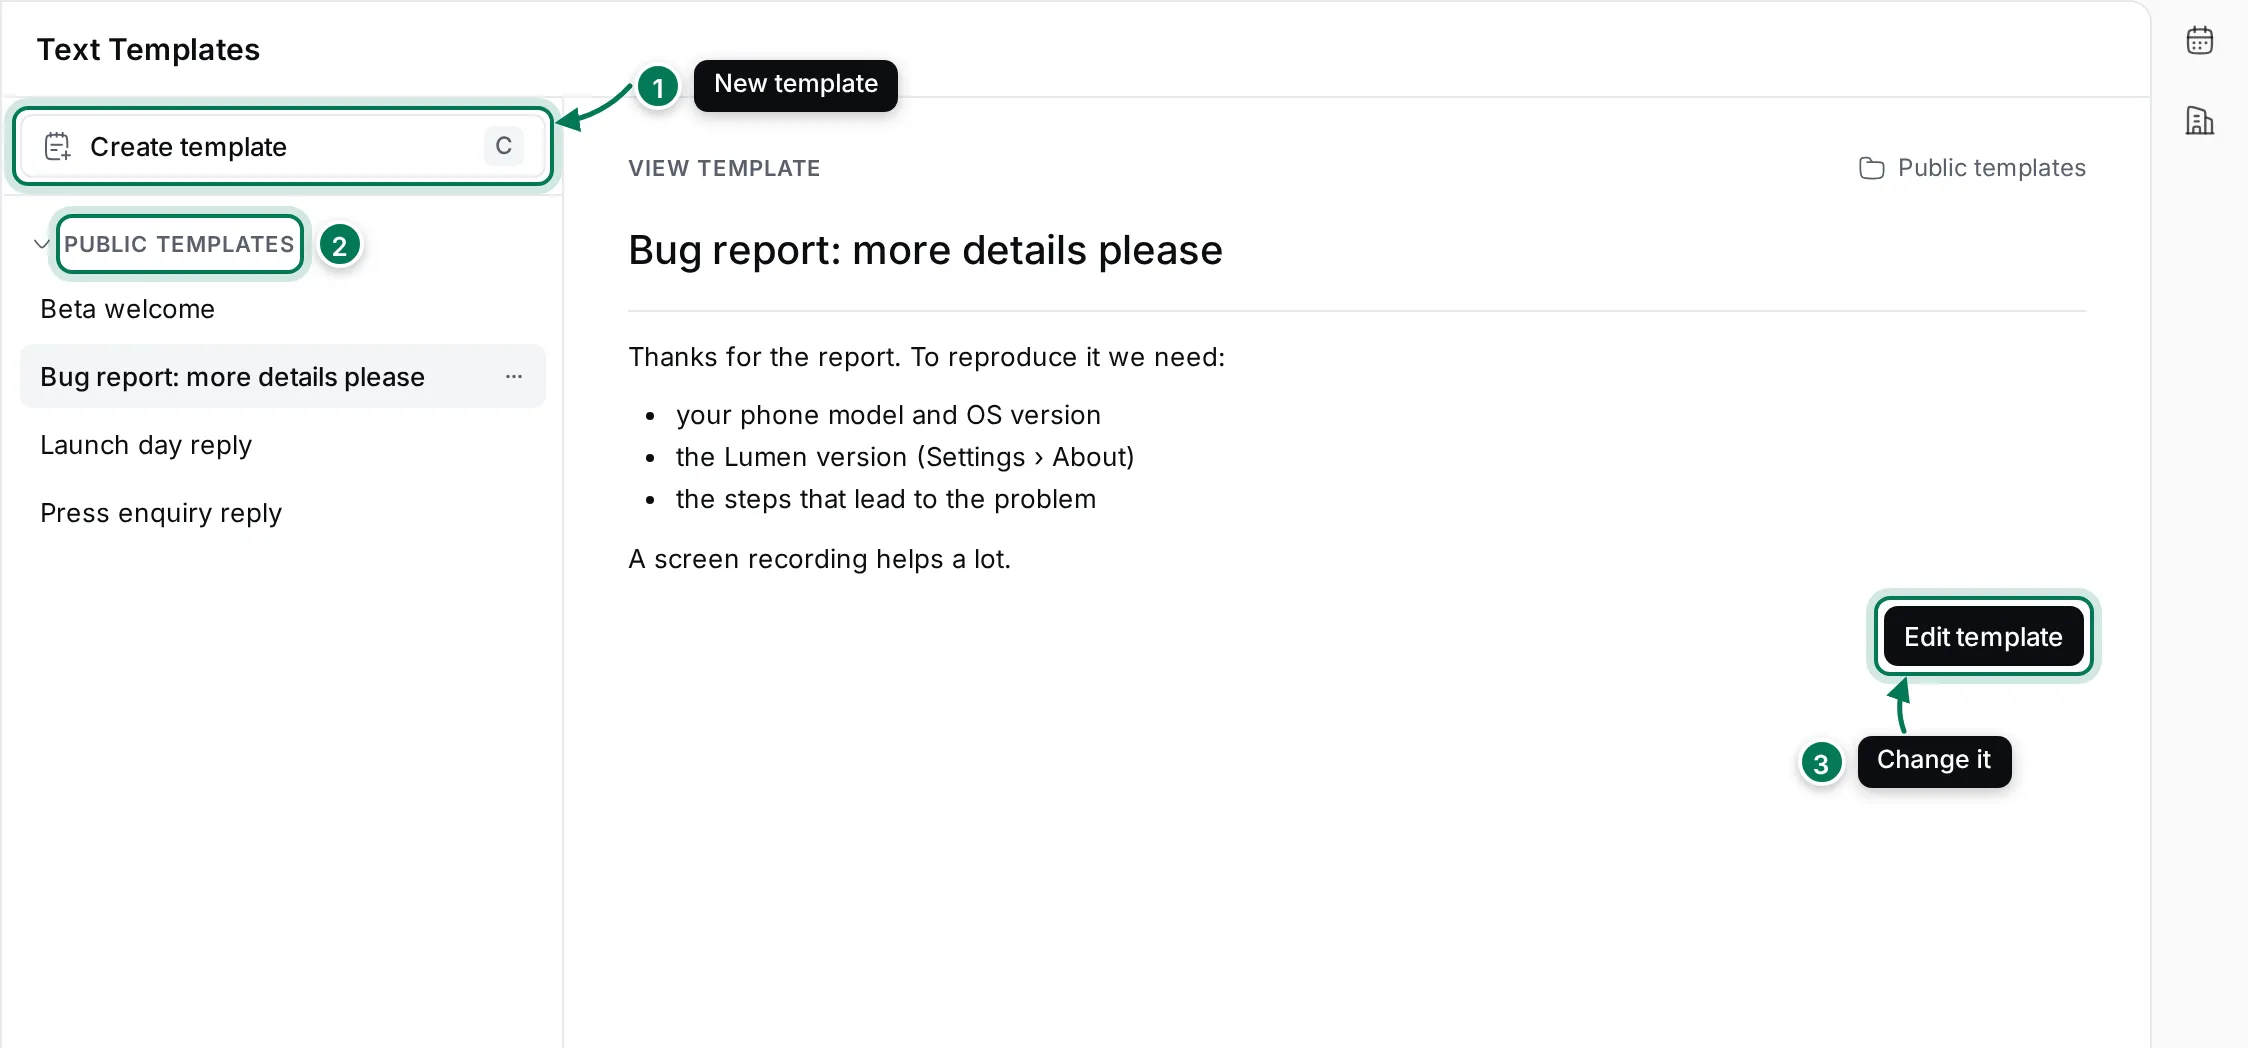
- Create template (or C) starts a new one.
- Templates are in groups. Public templates is shared with the whole workspace.
- Edit template changes the open template.
Create a template
Section titled “Create a template”- Click Create template.
- Type a title, for example “Launch day reply”.
- Write the text. Use formatting, mentions and emojis as in any message. Field inserts a placeholder such as the contact’s first name, filled in when the template is used.
- Click the group chip to choose its group, then Save template.
A template’s … menu can Copy or Move it to another group, Copy link or Delete it. A group’s … menu creates a group (it can be private: “Only members can see it”), opens it to change its members, or archives it.
Use a template
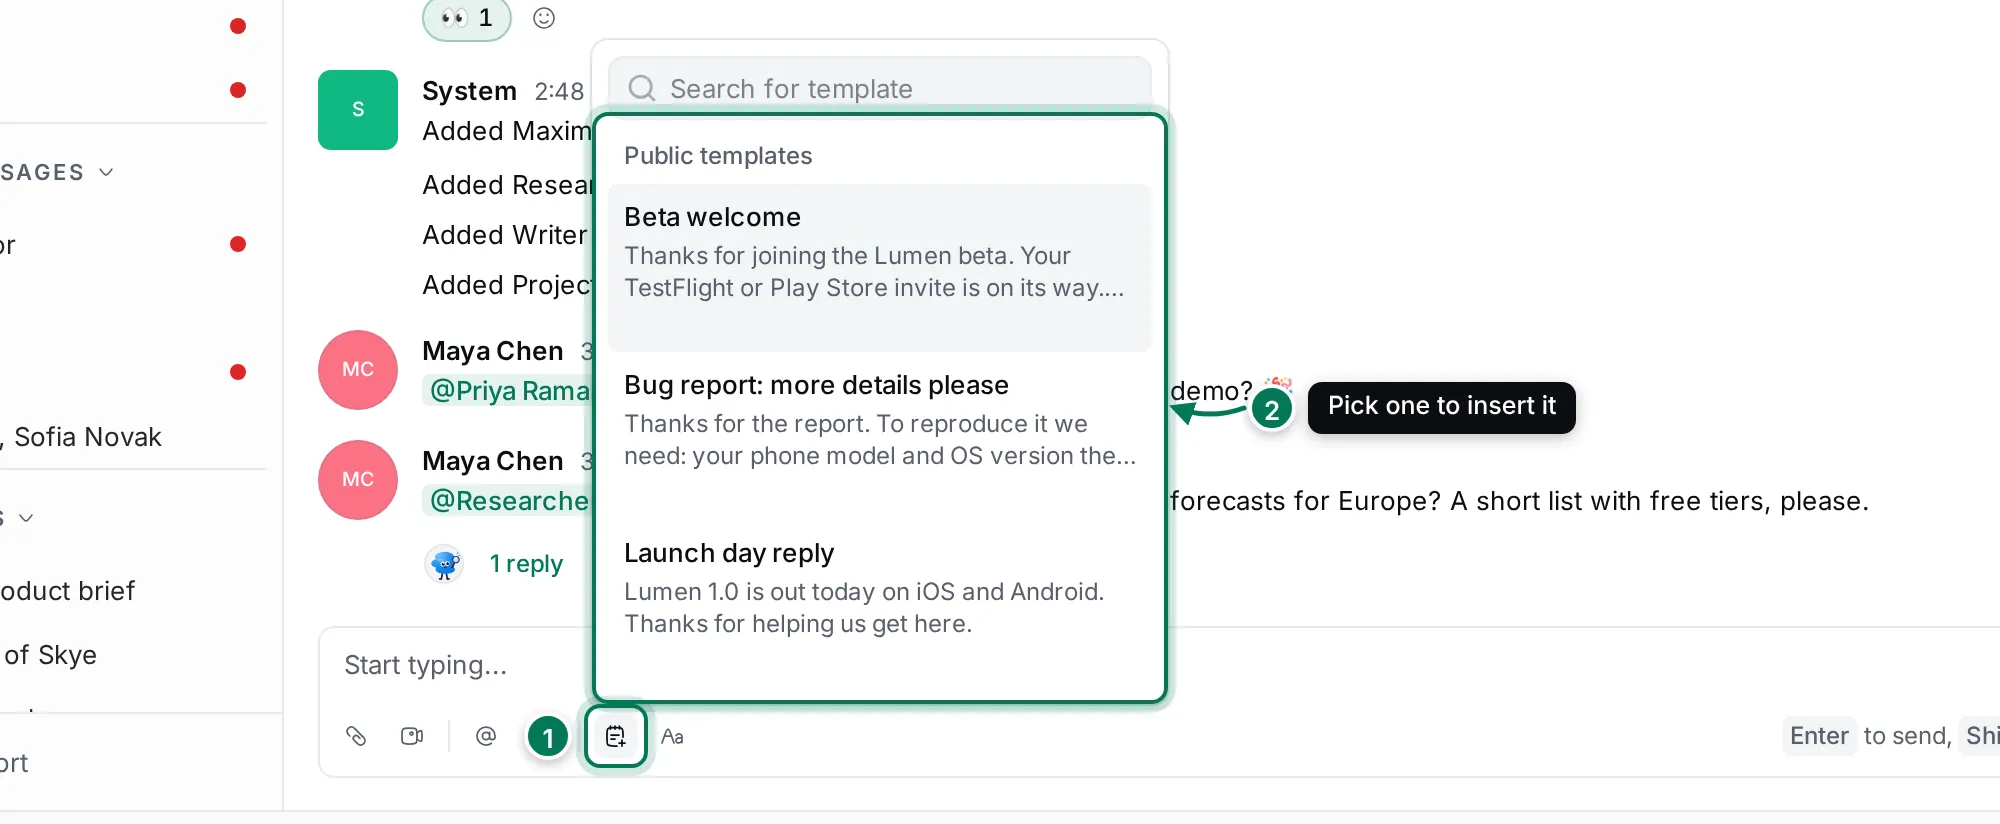
Section titled “Use a template”In any message box, click Text Templates in the toolbar under the text and pick a template. You can type to search.
Custom emojis
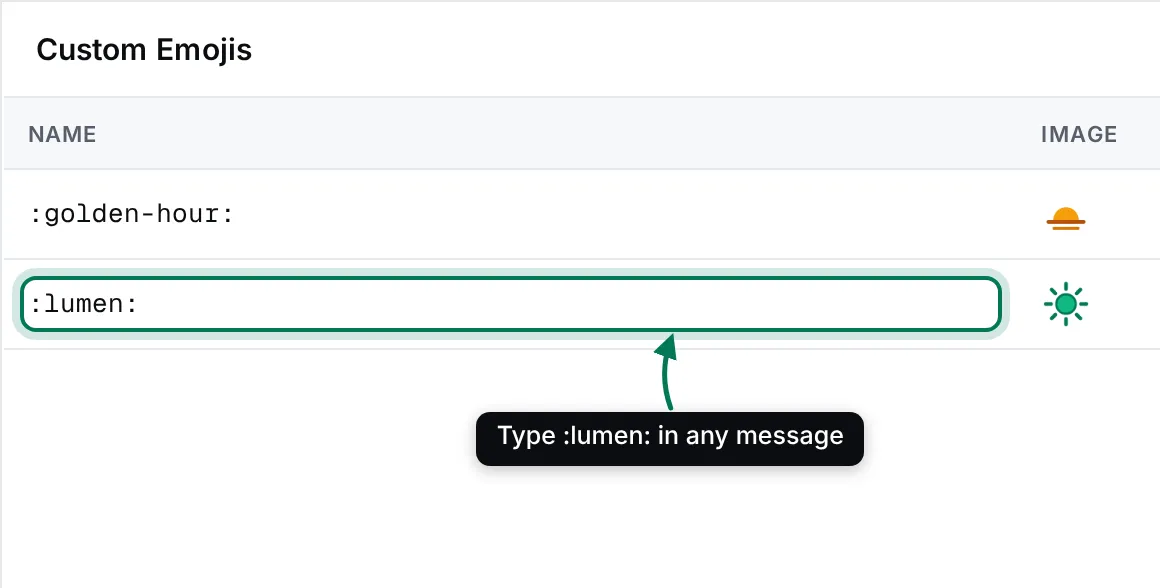
Section titled “Custom emojis”Settings › Custom Emojis (User and up) lists the workspace’s own emojis. Use them anywhere by their name, for
example :lumen:, or from the Custom Emojis tab of the emoji picker.
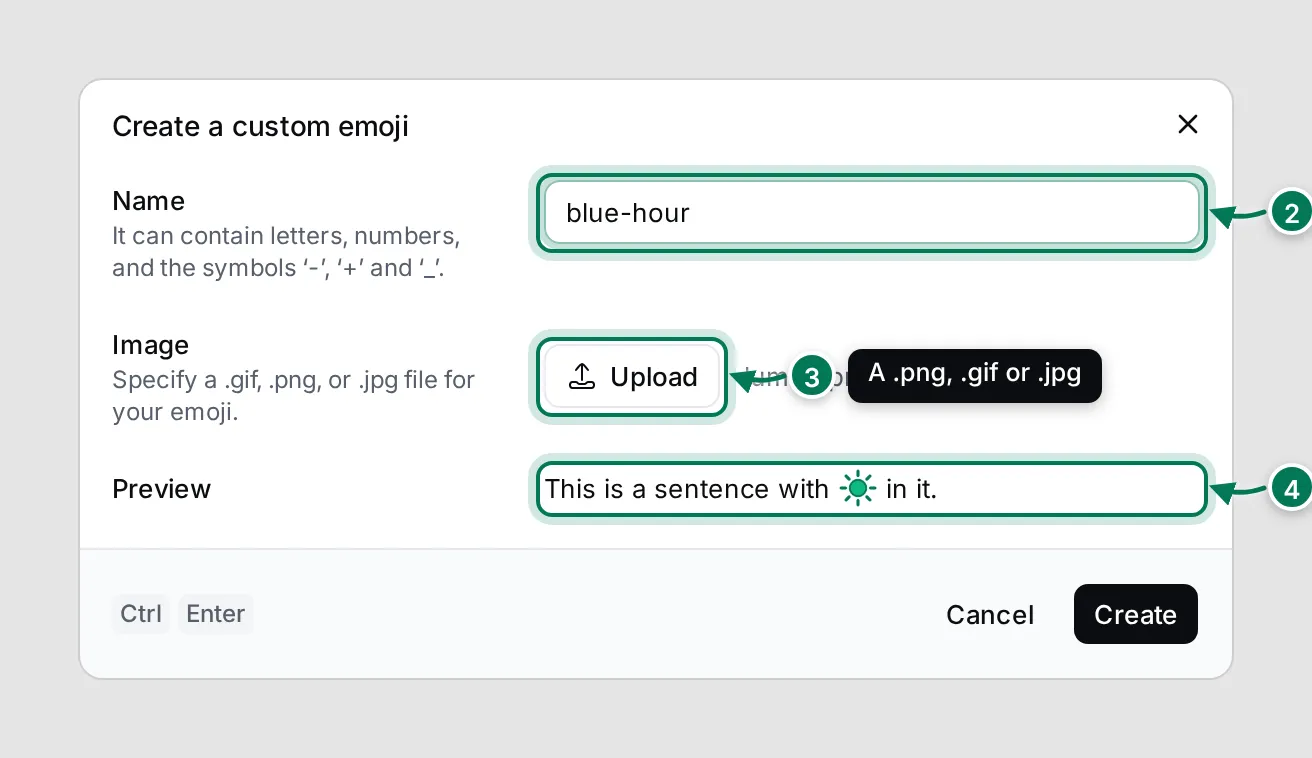
- Click Create.
- Type a Name: letters, numbers and
-,+or_. A name already used by another emoji is refused. - Click Upload and choose a .png, .gif or .jpg.
- Check the Preview and click Create.
To remove an emoji, click its trash button and confirm. Messages and reactions that used it show its name instead.
Where related issues go
Section titled “Where related issues go”When you create a related issue from a document, a drive file or another record, Maxint Work suggests a project for it. Settings › Related issues (User and up) sets that project for a whole space or class.
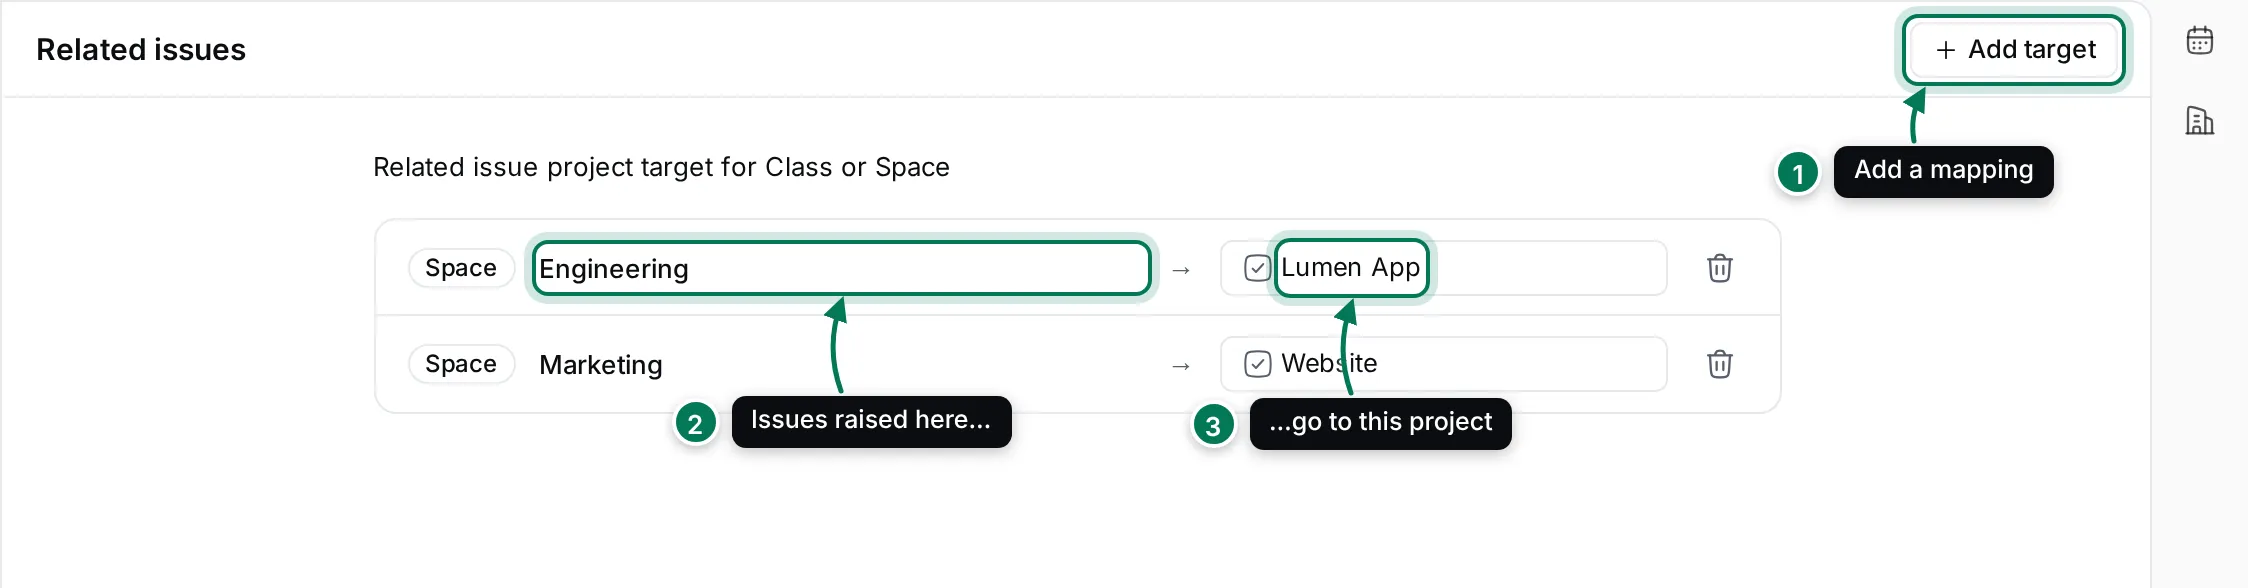
- Click Add target.
- Choose a class or a space, for example the Engineering teamspace.
- Choose the project its related issues go to, for example Lumen App.
Change a target’s project in its row, or click the trash button to remove it. Without a target, you pick the project each time. See sub-issues and relations.